

Ready to get your next 10,000 subscribers?
Join thousands of creators who use Subscribr to create faster, better YouTube videos.

Does hitting record fill you with dread? Do you watch your videos back and cringe, feeling like you just don't look "right" on screen? You're not alone. Many aspiring and new YouTubers struggle with the technical side of video production, and it can seriously impact their confidence and willingness to create.
The good news? You don't need fancy, expensive gear or a Hollywood production crew to look good on camera. Often, a few simple technical adjustments to your camera setup, lighting, and framing can make a world of difference. This article will walk you through easy, actionable tips to improve how you appear on camera, helping you feel more comfortable and confident sharing your message with the world.
Let's dive into the technical tweaks that will help you feel and look your best.
Finding Your Best Angle and Framing
The way you position yourself relative to your camera – your angle and framing – significantly impacts how you appear on video. Getting this right is one of the easiest ways to instantly improve your on-camera presence.
What's the Most Flattering Camera Angle?
For most people shooting a talking-head style video (where you're looking directly or slightly off-camera), a slightly elevated angle is generally the most flattering. Position your camera so it's slightly above your eye level, looking slightly down at you. This angle tends to minimize double chins and can make your face appear more defined. Avoid shooting from a low angle looking up at you, as this is often unflattering.
Think of it like taking a selfie – most people instinctively hold their phone slightly above them for a better look. The same principle applies here.
Perfecting Your Framing
Framing refers to how much of you and your surroundings appear in the shot. For a standard YouTube video where you're talking to the camera, a medium close-up shot is usually ideal. This means you should be visible from roughly your chest or waist up, with your head comfortably placed in the upper part of the frame.
Avoid positioning yourself too far away (a wide shot) where you appear small and distant, or too close (a tight close-up) where viewers can't see your body language.
When framing, make sure there's a little bit of space above your head – this is often called "headroom." Too much headroom makes you look small in the frame, while too little can feel cramped and awkward. A good rule of thumb is to have the top of your head or hairline near the top third of the frame.
Also, pay attention to centering. For a direct address video, positioning yourself in the center of the frame works well. Ensure you take up a good portion of the middle section of the frame, as suggested by YouTube strategy experts. Having sufficient space around you also provides flexibility if you need to do any minor cropping or adjustments in editing.
You don't need an expensive tripod to achieve good framing. You can easily prop your camera (even a smartphone) on a stack of books, a shelf, or anything stable to get the right height and distance.
Mastering Your Lighting Setup
Lighting is arguably the single most important factor in how you look on camera. Good lighting can make a basic phone camera look professional, while poor lighting can make even the best camera produce a grainy, unflattering image. The goal is to illuminate your face evenly, making you look clear, bright, and engaging.
How Does Lighting Affect How I Look on Camera?
Lighting affects everything from the clarity of your image to the appearance of your skin and features. Harsh, uneven lighting can create distracting shadows, emphasize imperfections, and make your video look amateurish. Soft, even lighting, on the other hand, smooths out skin tones, makes your eyes sparkle, and gives a pleasant, professional look.
The direction and quality of light matter. Light coming from directly above can cast dark shadows in eye sockets. Light coming from directly in front of you is often the most flattering for beginners because it minimizes shadows.
Simple Lighting Solutions for Beginners
You don't need a studio full of lights to get started. You can achieve great results with just one or two light sources.
The Free Method: Natural Light
The easiest and cheapest way to get flattering light is to use natural sunlight. Position yourself facing a window. The light coming through the window is often soft and diffused (especially on a slightly overcast day or if the window isn't in direct, harsh sunlight), providing beautiful, even illumination for your face. Avoid having the window behind you, as this will silhouette you and make you appear dark.
Simple Investment: An Inexpensive Light Source
If natural light isn't consistent or available (like filming at night), a simple, inexpensive light source can make a huge difference.
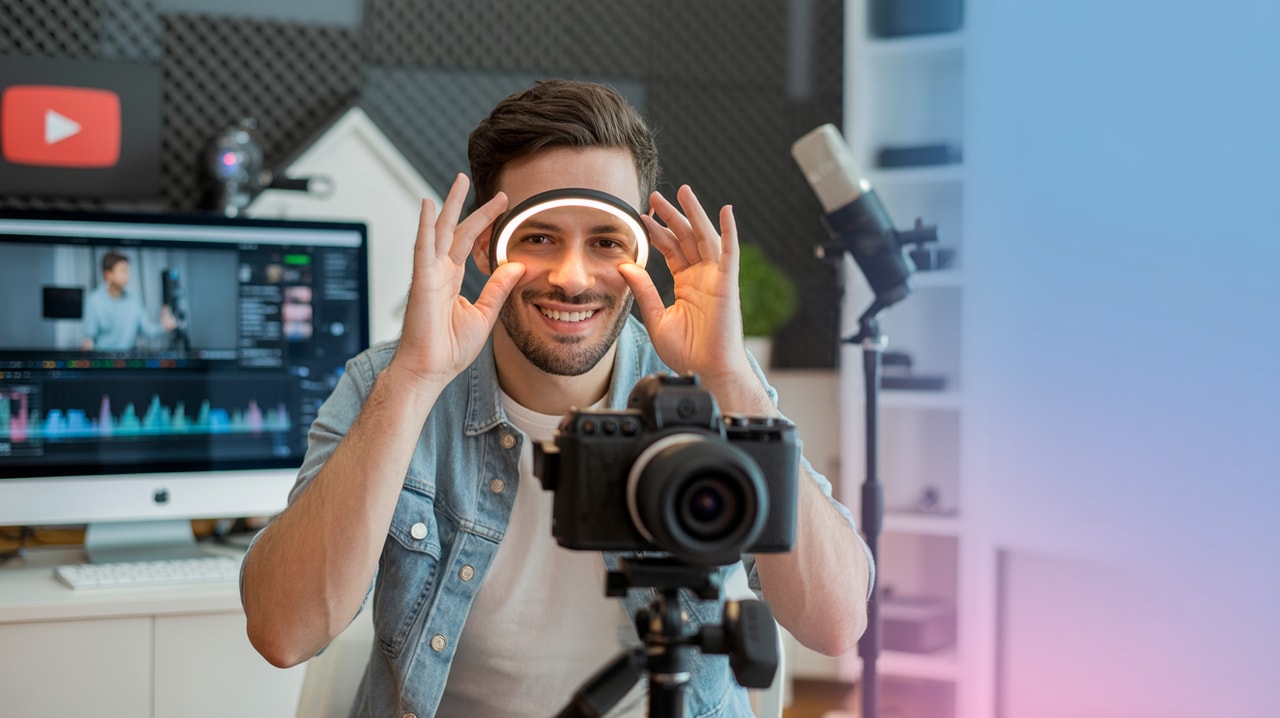
- Ring Lights: These are popular for a reason. A small ring light placed in front of you, around your camera lens, provides soft, even light that helps reduce shadows and gives a pleasant catchlight in your eyes. You can find decent ring lights for $20-$50 online.
- Small LED Panels: Another option is a small LED panel light. These are versatile and many allow you to adjust brightness and color temperature. Position it slightly to one side and slightly above you.
Even with a single light, you can significantly improve your look. The key is to have the light source in front of you, illuminating your face directly. Avoid placing a single light source far to the side, which can create harsh shadows on the other side of your face.
For a slightly more advanced setup, you can explore the concept of three-point lighting, which uses a main key light (your primary light source), a fill light (to soften shadows from the key light), and a back light (to separate you from the background). But for beginners, starting with one good light source in front is a perfect start.
Remember to position lights to minimize glare, especially if you wear glasses. Adjusting the angle slightly can often solve this.
Basic Camera Settings (Keep it Simple)
While this article focuses more on setup than complex camera operation, understanding a few basics can help.
If you're using a smartphone, the rear camera almost always offers better quality than the front-facing "selfie" camera. Use the rear camera whenever possible, even if it means you can't see the screen easily while recording (you can use a mirror or external monitor if needed).
Most cameras and smartphones have automatic settings that work reasonably well. For beginners, sticking to auto modes for things like white balance (which affects color temperature) and exposure (how bright or dark the image is) is usually fine. As you get more comfortable, you can experiment with manual settings to gain more control, but don't let complex settings stop you from starting.
Focus is important. Make sure your camera is focused on your face. Most modern cameras and phones have face-tracking autofocus, which is very helpful.
Don't Forget Audio (It Matters More Than You Think!)
While good audio doesn't directly change how you look, it dramatically impacts the perceived quality of your video and how professional you seem. Viewers are much more forgiving of less-than-perfect video quality than they are of bad audio. Muffled, noisy, or echoey audio is distracting and can cause viewers to click away quickly.
Your camera's built-in microphone is often not ideal. It picks up a lot of background noise and echoes. A simple external microphone can drastically improve your sound quality.
- Lavalier Microphones: These small mics clip onto your shirt and are relatively inexpensive. They connect to your camera or phone and pick up your voice clearly.
- USB Microphones: If you're sitting at a desk, a USB microphone that plugs directly into your computer is a great option.
Position your microphone correctly (close to your mouth but out of frame) and try to record in a quiet space with minimal echo. Soft furnishings like curtains, carpets, and furniture can help absorb sound and reduce echo.
Simple Backgrounds and Composition
What's behind you also affects the overall look of your video. A cluttered or distracting background can pull focus away from you.
Aim for a relatively clean and simple background. This could be a plain wall, a bookshelf (tidy!), or a corner of a room that isn't too busy. Ensure there aren't any embarrassing messes or distracting objects in the shot.
You can also use your background intentionally to reflect your channel's topic or personality, but keep it visually appealing and not overwhelming.
Consider the rule of thirds in your composition. Imagine your frame is divided into a 3x3 grid. Positioning yourself slightly off-center, along one of the vertical lines, with your eyes roughly on the upper horizontal line, can create a more dynamic and visually interesting shot than being dead center (though centered is also perfectly fine for talking heads!).
Simple Makeup Tips for Video
While makeup isn't a technical camera setting, it can help you look better on camera by addressing issues that lighting and cameras can sometimes emphasize. Keep it simple, especially for beginners.
The main goals of makeup for video are often to:
- Reduce Shine: Cameras and lights can pick up shine on the skin (especially on the forehead, nose, and chin). A little bit of translucent powder can help mattify the skin.
- Even Out Skin Tone: Foundation or BB cream can help create a more even complexion and cover up redness or blemishes.
- Add Definition: Lights can sometimes wash out features. A little bit of blush, bronzer, or simple eye makeup can help add back some natural definition to your face.
You don't need heavy stage makeup. Just a few basic products to address shine and even out skin tone can make a noticeable difference. Experiment to see what works best for you.
Putting It All Together: Practice Makes Progress
Improving how you look on camera isn't just about the technical setup; it's also about confidence and practice.
Once you've set up your camera angle, lighting, and audio, hit record and practice talking to the camera. Watch the footage back (yes, it can be awkward at first!) and analyze what you like and what you're less happy with. Is the lighting even? Is your framing good? Do you look comfortable?
The more you practice, the more natural you'll feel. Your comfort level will shine through, and that's a huge part of looking good on camera.
Recommended Gear for Beginners (Affiliate Opportunity!)
As you progress, you might consider investing in some basic gear to further enhance your video quality. Here are a few common items that make a big difference:
- Entry-Level Camera or Good Smartphone: Most modern smartphones shoot excellent video. If you want to step up, look at mirrorless cameras like the Sony ZV-1 or Canon M50, often recommended for YouTubers.
- Tripod: A sturdy tripod (or even a flexible gorillapod) gives you control over your camera angle and framing.
- Ring Light or LED Panel: As mentioned, a dedicated light source is a game-changer. Look for options with adjustable brightness and color temperature.
- External Microphone: A lavalier mic (like the Rode SmartLav+) or a USB mic (like the Blue Yeti or Rode NT-USB Mini) will significantly improve your audio quality.
(Consider adding affiliate links here to specific products you recommend)
Planning and Improving Your Production with Subscribr
Producing high-quality videos consistently involves planning and analysis. Tools like Subscribr can help streamline this process and even offer insights into what makes videos look and perform well.
While Subscribr is known for its AI Script Writer and strategy tools, you can also leverage its capabilities to think about your production value. By analyzing successful videos in your niche using Subscribr's video analysis features, you can start to notice common patterns in their lighting, framing, and overall visual style. This competitive intelligence can give you ideas for your own setup.
Furthermore, Subscribr's planning tools help you outline your video content, ensuring you're prepared before you even hit record. Feeling prepared and confident in your content will also naturally help you feel more comfortable on camera.
Conclusion
Looking good on camera for YouTube is an achievable goal for any beginner creator. By focusing on these simple technical aspects – getting your camera angle and framing right, using effective lighting (even just natural light), ensuring clear audio, and having a tidy background – you can dramatically improve your on-camera appearance.
Don't let the fear of not looking perfect hold you back. Start with these basic tips, practice consistently, and focus on delivering value through your content. As you gain confidence and experience, you can gradually refine your setup. Your audience is there for your message and personality; these technical tweaks simply help you present yourself in the best possible light. Now, go hit record!


