

Ready to get your next 10,000 subscribers?
Join thousands of creators who use Subscribr to create faster, better YouTube videos.

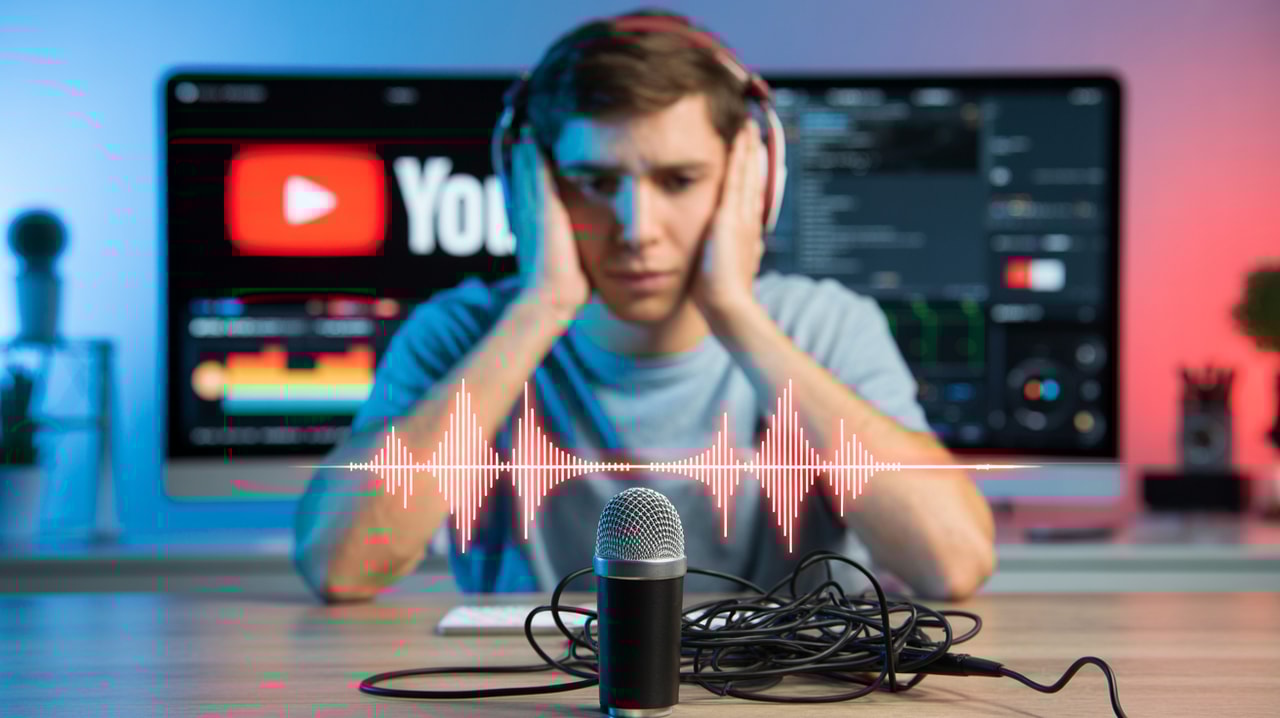
Why Your YouTube Audio Sucks (And How to Fix It on a Budget)
You've put in the work. You've planned your video, maybe even filmed some great-looking shots. But when you hit upload, something feels off. The video looks decent, but the sound is… well, it sucks. It's echoey, muffled, or maybe you just sound like you're talking from a mile away.
This is one of the most frustrating pain points for new YouTubers, especially when you're just starting out and don't have a huge budget for fancy gear. You're struggling to achieve that consistent, professional quality you see from bigger channels, and it feels like your budget limitations are holding you back.
Here's the tough truth: bad audio can kill your YouTube videos faster than bad video quality. Think about it – you might tolerate a slightly blurry image if the audio is crystal clear and engaging. But if you can't understand what someone is saying, or if the sound is annoying, you're hitting that back button almost instantly. As expert advice from Think Media highlights, 84% of viewers demand clear sound, and poor audio is an "INSTANT Click Away."
The good news? You absolutely do not need to break the bank to dramatically improve your YouTube audio. This guide will walk you through why your audio might be falling short and provide actionable, budget-friendly ways to fix it, helping you balance production quality with those crucial budgetary constraints.
Let's turn that muddy mess into crisp, clear sound.
Why Your Audio Sounds Bad (Common Problems)
Before we fix it, let's understand the culprits. Poor audio on YouTube usually comes down to a few common issues:
- Distance from the Microphone: The further you are from your microphone (including the one built into your camera or phone), the more room noise, echo, and background sounds it picks up. Your voice gets lost in the environment. Relying solely on a camera's built-in mic, especially if it's far away, is a prime example of this problem.
- Echo and Room Acoustics: Hard surfaces like bare walls, floors, and ceilings cause sound waves to bounce around, creating echo and making your audio sound distant and unprofessional. This is why filming in a large, empty room is often an audio nightmare.
- Background Noise: Refrigerators humming, traffic outside, fans, pets, or even just the ambient noise of your house can ruin an otherwise good recording. Built-in microphones are particularly bad at isolating your voice from these distractions.
- Low Quality Built-in Microphones: While convenient, the microphones built into most cameras, webcams, and even smartphones (unless you're very close) aren't designed for professional-sounding audio recording. They pick up everything and often sound thin or distorted.
- Incorrect Levels: Recording audio too loud leads to distortion (that crackly, unpleasant sound), while recording too quiet makes your audio hard to hear and can introduce noticeable background hiss when you try to increase the volume in editing.
- Poor Microphone Choice or Placement: Not all microphones are created equal, and even a good mic can sound bad if it's not positioned correctly.
These technical challenges can feel overwhelming, but they are absolutely solvable, even on a limited budget.
Budget-Friendly Ways to Dramatically Improve Your Audio
Improving your audio doesn't always mean buying the most expensive gear. Often, simple adjustments to your environment and technique can make a huge difference.
1. Optimize Your Recording Environment (Free!)
This is the cheapest and often most effective first step. You can significantly reduce echo and background noise without spending a dime.
- Choose a Small Space: Smaller rooms generally have less echo than large ones. A bedroom, closet (seriously!), or a corner of a room can work well.
- Add Soft Furnishings: Sound loves to bounce off hard surfaces. Soft things absorb sound. Film in rooms with carpets, curtains, upholstered furniture, pillows, or even blankets hung on walls. Get closer to these items when recording.
- Minimize Background Noise: Turn off fans, air conditioners, dishwashers, or anything else creating noise. Close windows and doors to block out external sounds. If you live in a noisy environment, try recording during quieter times of the day.
- Get Closer to Your Mic Source: Whether it's a built-in mic or an external one, proximity is key. The closer the microphone is to your mouth, the louder your voice will be relative to background noise and echo.
Strategic placement and environmental control are powerful tools, as emphasized by experts like Think Media, who suggest filming in locations with low ceilings and avoiding echoey rooms.
2. Invest in Budget-Friendly Audio Gear
While environment matters, an external microphone is often the single biggest upgrade you can make. The good news? You don't need to spend hundreds. There are excellent budget options available.
Here are a few types of budget microphones popular with YouTubers:
- Lavalier Microphones (Lav Mics): These small, clip-on mics attach to your shirt and are great for keeping the microphone close to your mouth, reducing room noise.
- Wired Lav Mics: Extremely affordable and plug directly into your camera or smartphone (you might need an adapter). Look for options under $30.
- Wireless Lav Mics: Offer more freedom of movement but are generally more expensive, though budget wireless systems are becoming more common (often in the $100-$200 range).
- USB Microphones: These plug directly into your computer via USB, making them super easy to use for voiceovers, podcasts, or videos filmed at a desk. You can find good quality USB mics for $50-$100.
- Shotgun Microphones: These directional mics are designed to pick up sound from the direction they are pointed, rejecting noise from the sides and back. They can be mounted on your camera, a stand, or a boom pole. Budget shotgun mics are available, but often require an adapter or audio interface depending on your camera.
When choosing a microphone, consider what you'll be filming. A lav mic is great if you're talking directly to the camera or doing interviews. A USB mic is perfect for desk-based content. A shotgun mic offers more versatility if you're moving around or filming from a distance.
Remember the advice on microphone connections – understand if your device needs TRS or TRRS and get the correct cables or adapters!
3. Improve Your Recording Technique
Even with a great mic, technique matters.
- Monitor Your Audio: If possible, use headphones while recording to actually hear what your microphone is picking up. This helps you identify background noise or positioning issues in real-time.
- Set Appropriate Levels: Most cameras or external recorders have audio level meters. Aim for your audio to peak around -12dB to -6dB. This gives you plenty of volume without risking distortion. Don't let the meter hit 0dB.
- Mind Your Distance: Experiment with how far you are from the microphone. For most mics, being 6-12 inches away is a good starting point.
- Use a Pop Filter or Windscreen: If you're using a microphone that's close to your mouth, a pop filter (for plosive sounds like 'P' and 'B') or a foam windscreen (for reducing breath noise) can make a big difference. These are very inexpensive accessories.
4. Edit Your Audio
Even with good recording, post-production can refine your sound. You don't need expensive software. Free options like Audacity (for audio only) or built-in tools in video editors can help.
Basic audio editing techniques include:
- Noise Reduction: Most editing software has a noise reduction effect that can help minimize constant background hums or hisses. Be careful not to overdo this, as it can make your voice sound unnatural.
- EQ (Equalization): This allows you to adjust the balance of frequencies (bass, mid-range, treble) in your audio. A simple EQ adjustment can make your voice sound clearer or warmer.
- Compression: This reduces the difference between the loudest and quietest parts of your audio, making the overall volume more consistent and easier for viewers to listen to.
- Boosting Volume: If your recording levels were a bit low, you can increase the volume in editing, but be wary of bringing up background noise with it.
Software like Adobe's free AI audio enhancer, as seen in some popular videos, can also offer quick, impressive improvements, demonstrating that powerful tools aren't always expensive.
Putting It All Together for Professional Sound
Achieving professional-sounding audio on a budget is a journey, not a destination. Start with optimizing your environment. Then, invest in the best budget microphone you can afford for your needs. Practice good recording technique, monitoring your levels and distance. Finally, use basic audio editing to clean up and enhance your sound.
Consistency is key. Apply these principles to every video you create. Over time, your ear will become more attuned to good audio, and your technical skills will improve.
Tools & Resources to Help You
Improving your audio quality is a crucial step in creating videos that viewers want to watch and share. Tools like Subscribr can support your overall YouTube strategy, helping you research topics, plan your content, and optimize your videos for success. While Subscribr focuses heavily on content planning and strategy, understanding the importance of technical quality like audio, and having a workflow to achieve it, is part of a comprehensive approach. You can use Subscribr's research features to explore different types of content and see how successful channels prioritize clear audio, or use the planning tools to factor in your audio setup for each video.
When it comes to gear, look for budget microphone guides from trusted tech reviewers on YouTube. Many creators share their favorite affordable lav mics, USB mics, and shotgun mics. Consider using affiliate links for the budget microphones and audio accessories you recommend in your own videos once you've found gear you trust – it's a great way to monetize your content while helping your audience improve their setup.
Conclusion
Don't let bad audio be the reason viewers click away from your YouTube channel. By understanding the common problems and implementing these budget-friendly fixes, you can dramatically improve your sound quality.
Focus on optimizing your environment first, then invest wisely in an external microphone that suits your content style. Practice good recording habits and learn the basics of audio editing. You have the power to transform your audio from sucking to sounding surprisingly professional, all without needing a massive budget. Start implementing these tips today and give your viewers the clear, engaging audio they deserve.


