

Ready to get your next 10,000 subscribers?
Join thousands of creators who use Subscribr to create faster, better YouTube videos.

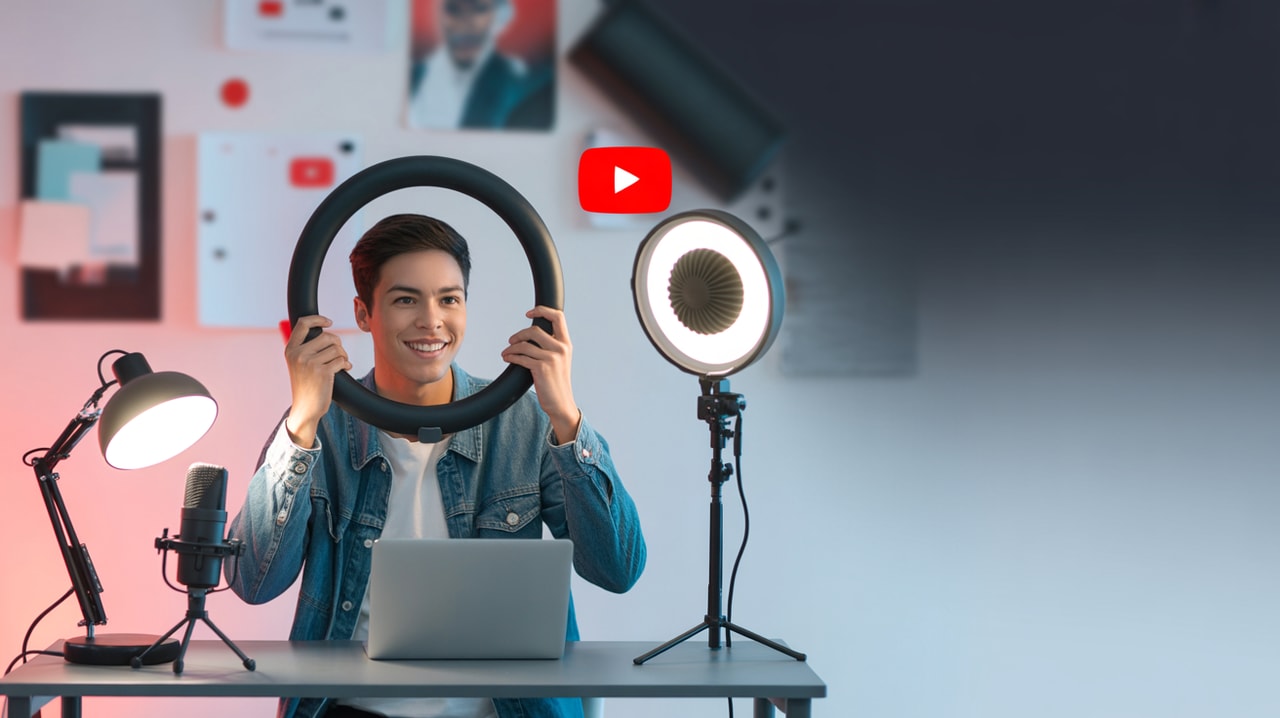
How to Get Pro YouTube Lighting Without Breaking the Bank
Think achieving professional-looking video quality on YouTube requires a massive budget for fancy lights? Think again! While high-end gear is great, the truth is you can dramatically improve your video lighting and achieve a polished, professional look without emptying your wallet. This guide is specifically for aspiring and new YouTubers facing budget limitations but wanting to overcome the difficulty in achieving consistent, professional-level video quality. We'll show you how to balance production quality with budgetary constraints and master the technical skill of lighting, even if you're starting from scratch.
Good lighting isn't just about looking good; it's a critical element of viewer retention and engagement. As YouTube strategy experts often point out, clear, well-lit footage makes your content more visually appealing and keeps viewers watching longer. You could have the best camera in the world, but poor lighting will make your video look amateurish. Conversely, even a smartphone camera can produce stunning results with the right lighting setup.
So, how do you light your YouTube videos cheaply? What lighting do YouTubers use on a budget? Do you need expensive lights for YouTube? Let's dive into practical, affordable solutions.
Start with the Free Stuff: Harnessing Natural Light
The absolute cheapest (as in, free) way to improve your lighting is by using natural light. The sun provides beautiful, soft illumination that can make you look fantastic on camera.
How to use natural light effectively:
- Face a Window: Position yourself directly facing a window. This will illuminate your face evenly, minimizing harsh shadows.
- Avoid Direct Sunlight: Direct sunlight can be too harsh and create blown-out highlights and deep shadows. If the sun is streaming in, use sheer curtains or blinds to diffuse the light.
- Be Mindful of Time: Natural light changes throughout the day. The "golden hour" (shortly after sunrise or before sunset) offers warm, soft light, while midday light can be harsher. For consistency, try to film at the same time of day.
- Watch the Background: Ensure the window isn't visible in the shot unless you're intentionally going for that look, as it can blow out the background and make you look like a silhouette.
While natural light is free and can look great, it's not always consistent or available. This is where budget-friendly artificial lighting comes in.
Building Your Budget Lighting Arsenal
You don't need a full studio lighting kit to make a big difference. A few affordable pieces of gear can elevate your video quality significantly.
Essential Budget Lighting Types:
- Ring Lights: These circular lights are incredibly popular with YouTubers, especially for vlogging and beauty content. They provide soft, even light that wraps around your face, creating a flattering look and often a signature ring-shaped catchlight in your eyes. You can find decent ring lights for under $50.
- Small LED Panels: Compact and versatile, small LED panels offer adjustable brightness and sometimes color temperature. They can be used as key lights, fill lights, or even background lights. Many are USB-powered or run on batteries, making them portable.
- Desk Lamps: Don't underestimate the power of ordinary household items! A simple desk lamp with a daylight-balanced LED bulb can serve as a key light or fill light in a pinch.
- Work Lights: Basic clamp-on work lights from a hardware store are incredibly bright and affordable. However, be cautious: these lights are often very harsh and can get hot. You'll definitely need to diffuse them (more on that below).
When choosing budget lights, look for options that allow you to adjust brightness. Color temperature adjustment is also a plus, as it lets you match the light to create a natural look and avoid orange or blue color casts.
The Magic of Diffusion: Softening Harsh Light
One of the biggest secrets to professional lighting is making the light source larger and softer. Hard light creates harsh shadows, which can be unflattering. Soft light wraps around your subject and produces softer, more gradual shadows.
Professional setups use large softboxes or umbrellas to diffuse light. But you can create a similar effect on a budget:
- DIY Softboxes: You can build simple diffusers using materials like white fabric (an old white t-shirt or bedsheet works) or even parchment paper stretched over a frame (like a cardboard box with the front cut out). Place this diffusion material between your light source and yourself.
- Bouncing Light: Instead of pointing a harsh light directly at you, bounce it off a white wall or ceiling. This makes the light source (the wall or ceiling) much larger, resulting in softer light. You can also use a piece of white foam board as a bounce card.
- Shower Curtains: A white translucent shower curtain can be hung in front of a window or a harsh light to create a large, inexpensive diffusion panel.
Experiment with these methods to see what works best with your specific lights and filming space.
Simple Lighting Setups on a Budget
You don't need a complex multi-light setup to look good. Here are a couple of effective budget setups:
- The Window + Reflector: Position yourself facing a window for your main light (key light). Use a piece of white foam board or even a white sheet on the side opposite the window to bounce light back onto your face, filling in shadows. This is a simple two-point setup using mostly free resources.
- One Budget Light + Diffusion + Bounce: Use a ring light or a small LED panel as your key light, positioned slightly to one side of your camera. If the light is still a bit harsh, add a layer of diffusion in front of it. Use a bounce card on the opposite side to fill in shadows.
- The Three-Point Concept (Budget Version): While traditional three-point lighting uses a key, fill, and backlight, you can replicate the concept affordably. Use your main budget light as the key. For the fill, use a bounced light from a desk lamp or a smaller, less intense budget light. For a subtle backlight (to separate you from the background), a small LED panel or even another diffused desk lamp placed behind you can work. Channels like Think Media have tutorials demonstrating how to achieve a cheap three-point lighting setup using affordable gear.
The key is to experiment with placement. Position your lights (or your window) to illuminate your face evenly and create depth without harsh shadows. Watch popular YouTube videos covering budget lighting setups, like Peter McKinnon's "CHEAP LIGHTING SETUP on a Budget! - DIY" (1.2M views), for visual examples and practical demonstrations.
DIY Lighting Hacks for Creative Solutions
Creativity can often replace expensive equipment. Here are some DIY lighting hacks you can implement:
- Cardboard Box Softbox: Cut a hole in the back of a cardboard box to fit your light fixture. Line the inside with aluminum foil to reflect light and cover the front with white diffusion fabric or parchment paper.
- Clothespin and Fabric Diffusers: Use clothespins to attach white fabric directly to the barn doors or front of a budget light.
- Colored Background Lights: Use inexpensive colored LED bulbs in desk lamps or small RGB LED lights to add color to your background and make your shot more visually interesting. This adds production value without a high cost.
- Mark Your Spots: Once you find a lighting setup that works, use tape on the floor to mark the positions of your lights and camera. This saves time and ensures consistency for future filming sessions.
These DIY solutions, combined with strategic placement, can help you achieve surprisingly professional results.
Affordable Gear Recommendations & Affiliate Opportunities
As you grow, you might want to invest in slightly more robust budget lighting gear. Here are some types of affordable equipment to consider, keeping in mind that prices can fluctuate:
- Budget LED Panel Kits: Many brands offer two or three-light LED panel kits with stands and basic diffusers for under $200-$300. These provide more power and flexibility than single small lights.
- Affordable Softbox Kits: You can find basic softbox kits that include a light stand, bulb socket, and small softbox for under $100. These are a great way to get started with diffused lighting.
- 5-in-1 Reflectors: These collapsible reflectors come with different surfaces (white, silver, gold, black, diffuser) and are incredibly useful for bouncing or diffusing light. You can find them for around $20-$30.
If you're creating content around video production, tech reviews, or even just sharing your setup, recommending the budget lighting gear you use can be a great monetization strategy through affiliate marketing. Platforms like Amazon Associates allow you to earn a small commission when someone purchases a product through your unique link. This aligns perfectly with helping your audience achieve professional results on a budget while creating a potential revenue stream for your channel.
Achieving Consistency and Polished Quality
Beyond the initial setup, consistency is key to a professional YouTube channel. Viewers appreciate consistent video quality.
- Control Your Environment: Try to film in the same location with similar ambient light conditions. Close curtains to block changing natural light if you're relying on artificial lights.
- White Balance: Ensure your camera's white balance is set correctly for your lighting. This prevents unnatural color casts.
- Test Shots: Always do test shots before filming your main content. Review the footage to check for harsh shadows, uneven lighting, or glare (especially if you wear glasses). Adjust your lights as needed.
- Learn Basic Editing: Minor lighting issues can sometimes be corrected in editing software. Learn basic color correction and grading to fine-tune your footage. Technical skill development in editing complements good lighting.
Balancing production quality with budgetary constraints is an ongoing process. Start simple, learn the basics, and gradually upgrade your gear as your channel grows and your budget allows.
Leveraging Subscribr for Your YouTube Journey
Improving your video quality through better lighting is a crucial step, but it's just one piece of the YouTube puzzle. To truly grow and succeed, you need a solid content strategy, efficient workflow, and deep understanding of your audience. This is where a platform like Subscribr becomes invaluable.
While you're mastering your lighting setup, Subscribr can help you with everything from idea generation and scriptwriting to competitive analysis and understanding your channel's performance. Use Subscribr's Research Assistant to look up reviews for budget lighting gear or find tutorials on advanced lighting techniques. The AI Script Writer can help you outline and write engaging scripts for your videos, ensuring that the content matches the quality of your improved visuals. Subscribr's Channel Intelligence and Video Intel features allow you to analyze what's working for other channels in your niche and track how your improved production quality impacts your own metrics like view duration and subscriber growth. By combining strong content strategy and efficient production workflows with improved technical skills like lighting, you're setting your channel up for success.
Conclusion
You absolutely do not need expensive lights to create professional-looking YouTube videos. By understanding the principles of lighting – especially diffusion and placement – and utilizing budget-friendly gear or even DIY solutions, you can significantly elevate your video quality.
Start with natural light, experiment with simple one or two-light setups, and don't be afraid to get creative with household items. As you progress, consider investing in affordable LED panels or softbox kits. Remember that consistency and practice are key.
Mastering budget lighting is a fundamental technical skill that will pay dividends in viewer engagement and channel growth. Focus on providing value through your content, enhance it with great lighting, and leverage tools like Subscribr to strategize and streamline your workflow. Your dream of professional video quality on a budget is well within reach.


