

Ready to get your next 10,000 subscribers?
Join thousands of creators who use Subscribr to create faster, better YouTube videos.

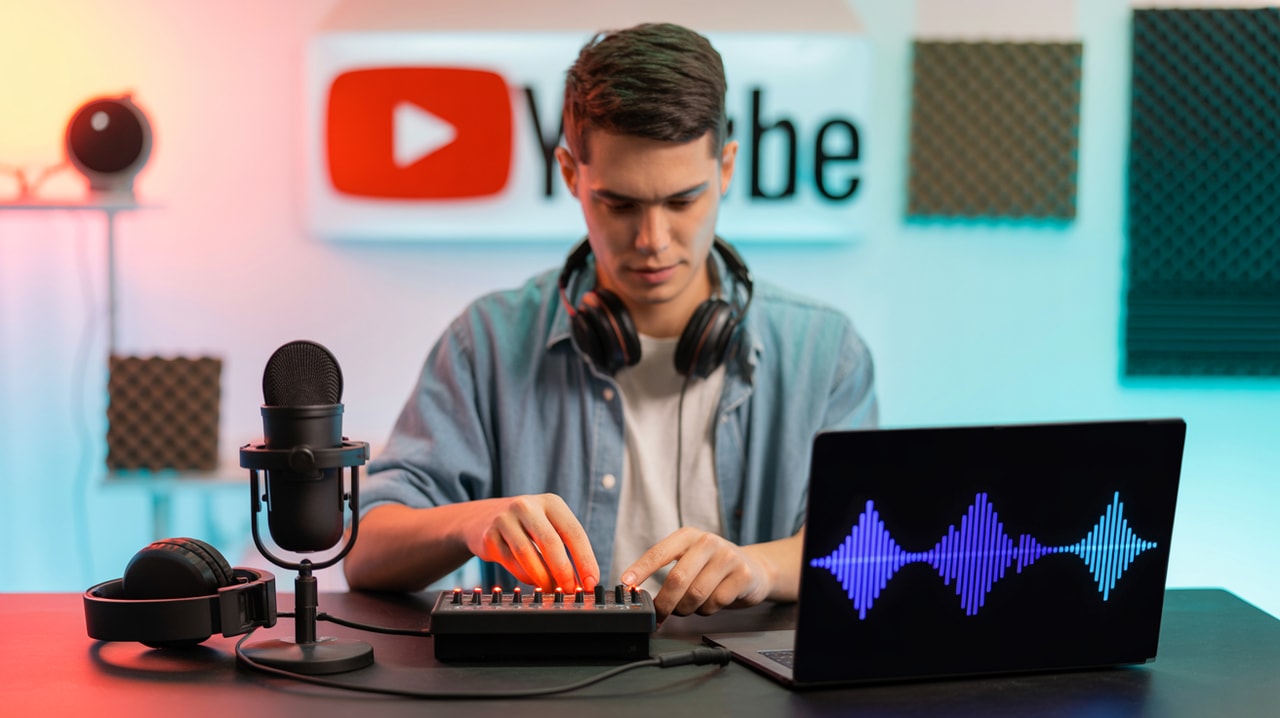
Stop Losing Viewers: Why Sound Mixing is Crucial for YouTube Success
You've spent hours filming, perfecting your visuals, and crafting a compelling script. But if your audio sounds muddy, inconsistent, or distracting, viewers will click away faster than you can say "subscribe." For intermediate YouTubers looking to elevate their content, mastering sound mixing isn't just a technical skill – it's a viewer retention superpower.
Bad audio quality is consistently cited as a major reason viewers abandon a video early. Think about it: you can often tolerate slightly imperfect visuals if the content and sound are engaging. But trying to decipher muffled speech, enduring sudden volume changes, or battling distracting background noise is a frustrating experience that sends viewers running. As experts point out, poor audio is the single biggest deterrent for viewers right after they click on your video. They demand clear sound – in fact, research indicates that a significant majority of viewers prioritize clear audio even over basic video quality.
Achieving consistent, professional-level video and audio quality can feel daunting. You might be grappling with inconsistent recording environments, balancing different audio sources, or simply not knowing where to start with post-production audio. This is where understanding the importance of sound mixing comes in.
What is Sound Mixing in Video Editing?
At its core, sound mixing is the process of combining all the audio elements in your video – dialogue, background music, sound effects, ambient noise – into a cohesive and balanced whole. It's where you adjust volume levels, clean up noise, add effects, and ensure that everything sounds clear, professional, and consistent from start to finish.
Think of it like cooking: you have various ingredients (your audio tracks), and mixing is the process of blending them, seasoning them correctly, and ensuring no single flavor overpowers the rest, creating a delicious final dish (your video's soundscape).
Effective sound mixing ensures:
- Dialogue Clarity: Your voice (or your subject's voice) is easily heard and understood above all other sounds.
- Balanced Levels: Music and sound effects support, rather than compete with, the dialogue. Volume doesn't jump unexpectedly.
- Consistency: The audio quality and volume remain consistent throughout the video, even if you filmed in different locations or at different times.
- Professionalism: Clean audio free of distracting hums, hisses, or echoes elevates the perceived quality of your entire production.
How Important is Sound Mixing for YouTube?
Beyond just sounding good, strategic sound mixing directly impacts key YouTube metrics, particularly viewer retention and watch time. These are crucial signals the YouTube algorithm uses to determine how much to promote your video.
- Preventing Early Clicks Away: As highlighted by YouTube strategists, poor audio is an "instant click away" factor. If your intro or the first few seconds have bad sound, viewers won't stick around long enough to see your amazing content. Good audio hooks them in and keeps them watching.
- Maintaining Engagement: A video with consistent, clear audio is simply more pleasant to watch for extended periods. Viewers are less likely to get fatigued or distracted by audio issues, leading to longer watch times.
- Enhancing Storytelling: Sound effects and background music, when mixed correctly, can dramatically enhance the mood, pacing, and impact of your video, keeping viewers emotionally invested. Using sound effects strategically at key moments can act as "pattern interrupts" that re-engage a viewer whose attention might be drifting.
- Accessibility: Clear audio is essential for viewers who are hard of hearing or rely on captions. While captions are vital (another post-production best practice!), they work best when the underlying audio is clear.
Ultimately, investing time in sound mixing shows your audience you care about their viewing experience. It's a sign of quality and professionalism that builds trust and encourages repeat viewership.
How Do I Make My YouTube Audio Sound Professional?
Achieving professional-sounding audio on YouTube doesn't necessarily require a high-end studio, but it does require attention to detail both during recording and in post-production. Here are key techniques and steps:
1. Improve Your Recording Environment
Before you even get to mixing, the quality of your raw audio is paramount. You can't magically "fix" truly terrible recordings in post-production.
- Minimize Background Noise: Record in the quietest space possible. Turn off fans, air conditioners, refrigerators, and anything else generating noise.
- Control Echo and Reverb: Hard surfaces like bare walls and floors cause sound to bounce, creating echo. Record in spaces with soft furnishings like carpets, curtains, couches, and even blankets or acoustic foam if you have it. Recording in a smaller room with lower ceilings also helps reduce echo.
- Get Closer to the Microphone: This is one of the most effective free tips. The closer your mouth is to the microphone, the stronger your voice signal will be relative to background noise and room echo.
2. Choose the Right Microphone
While you can start with your camera's built-in mic or even your phone's, a dedicated microphone is one of the best investments you can make for audio quality. You don't need to spend a fortune; there are many excellent, affordable options like simple USB microphones for computer recording or lavalier (lapel) mics that plug into your camera or phone. Even a $20 microphone can make a significant difference compared to a built-in one.
3. Understand Basic Audio Editing in Your Software
Most video editing software (like Adobe Premiere Pro, Final Cut Pro, DaVinci Resolve, or even simpler options) includes built-in audio editing tools. Familiarize yourself with these essential functions:
- Volume Adjustment: The most basic step. Ensure all clips are at a consistent, listenable volume. Dialogue should typically be the loudest element.
- Noise Reduction/Removal: Tools to reduce or eliminate steady background noise like hums, hisses, or computer fans. Be careful not to over-apply this, as it can make your audio sound robotic.
- Equalization (EQ): This allows you to boost or cut specific frequencies. You can use EQ to make voices clearer, reduce muddiness, or remove unwanted low-end rumble.
- Compression: This reduces the dynamic range of your audio, making the loudest parts quieter and the quietest parts louder. This results in a more consistent overall volume, so viewers don't have to constantly adjust their volume knob.
- Gating: A gate cuts off sound below a certain volume threshold. Useful for eliminating background noise during pauses in speech, but like noise reduction, use with care.
- Mixing Multiple Tracks: Balance your dialogue track with your music and sound effect tracks. Use your ears! The music should duck down significantly when someone is speaking.
4. Mastering the Mix
This is where the art comes in. Listen critically to your audio through good headphones or speakers.
- Prioritize Dialogue: Your message is key. Ensure the dialogue is always clear and at a comfortable listening volume.
- Layer Sounds Intentionally: Don't just throw music and sound effects in. Use them to enhance specific moments, create atmosphere, or guide the viewer's attention.
- Check Levels Across Devices: Listen to your final mix on different speakers (headphones, phone speaker, computer speakers) to ensure it sounds good everywhere. What sounds balanced on your fancy headphones might be too quiet or too loud on a phone.
- Reference Levels: Aim for a consistent output volume. Many platforms, including YouTube, have recommended loudness levels (often measured in LUFS). While this is a more advanced concept, simply aiming for consistent levels across all your clips is a great start.
5. Post-Production Best Practices
Sound mixing is part of the larger post-production puzzle, which also includes crucial elements like color grading and adding captions. Just as a good color grade enhances visuals, good sound mixing enhances the auditory experience. Developing your technical skills in shooting, lighting, audio, and editing is an ongoing process that pays huge dividends in video quality.
Advanced Audio Production Techniques for YouTube: Achieving Studio-Quality Sound Without Breaking the Bank
For those ready to go deeper, here are some techniques to consider without needing a professional studio:
- Using a Digital Audio Workstation (DAW): While video editors have audio tools, dedicated DAWs (like Audacity - free, or more advanced options like Reaper, Pro Tools First, Ableton Live Lite) offer more powerful editing, mixing, and effects capabilities. You can export your audio from your video editor, refine it in a DAW, and import the finished mix back into your video timeline.
- Understanding EQ More Deeply: Learn about common frequency ranges for voice (e.g., boosting around 1-4 kHz for clarity, cutting around 200-300 Hz to reduce muddiness) and how different instruments or sounds occupy different parts of the frequency spectrum.
- Multiband Compression: More advanced than standard compression, this allows you to compress different frequency ranges independently, giving you more control over the sound.
- De-essing: A specific type of compressor that targets harsh "s" sounds.
- Reverb and Delay: Use these effects sparingly and intentionally to add space or atmosphere, but be careful not to make your audio sound distant or washed out.
- Room Tone: Record a minute or two of silence in your recording environment. This "room tone" can be layered under your dialogue during editing to fill gaps and make cuts sound smoother, preventing jarring silence.
Many of these advanced techniques can be achieved using plugins within your video editor or DAW.
Tools & Resources
Improving your audio workflow involves both hardware and software. While we won't list specific competitor tools, here's where different types of resources fit in:
- Microphones: As mentioned, a dedicated microphone is key. Research options that fit your budget and recording setup (USB mics, lav mics, shotgun mics).
- Headphones: A good pair of neutral-sounding headphones is essential for accurate mixing. Avoid consumer headphones that overly boost bass or treble.
- Digital Audio Workstations (DAWs): For advanced editing and mixing outside of your video editor.
- Audio Plugins: Software add-ons for noise reduction, EQ, compression, and other effects within your editor or DAW.
- Educational Content: Look for tutorials on audio editing and mixing specifically for video.
- Subscribr: While focused on strategy and scriptwriting, understanding your channel's performance metrics and audience engagement within Subscribr's Channel Intelligence and Video Performance Intelligence features can indirectly inform your production priorities, including audio quality, by highlighting how crucial viewer retention is. Although Subscribr doesn't directly mix audio, its research tools can help you analyze successful videos (via transcript import and analysis) to understand how effective audio is used by top creators.
Monetization Angle: Affiliate Opportunities
As you learn more about audio for YouTube, you'll inevitably explore different microphones, headphones, software, and plugins. This presents a natural monetization opportunity through affiliate marketing.
- Review Gear: Create videos reviewing the microphones, headphones, or audio interfaces you use and recommend.
- Software Tutorials: If you learn to use a specific audio editing software or plugin, create tutorials and include affiliate links to the products.
- Recommend Courses/Guides: If you find excellent paid resources for learning audio production, become an affiliate and recommend them to your audience.
Always be transparent about affiliate links and only recommend products you genuinely use and believe in.
Conclusion
Ignoring audio quality is a surefire way to lose viewers on YouTube, regardless of how good your video looks. Sound mixing is the critical step in post-production that takes your raw audio and transforms it into a professional, engaging soundscape.
By focusing on improving your recording environment, using a decent microphone, and learning the fundamentals of audio editing – volume, noise reduction, EQ, and compression – you can dramatically improve the viewer experience. For intermediate creators, exploring more advanced techniques will further elevate your production value.
Prioritizing clear, balanced audio will not only make your videos more professional and enjoyable but will also directly contribute to higher viewer retention and increased watch time, signaling to the YouTube algorithm that your content is valuable. Start paying attention to your sound, and watch your channel grow.


