

Ready to get your next 10,000 subscribers?
Join thousands of creators who use Subscribr to create faster, better YouTube videos.

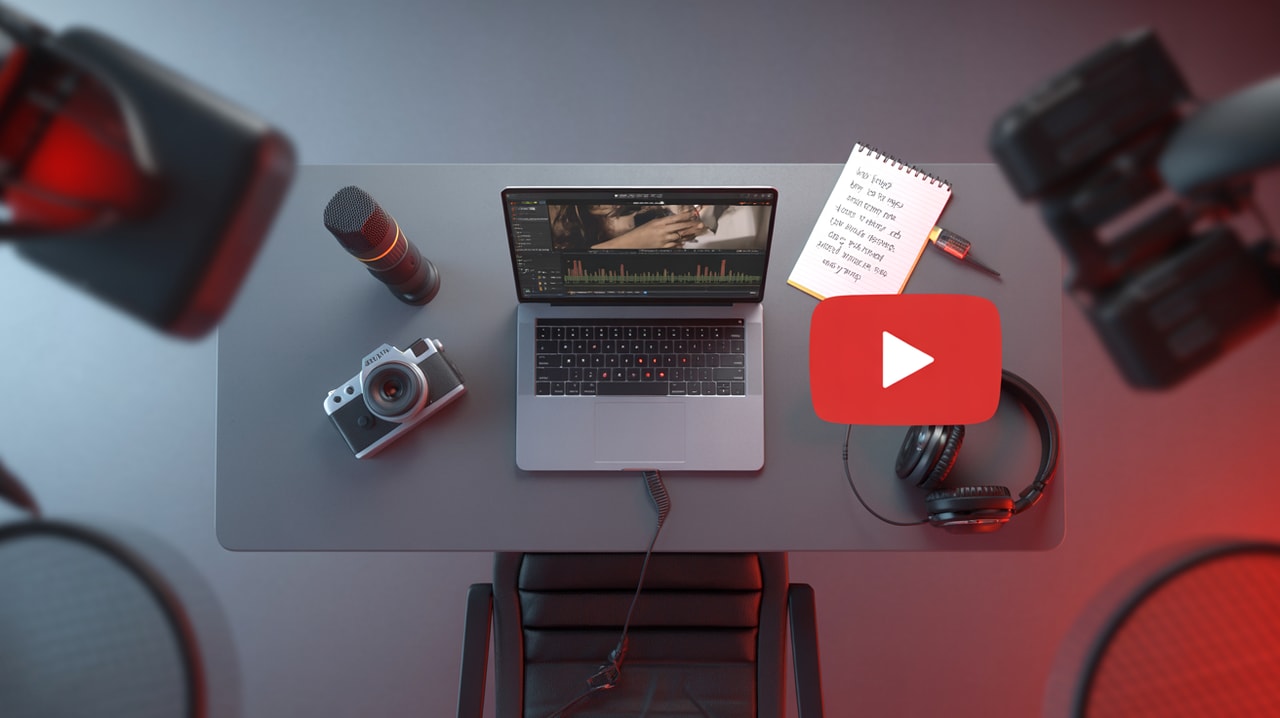
Okay, here is the article focusing on quick wins to improve YouTube video quality using basic equipment, based on the research gathered.
Stop Wasting Time: Quick Wins to Improve YouTube Video Quality NOW
You've got great ideas for YouTube videos, but maybe you feel like your video quality isn't quite matching up. Or perhaps you're spending way too much time trying to figure out complicated gear, and it's taking away from actually creating content. Sound familiar?
You're not alone. Many new creators struggle with inconsistent audio and video quality, and get bogged down in the endless research of expensive equipment. The good news? You don't need a Hollywood budget or a degree in cinematography to make your videos look and sound dramatically better.
This article is all about high-impact, low-effort adjustments you can make right now to boost your video quality instantly. We'll focus on smart filming techniques and making the most of the basic equipment you likely already own, so you can stop stressing about gear and start creating videos your audience will love.
Let's dive into the quick wins that will make a difference today.
The Foundation: Why Quality Matters (Even with Basic Gear)
Think of it this way: your content is the main course, but production quality is the plate it's served on. A messy plate makes even the best food less appealing. Similarly, poor audio, shaky footage, or bad lighting create "viewer friction" – distractions that pull people out of your message.
Improving your production quality isn't about being perfect; it's about removing those distractions so viewers can focus entirely on your brilliant ideas and personality. And the best part? The most impactful improvements come from mastering fundamentals, not buying the latest camera.
Even creators using just a smartphone can produce high-quality content by focusing on key areas. It’s about craftsmanship and understanding how simple elements like light and sound work.
Quick Win #1: Master Your Lighting (The Single Biggest Impact)
If there's one thing that can instantly elevate your video quality, it's lighting. Good lighting makes your image clearer, makes you look better on camera, and helps your camera (especially smartphone cameras) perform significantly better. Bad lighting, on the other hand, can make even expensive cameras look terrible.
You don't need fancy studio lights to get started. Here’s how to get quick wins with lighting:
- Find Your Natural Light Source: The easiest and often best light source is free: the sun! Position yourself facing a window. This provides soft, natural light that is very flattering. Avoid having the window behind you, as this will silhouette you and make your face dark.
- Diffuse Harsh Light: Direct sunlight can be too harsh, creating strong shadows. If using window light, you can diffuse it by hanging a sheer curtain or even a white bedsheet over the window. The goal is soft, even light on your face.
- Consider an Affordable Light: If natural light isn't consistent or available, a simple, affordable investment in a dedicated light makes a huge difference. You can find basic softbox light kits on Amazon for around $50 or less. Softboxes create soft, diffused light, similar to window light. Position it slightly off-center and angled towards your face.
- Avoid Overhead Lighting: Ceiling lights often create harsh shadows, especially under your eyes. Turn them off or minimize their impact if you have a better light source.
- Fill Shadows: If one side of your face is too dark, you can use a simple white bounce board (a piece of white foam core or even a white poster board) opposite your main light source to reflect light back onto the shadow side.
Actionable Tip: Spend 10 minutes right now experimenting with sitting or standing facing a window at different times of the day. See how the light changes and find the best spot in your home for filming. If you can, invest in one affordable softbox light and practice setting it up.
Quick Win #2: Crystal Clear Audio (More Important Than You Think)
Viewers are often more forgiving of less-than-perfect video quality than they are of bad audio. Scratchy, echoing, or unclear sound is a surefire way to make people click away. Improving your audio doesn't have to be complicated or expensive.
Here’s how to get quick audio wins:
- Get Closer to Your Camera (or Phone): Built-in microphones work best when the sound source (you!) is close. If you're filming relatively close to your camera, the built-in mic might be sufficient initially.
- Use a Lavalier Microphone: For a significant audio upgrade without breaking the bank, invest in a lavalier microphone (those small clip-on mics). You can find wired lav mics for $20-$30 that plug directly into your smartphone or camera. Wireless options are more expensive but offer more freedom of movement. Lav mics isolate your voice and reduce room echo and background noise.
- Minimize Background Noise: Before recording, turn off fans, air conditioners, dishwashers, or anything else making noise. Choose the quietest space possible to film. Soft furnishings like carpets, curtains, and upholstered furniture can help absorb sound and reduce echo.
- Monitor Your Audio: If possible, use headphones to listen to your audio while recording. This helps you catch problems like clipping (audio that's too loud and distorted) or background noise you didn't notice.
- Set Proper Levels: If your camera or external mic has gain controls, set them so your audio is loud enough to be clear but not so loud that it distorts. Aim for your audio levels to typically be in the -12 to -6 decibel (dB) range.
Actionable Tip: Record a short test clip in your filming location using your current setup. Listen back critically. Is there an echo? Is there background noise? Is your voice clear? Based on that, decide if a simple lav mic is your next quick win investment. You can often find great budget options on Amazon.
Quick Win #3: Frame Your Shot Like a Pro (Simple Composition)
How you arrange yourself and your background in the frame makes a big difference in how professional your video looks. You don't need to be a master cinematographer, just pay attention to a few basics:
- Clean Up Your Background: Look at what's behind you. Is it messy? Is there anything distracting? Take a few minutes to tidy up. A clean, uncluttered background keeps the focus on you.
- Consider Your Background Elements: Sometimes a little in the background can add personality, but make sure it's intentional and not distracting. Ensure things like pictures on the wall are straight.
- Position Your Camera: Avoid filming from a low angle looking up at you – this is often unflattering. A slightly higher angle, looking slightly down at you, is generally more appealing. Position the camera so your eyes are roughly in the upper third of the frame.
- Use the Rule of Thirds (Optional but Helpful): Imagine a tic-tac-toe grid over your video frame. Instead of centering yourself dead center, try positioning yourself slightly to the left or right, along one of the vertical lines. This can make the shot more visually interesting.
- Ensure Stability: Shaky footage is hard to watch. Use a tripod! You can find very affordable phone tripods and basic camera tripods online for under $30. Make sure it's tall enough for your desired filming angle. If you don't have a tripod, prop your camera or phone up on a stack of books or anything stable.
Actionable Tip: Before hitting record, look critically at your frame. What's in the background? Is the camera stable? Try adjusting your position or the camera angle slightly and see how it changes the shot.
Quick Win #4: Keep it Steady (Stabilization)
Even minor camera shake can be distracting. Whether you're using a phone or a camera, keeping it steady is a quick win for better quality.
- Use a Tripod: As mentioned in composition, a tripod is the easiest way to ensure a steady shot when you're stationary.
- Use Two Hands: If you're holding the camera or phone, use both hands for a more stable grip.
- Lean on Something: If filming handheld, lean against a wall, table, or chair for extra support.
- Practice Smooth Movements: If you need to pan or tilt, practice doing it slowly and smoothly.
Actionable Tip: If you don't have a tripod, find a stable surface to rest your camera or phone on for your next video. Notice how much better the footage looks without shake.
Quick Win #5: Optimize Your Camera Settings (Even on a Phone)
You don't need to understand every technical setting, but a few quick checks can maximize the quality from your existing camera or smartphone.
- Record in HD (1080p): Most modern smartphones and cameras can record in at least 1080p (High Definition). Make sure this is selected in your camera settings. If your device supports 4K and your computer can handle editing it, even better, but 1080p is the minimum standard for a good-looking YouTube video.
- Check Frame Rate: For standard video, 24 or 30 frames per second (fps) is typical. Most cameras default to this. If you plan on using slow motion, you'll need to record at a higher frame rate (like 60fps or 120fps), but stick to 24 or 30 for regular footage.
- Ensure Focus: Make sure your camera is focused on you, not the background. On smartphones, you can often tap on the screen where you want to focus.
- Check White Balance: White balance makes sure the colors in your video look accurate (that whites look white, not blue or orange). Many cameras and phones have automatic white balance, but if you have the option, using a preset (like "daylight" or "cloudy") or manually setting it can improve color accuracy.
Actionable Tip: Go into your camera or smartphone camera app's video settings right now. Find the resolution and frame rate options and make sure you're set to at least 1080p at 24 or 30fps. Look for focus and white balance options to familiarize yourself with them.
Workflow Efficiency: Spending Less Time on Gear, More on Content
The goal of these quick wins isn't just better quality; it's also about simplifying your process so you can create content more efficiently. When you have a go-to spot with Good lighting, a stable setup, and reliable audio, you spend less time fussing with gear and more time focusing on your message and connecting with your audience.
This is where tools designed specifically for creators can make a difference. Platforms like Subscribr are built to streamline the entire content creation process, from idea to finished script, so you can maximize your time. Instead of getting lost in the technical weeds of production, you can use Subscribr's AI-powered tools for research, scriptwriting, and planning, freeing you up to implement these quick quality wins during filming.
Subscribr's Research Assistant, for example, helps you gather information efficiently, and the AI Script Writer can turn your ideas into a structured script quickly. This means less time wrestling with cameras and more time delivering value to your viewers.
Monetization Angle: Turning Quick Wins into Affiliate Opportunities
As a new creator implementing these quick quality improvements, you're also creating opportunities for potential monetization through affiliate marketing. The affordable accessories you discover and use – the $50 softbox, the $20 lav mic, the $30 tripod – are perfect products to recommend to your audience who are likely facing the same challenges you were.
- Be Authentic: Only recommend products you genuinely use and like. Your audience trusts your opinion.
- Showcase the Impact: In your videos, briefly mention how a specific piece of gear improved your quality. For instance, "You might notice the audio is much clearer in this video – that's thanks to this simple lav mic I picked up for under $30."
- Include Affiliate Links: Sign up for affiliate programs (like Amazon Associates) and include links to the products in your video description. Always disclose that they are affiliate links.
- Create Dedicated Reviews (Optional): Once you're comfortable, you could even create short, simple review videos of the budget gear you recommend.
This approach provides value to your audience by recommending helpful, affordable solutions, and creates a potential small income stream for you as your channel grows.
Answering Your Questions
Here's a recap addressing the specific questions you had:
What are basic steps creators can take to improve the production quality?
Focus on the fundamentals:
- Lighting: Use natural light or an affordable softbox to light your face evenly.
- Audio: Use a lav mic or get close to your camera's mic and minimize background noise.
- Composition: Clean up your background and use a flattering camera angle (slightly above eye level).
- Stability: Use a tripod or stable surface to avoid shaky footage.
- Camera Settings: Ensure you're recording in at least 1080p.
How can a YouTuber improve their production value without expensive equipment?
By mastering the fundamental skills of lighting, audio recording, and composition using the equipment they already have (like a smartphone) and investing strategically in one or two key, affordable accessories like a lavalier microphone and a basic tripod or light. The biggest improvements come from technique and understanding how to use light and sound effectively, not from the price tag of the gear. Tools like Subscribr can also help improve overall production value by streamlining the planning and scripting process, ensuring the content itself is high quality and well-structured.
Conclusion
Improving your YouTube video quality doesn't have to be a daunting or expensive process. By focusing on these quick wins – better lighting, clearer audio, smarter framing, stability, and optimizing basic camera settings – you can make a significant impact on your videos right away.
Stop getting bogged down in gear research and focus on implementing these simple techniques. Combine these production quick wins with efficient content planning using tools like Subscribr, and you'll be well on your way to creating videos that look professional, keep viewers engaged, and help you grow your channel. Start with one or two of these tips today and see the difference it makes!


