

Ready to get your next 10,000 subscribers?
Join thousands of creators who use Subscribr to create faster, better YouTube videos.

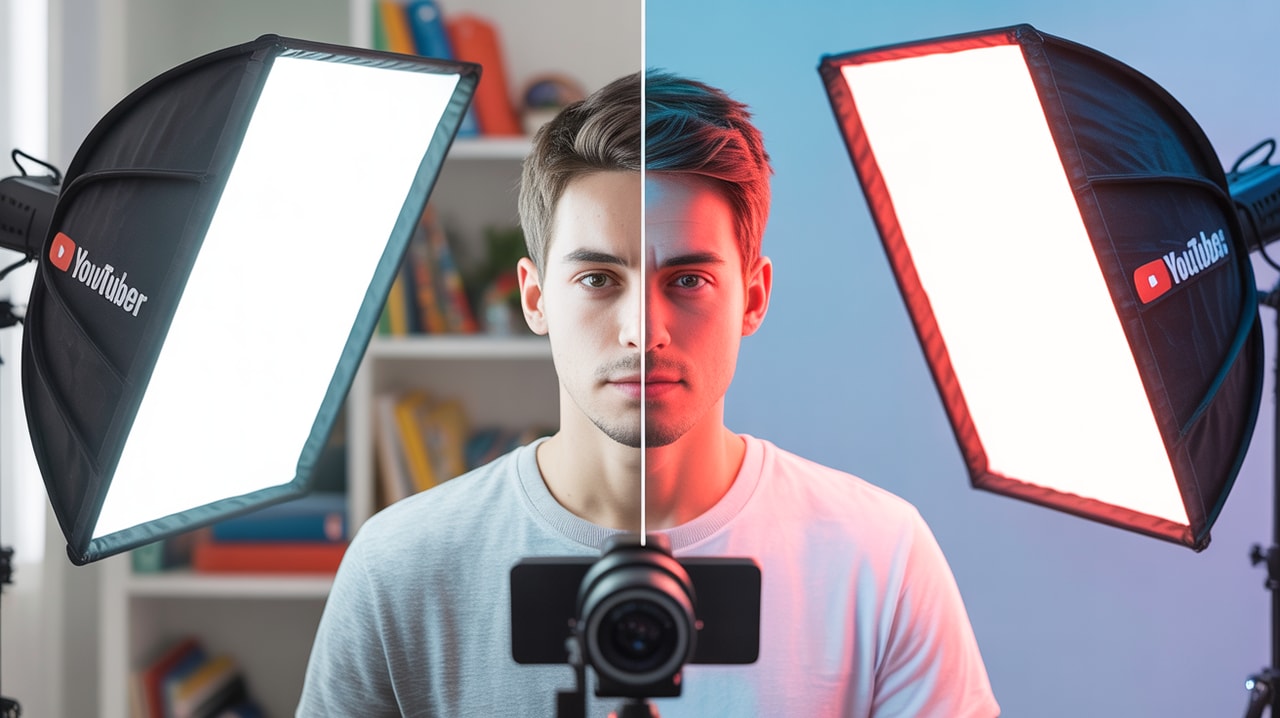
Why Your YouTube Lighting Sucks (And How to Fix It Cheaply!)
Let's be honest. You've got great ideas, a decent camera (even if it's just your phone!), and the passion to create YouTube videos. But when you hit record, something just looks... off. Your face is shadowy, the background is muddy, and the whole video feels a bit dull.
If this sounds familiar, your lighting probably sucks. But don't worry – you're not alone, and you absolutely do not need to spend a fortune to fix it. Bad lighting is one of the biggest pain points for new creators, often making videos look unprofessional and causing viewers to click away, regardless of how good your content is. The perceived high cost of lighting equipment can feel like a huge barrier, but we're here to show you how to achieve consistent, professional-looking video quality without breaking the bank.
Improving your production value, especially your lighting, is one of the most impactful things you can do as a new YouTuber. It’s often more important than having the fanciest camera. As YouTube strategists often point out, creative and effective lighting can elevate your production value tenfold, even with budget gear.
This article will guide you through simple, actionable, and budget-friendly steps to transform your YouTube lighting setup, making your videos instantly more professional and engaging for your target audience of New Creators/Aspiring YouTubers.
Why Good Lighting is Your Secret Weapon (It's More Than Just Brightness)
Think about your favorite YouTube channels. What do they have in common? Crisp visuals, clear audio, and usually, great lighting. Good lighting isn't just about making things bright; it's about shaping your shot, creating depth, and making you and your content look appealing.
For beginners, especially those creating educational content or tutorials like channels such as @Technoobie Tutorials or @Learning time, clear visuals are paramount. If viewers can't clearly see you or what you're demonstrating, they'll get frustrated and leave. Effective lighting helps highlight your subject (usually you!), minimizes distracting shadows, and creates a pleasant viewing experience that keeps people watching longer.
In the world of YouTube, where viewer retention is key, better production quality signals professionalism and makes your content easier to consume. This directly impacts your channel's growth and potential for monetization through increased watch time and ad revenue.
Your First & Cheapest Light Source: Embrace Natural Light
The absolute best place to start with improving your lighting, and the cheapest, is using what's already available: natural light. Sunlight is free, abundant, and often provides a beautiful, soft, and flattering light source.
How to use window light effectively:
- Face the Window: Position yourself directly facing a window. This ensures the light hits you evenly from the front, illuminating your face and making your eyes sparkle.
- Avoid Direct Sunlight: Harsh, direct sunlight can create strong shadows and cause you to squint. Aim for soft, diffused light, like from a window on a cloudy day, or during the "golden hour" (shortly after sunrise or before sunset). If direct sun is unavoidable, you can diffuse it by hanging a sheer curtain or even a white bedsheet over the window.
- Beware of Backlighting: Never sit with a window directly behind you. This will silhouette you, leaving your face dark and underexposed while the background is blown out. This is a classic beginner mistake that immediately makes your video look less professional.
- Side Lighting: Positioning yourself with a window to your side can create more dramatic lighting with shadows, which might be suitable depending on your content and desired mood. Experiment to see what looks best for your style.
Using natural light is the easiest way to instantly improve your video quality without spending a dime. It's the go-to free method recommended by many YouTube experts.
Building Your Basic Setup: Affordable Artificial Lights
While natural light is great, it's inconsistent (hello, sunset!) and not always available. This is where affordable artificial lights come in. You don't need expensive studio lights to make a big difference.
Budget-Friendly Lighting Options:
- Desk Lamps (Your Secret Weapon): You probably already own one or two! Simple desk lamps can be incredibly effective.
- How to use them: Place them strategically around you. Don't point them directly at your face, as this creates harsh light and shadows.
- Diffusion is Key: To soften the light from a harsh desk lamp, you need diffusion. You can buy small, cheap clip-on diffusers, or make your own using parchment paper, a white t-shirt, or even a plastic bag (be careful with heat!). The goal is to make the light source larger and softer.
- As suggested by strategy experts, combining one professional light with several inexpensive desk lamps (under $50 each) is a great way to build a cinematic, budget-friendly setup.
- Ring Lights: These circular lights are very popular for a reason. They provide soft, even, frontal lighting that minimizes shadows and creates an attractive catchlight in your eyes.
- Pros: Easy to set up, relatively inexpensive (you can find decent ones for $20-$50), great for solo creators filming straight to camera.
- Cons: Can look unnatural if used too intensely, primarily a single light source which limits creative setups.
- Small LED Panels: These have become increasingly affordable and versatile. You can find small, powerful LED panels for under $50-$100.
- Pros: Often adjustable in brightness and color temperature, compact, can be used on stands or even camera hot shoes.
- Cons: Can be harsh if not diffused; look for ones that come with a diffusion panel or buy small softboxes/diffusers separately.
These options give you control and consistency that natural light can't. Start with what you have (desk lamps!) and add inexpensive dedicated video lights as your budget allows.
Understanding the Basics: Simple Lighting Principles
You don't need a film degree to understand fundamental lighting. The most common and effective setup is called Three-Point Lighting. While it sounds complicated, it's a simple principle you can apply even with budget lights.
Imagine your subject (you) is in the center, and the camera is in front.
- Key Light: This is your main light source. It's usually the brightest and placed slightly to one side of the camera, angled towards you. If you're using a window, a ring light, or your brightest desk lamp, this is your key light.
- Fill Light: This light is placed on the opposite side of the camera from the key light. Its purpose is to "fill in" or soften the shadows created by the key light. It should be less intense than your key light. You can use another desk lamp, a smaller LED panel, or even a reflector (a white board, a piece of foam core, or a cheap collapsible reflector) bouncing some of the key light back onto your face.
- Back Light (or Hair Light/Rim Light): This light is placed behind you, often higher up and angled down towards your head and shoulders. Its purpose is to separate you from the background, creating a subtle outline of light (a "rim") that adds depth and dimension to your shot. A simple desk lamp or small LED panel works great for this.
You can achieve a decent three-point setup with just three inexpensive desk lamps and some parchment paper for diffusion, or a combination of the budget lights mentioned above. The key is to experiment with placement and intensity to find what looks best for your space and face shape.
Avoiding Common Mistakes:
- Harsh Shadows: Caused by small, undiffused light sources pointed directly at your subject. Always try to diffuse your lights.
- Backlighting: As mentioned, avoid sitting with a bright light source directly behind you.
- Uneven Lighting: Ensure both sides of your face are reasonably well-lit, unless you're going for a specific dramatic effect.
Beyond the Basics (Still on a Budget): Adding Mood and Depth
Once you've mastered basic illumination, you can start thinking about how lighting can enhance the mood and message of your videos. This is where the "Lighting for Mood and Message" opportunity comes in, even at a beginner level.
- Background Lighting: Don't forget your background! Adding a simple, inexpensive light to illuminate a plant, a bookshelf, or a textured wall behind you can add visual interest and depth to your shot. A small LED panel with adjustable color can even add a splash of color to match your branding or video topic.
- Creating Atmosphere: Different lighting setups evoke different feelings. Soft, even lighting is great for friendly, educational content. More dramatic lighting with stronger shadows can add intrigue or seriousness. Experiment with the intensity and placement of your fill and backlights to change the mood.
You don't need expensive gels or fancy fixtures to start playing with mood. Even strategically placing a colored light bulb (like a Philips Hue bulb if you have one) in the background can make a big difference.
Choosing Your Gear & Where to Find It
Ready to buy some affordable lights? Here are the types of gear often highlighted in budget lighting discussions:
- Softbox Lighting Kits: These typically include one or two softboxes (which provide large, soft light) on stands. You can find basic kits for under $100-$150. Videos like "Best Budget Lighting Kit for YouTube" by channels like Think Media often review these options.
- LED Panel Kits: Kits with one or two adjustable LED panels and stands are also available in the under $150-$300 range. Look for ones with high Color Rendering Index (CRI) for accurate colors.
- Individual Lights: If you're piecing together a setup, look for affordable ring lights, small LED panels, or even powerful LED desk lamps.
Check online marketplaces and electronics stores. Look for sales and read reviews from other beginner creators. Remember the monetization angle: you can often include affiliate links for the budget lighting gear you recommend in your video descriptions, earning a small commission while helping others improve their setups.
Improving Quality = Improving Monetization
Investing a small amount of time and potentially a little bit of money into your lighting setup has a direct impact on your channel's monetization potential. Higher quality videos are more likely to:
- Increase Viewer Retention: Viewers stay engaged longer with videos that are visually appealing and easy to watch.
- Attract More Views: Better quality makes your thumbnails stand out and encourages clicks.
- Boost Watch Time: More views and longer watch times lead to increased ad revenue.
- Open Affiliate Opportunities: As mentioned, you can recommend the budget gear you use and earn commissions.
Think of improving your lighting as an investment in your channel's future. It's one of the most effective ways to enhance production quality and signal to both the algorithm and potential viewers that your content is worth watching.
Planning Your Content with Quality in Mind
Improving your lighting isn't a one-time fix; it's part of an ongoing process of enhancing your production quality and overall content strategy. Tools like Subscribr can help you integrate this focus into your workflow.
Subscribr's comprehensive platform assists with everything from researching content ideas your audience actually wants, to scripting videos that keep viewers hooked. As you improve your lighting and video quality, Subscribr can help you analyze which videos perform best with your enhanced production value using its Channel and Video Intel features. You can then use these insights to refine your approach and plan future content where lighting plays a key role in effectively communicating your message and showcasing your expertise. Subscribr's AI Script Writer and Smart YouTube Script Writer can even help you plan out shots and visual cues within your script, ensuring you consider your lighting setup during the content creation phase.
Conclusion: Light Up Your YouTube Journey
Don't let bad lighting dim your YouTube dreams. Achieving a professional look on a budget is entirely possible with a little knowledge and strategic use of affordable tools. By understanding basic principles like three-point lighting, leveraging free natural light, and investing wisely in inexpensive artificial lights like desk lamps, ring lights, or small LED panels, you can dramatically improve the visual quality of your videos.
Addressing the pain points of inconsistent quality and budget constraints head-on allows you to focus on creating valuable content that resonates with your New Creators/Aspiring YouTubers audience. Remember that better lighting isn't just about aesthetics; it's a fundamental step towards increasing viewer retention, growing your channel, and unlocking monetization opportunities.
Start experimenting with the lighting you have today, gradually add budget-friendly gear, and use tools like Subscribr to integrate production quality into your overall content strategy. Your audience (and the algorithm) will thank you.


