

Ready to get your next 10,000 subscribers?
Join thousands of creators who use Subscribr to create faster, better YouTube videos.

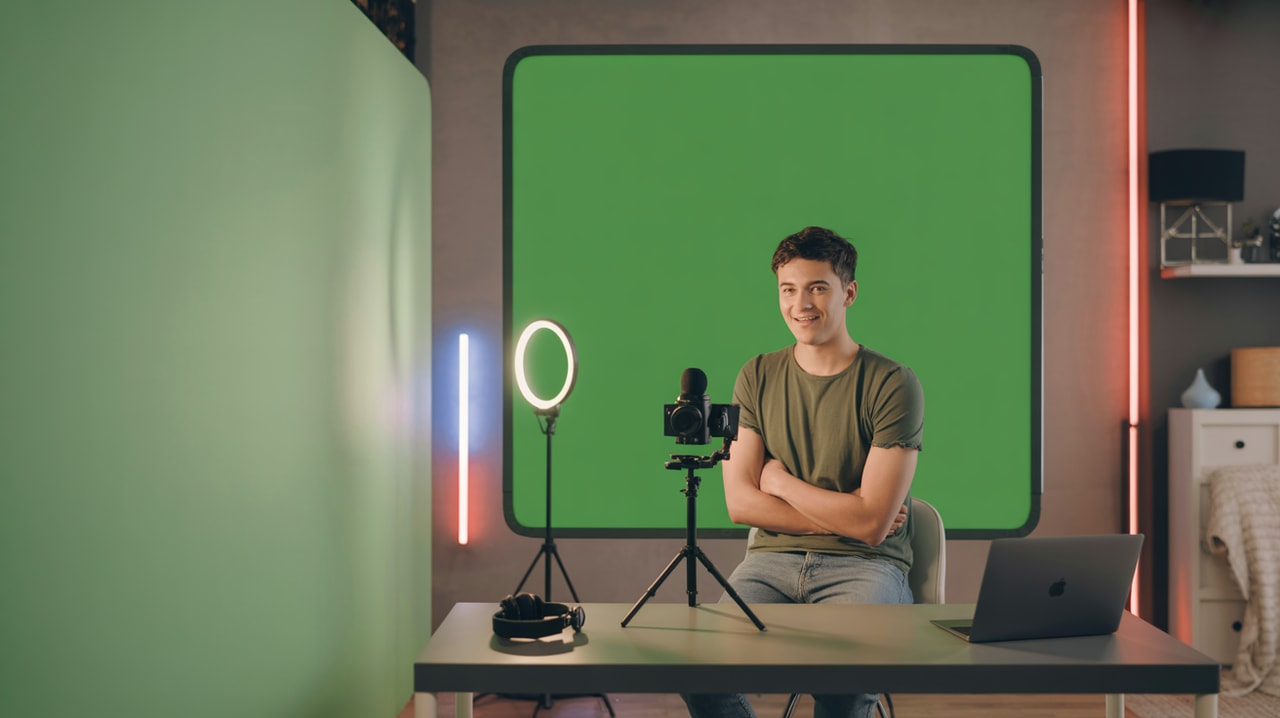
How to Use a Green Screen for YouTube (Even in a Small Room)
Dreaming of dynamic backgrounds, professional-looking sets, or placing yourself inside a video game? Many new YouTubers face the challenge of limited space and budget, making a dedicated studio seem impossible. The good news is you don't need a massive room or expensive equipment to transform your video's background. With a green screen and a few key techniques, you can unlock a world of creative possibilities right from your home, even in the tightest of spaces.
This guide will walk you through everything you need to know about setting up and using a green screen effectively for your YouTube videos, helping you overcome budget limitations and achieve that consistent, professional quality you're aiming for.
What is a Green Screen and Why Use One?
At its core, a green screen (or blue screen, though green is more common) is a solid-colored backdrop that allows you to use a technique called chroma keying. Chroma keying is a visual effects technique where a specific color (like green) is digitally removed from your footage, making it transparent. This transparent area can then be replaced with any other image or video background you choose.
Why is this essential for creators, especially those starting out?
- Unlimited Backgrounds: Instantly transport yourself anywhere – from a bustling city street to outer space, a professional studio, or the world of your favorite video game. No more worrying about your messy bedroom or plain wall.
- Increased Production Value: A well-executed green screen effect can make your videos look significantly more polished and professional, helping you stand out.
- Space Saving: You don't need multiple physical sets. A single green screen setup allows for endless virtual environments, perfect for small apartments or rooms.
- Consistency: Maintain a consistent brand look across all your videos, regardless of where you're actually filming.
- Flexibility: Easily update your background to match different video topics or seasons without any physical setup changes.
Choosing Your Green Screen: Budget-Friendly Options
You don't need to break the bank to get a usable green screen. There are several budget-friendly options available:
- Pop-up/Collapsible Green Screens: These are often rings or panels that fold up easily for storage. They are great for small spaces as they require minimal setup and can be placed behind a chair. Look for ones that are wrinkle-resistant.
- Green Screen Fabric: You can buy large bolts of green fabric relatively cheaply. The key here is to find a non-reflective material and ensure you can hang it smoothly to avoid wrinkles, which can cause problems during editing.
- Painted Wall: Dedicate a section of a wall to be painted with a specific shade of matte green paint designed for chroma keying. This is a more permanent solution but ensures a perfectly flat and wrinkle-free surface.
What's the best budget green screen? For most beginner YouTubers in small spaces, a collapsible pop-up green screen is often the most practical and budget-friendly option. They are relatively inexpensive, easy to set up and store, and designed to minimize wrinkles. When choosing, look for a size that is large enough to cover the area behind you for your desired shot framing.
Setting Up Your Green Screen
Proper setup is crucial for a clean chroma key. Even the best software struggles with a poorly set up green screen.
- Hang or Mount Smoothly: Whether it's fabric or a pop-up, ensure the green screen is as flat and smooth as possible. Wrinkles create shadows and variations in color, making it hard for the software to remove the green evenly. If using fabric, stretch it taut or use clamps to pull it flat.
- Cover Enough Area: Make sure the green screen covers the entire background area that will be visible in your shot. If your shot is wider, you'll need a wider screen.
- Distance from the Subject: This is critical, especially in a small room. Try to position yourself a few feet away from the green screen. This helps prevent the green color from reflecting onto you ("green spill") and also makes it easier to light the green screen and yourself separately, reducing shadows on the screen. Even a small distance can make a big difference.
Lighting Your Green Screen Properly
Lighting is arguably the most important factor for a successful green screen effect. Uneven lighting or shadows will make your green screen look patchy after chroma keying.
How do I light a green screen properly? The goal is to light the green screen itself as evenly as possible, aiming for a consistent color and brightness across the entire surface visible to the camera.
- Use Separate Lights: Ideally, use at least two lights specifically for the green screen, positioned on either side and slightly in front of it, pointing back towards the screen. This helps eliminate shadows and ensures even coverage.
- Soft, Diffused Light: Avoid harsh spotlights. Soft, diffused light works best. You can achieve this using softboxes, diffusion panels, or even bouncing lights off a white ceiling or wall (if space allows).
- Brightness: The green screen should be lit brightly, but not so bright that the color washes out or creates hotspots.
- Avoid Shadows: Ensure your own shadow isn't falling onto the green screen. This is where having distance between you and the screen helps significantly. Adjust the position of your green screen lights and yourself until no shadows are visible on the green surface.
Budget doesn't have to be a barrier here. As experts suggest, you can achieve good lighting even on a budget. While professional LED panels are great, you can start by using inexpensive desk lamps with diffused bulbs, or even strategically positioned natural light from a window, ensuring you face the light source directly to illuminate your front. @ThinkMedia and @FullTimeFilmmaker have tutorials on lighting setups that can provide helpful visual examples.
Lighting Yourself (Subject Lighting)
Once your green screen is evenly lit, you need to light yourself separately. This helps you stand out from the background and prevents green spill.
- Key Light: This is your main light source, usually positioned slightly to one side and in front of you.
- Fill Light: Positioned on the opposite side of your key light, this light reduces shadows on your face. It should be less intense than your key light.
- Backlight (Optional but Recommended): A light placed behind you, shining towards your back, helps separate you from the green screen and adds depth. This is where a budget desk lamp can work effectively as a rim light.
Ensure your subject lighting is consistent throughout your recording.
Recording Your Video
With your green screen and lighting set up, here are a few tips for recording:
- Camera Settings: Use a consistent white balance. Shoot at a higher resolution (like 1080p or 4K) if possible, as this provides more detail for the editing software to work with. Avoid automatic exposure if it causes the green screen brightness to fluctuate.
- Clothing: Avoid wearing green clothing that matches your green screen, unless you want parts of you to disappear! Also, be mindful of shiny or reflective clothing that might pick up the green color.
- Movement: While some movement is fine, excessive or rapid movement can sometimes make it harder for the software to get a clean key.
Editing: Chroma Keying in Software
This is where the magic happens – removing the green background using chroma key effects in your video editing software.
What software is best for chroma keying? Most modern video editing software, from free options to professional suites, have robust chroma key features. The "best" depends on your budget, operating system, and skill level.
- Free/Budget Options: OBS Studio (great for live streaming and recording, includes chroma key), iMovie (Mac/iOS), CapCut (mobile/desktop).
- Paid Options: Adobe Premiere Pro, Final Cut Pro (Mac), DaVinci Resolve, Filmora, Descript.
The basic process is similar across most software:
- Import Footage: Bring your green screen footage into your editing project.
- Apply Chroma Key Effect: Find the "Chroma Key," "Green Screen Key," or "Ultra Key" effect (the name varies) and apply it to your video clip.
- Use the Color Picker: Use the eyedropper or color picker tool within the effect settings to select the exact shade of green on your green screen. The software will then attempt to make that color transparent.
- Adjust Settings: This is the most crucial step. You'll typically have sliders or controls for settings like:
- Similarity/Tolerance: How close a color needs to be to the selected green to be removed. Increase this carefully to remove more green, but too high will start removing parts of your subject.
- Smoothness/Feather: Softens the edges of your subject. Use subtly to avoid a harsh cutout look.
- Spill Suppression/Despill: This is vital for removing any green tint that might have reflected onto your subject. Adjust this to get rid of the green halo around your edges.
- Matte Controls (Clipping/Choke): These advanced settings help refine the edges, removing any lingering green or bringing back lost details.
Experiment with these settings until you get a clean cutout of yourself with a transparent background. Tutorials like those found on channels such as @KevinStratvert can provide step-by-step guides for specific software like OBS or iMovie. Even smartphone apps are capable of chroma keying, as demonstrated by channels like Content Creators.
Adding Your New Background
With the green removed, you can now place any image or video on a layer below your green screen footage in the editing timeline. This new layer will appear as your background. You can use still images, video clips, graphics, or even screen recordings.
Tips for a Clean Key (Troubleshooting)
Getting a perfect key can take practice. Here are solutions for common issues:
- Shadows on Green Screen: Go back to your lighting setup. Ensure even lighting and that you are far enough from the screen that your shadow doesn't hit it.
- Green Spill on Subject: Adjust the "Spill Suppression" or "Despill" setting in your chroma key effect. You can also try moving further away from the green screen during filming or adding a backlight to create separation.
- Patchy Background Removal: This is usually due to uneven lighting on the green screen or wrinkles. Ensure your green screen is smooth and consistently lit.
- Edges Look Choppy: Refine your matte settings (choke/clip) and smoothness/feather settings. Avoid over-keying the green.
Green Screen Alternatives
If a physical green screen isn't feasible, some software offers AI-powered background removal without a screen. Tools like NVIDIA Broadcast (requires compatible GPU) or features in some editing software (like Descript's "Green Screen" feature, which works even without a physical screen) can remove backgrounds effectively, though results can vary depending on your lighting and background complexity. While not always perfect, these can be good alternatives for vlogs or simpler setups, directly addressing the pain point of needing a professional look without physical equipment.
Integrating Green Screen into Your YouTube Strategy
Using a green screen is more than just a cool effect; it's a strategic tool to enhance your content and improve key YouTube metrics that the algorithm values. By allowing for dynamic and engaging visuals, a green screen can help you:
- Increase Viewer Retention: More visually interesting backgrounds and the ability to integrate graphics or footage seamlessly can keep viewers watching longer.
- Improve Watch Time: Higher retention leads to increased watch time, a critical signal to YouTube that your content is valuable.
- Enhance Engagement: Professional-looking videos encourage likes, comments, and shares.
- Stand Out: Unique backgrounds and visual storytelling enabled by green screens can differentiate your channel.
Analyzing what works in your niche is key. Subscribr's Intel feature and Research Assistant can help you study successful videos, including those that might use green screen effects effectively. Understanding how top creators in your space use visuals to enhance their content can inform your own strategy.
Tools & Resources
Mastering the technical aspects of green screen is just one part of successful YouTube creation. To consistently produce high-quality videos that resonate with your audience and perform well, you need a streamlined workflow.
This is where a platform like Subscribr can be invaluable. While you handle the physical setup and recording, Subscribr helps with the crucial pre-production and optimization phases. Use Subscribr's Research Assistant to gather information and inspiration for your video topics and backgrounds. Leverage the AI Script Writer to craft engaging scripts that integrate seamlessly with your planned green screen visuals. Analyze performance with Channel and Video Intel to see how your enhanced production quality impacts viewer engagement. Subscribr provides the strategic framework and content creation tools that complement your technical skills, ensuring your efforts with a green screen translate into genuine channel growth by focusing on audience value and retention.
Monetization Angle
Improving your video quality with a green screen can also indirectly help with monetization, particularly through affiliate marketing. As you showcase your green screen setup, lighting, and editing process, you can naturally recommend the specific products you use – the green screen itself, your lights, and your preferred editing software. Including affiliate links for these items in your video descriptions can provide an additional revenue stream, helping to offset the cost of your initial setup.
Conclusion
Using a green screen is an accessible way for beginner YouTubers to elevate their video production quality, save space, and unlock incredible creative freedom. While it requires attention to detail, particularly with lighting and editing, the results can dramatically improve the look and feel of your content. By following the steps outlined in this guide – choosing the right screen, setting it up smoothly, lighting it evenly, and mastering the chroma key in your editing software – you can transform your video backgrounds and create more engaging, professional videos, even from the smallest room. Start experimenting, practice your technique, and watch your creative possibilities expand!


