

Ready to get your next 10,000 subscribers?
Join thousands of creators who use Subscribr to create faster, better YouTube videos.

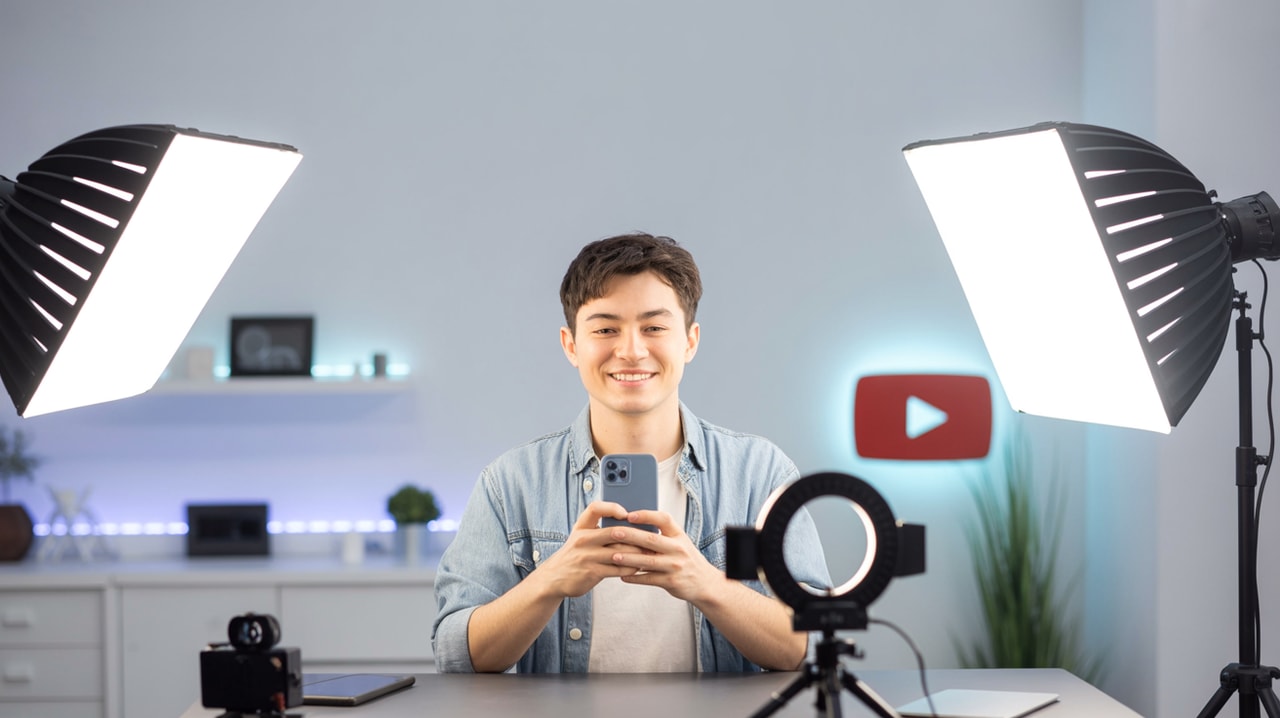
Look Amazing on a Budget: Affordable YouTube Lighting Kits
Creating high-quality YouTube videos might seem like it requires expensive gear, especially when it comes to lighting. Many aspiring creators face significant budget limitations restricting access to professional equipment and tools, leading to difficulty in achieving consistent, professional-level video and audio quality. The good news? You absolutely don't need to spend a fortune to light your videos effectively and make them look polished. By focusing on balancing production quality with budgetary constraints, you can dramatically improve your video aesthetics without emptying your wallet.
This guide is designed for aspiring and new YouTubers looking to develop their technical skill development (shooting, lighting, audio, editing), specifically focusing on how to get great lighting affordably. We’ll break down the essentials of budget-friendly lighting, what types of lights to consider, and how to set them up to make your videos shine.
Why Good Lighting is Your Secret Weapon
You might think your camera is the most important factor for video quality, but expert YouTube strategists often say that improving your lighting setup is significantly more impactful. Even with a basic camera (like your smartphone!), proper lighting can elevate your production value tenfold. It helps your viewers see you clearly, sets the mood, and makes your video look much more professional and engaging. Poor lighting, on the other hand, can be distracting, make your video look amateurish, and even discourage viewers from sticking around.
Basic Lighting Concepts You Need to Know (Affordably Achieved)
Before diving into gear, let's cover some fundamental lighting principles. You'll often hear about "three-point lighting," which is the standard setup for interviews and many YouTube videos. It involves three lights:
- Key Light: This is your main light source, usually placed slightly to the side and in front of you. It provides the primary illumination on your face.
- Fill Light: Placed on the opposite side of the key light, the fill light softens shadows created by the key light. It's usually less intense than the key light.
- Backlight (or Hair Light): Positioned behind you, this light helps separate you from the background, adding depth and dimension.
Achieving this doesn't necessarily require three dedicated, expensive lights. As we'll see, you can get creative with affordable options.
A critical rule to remember: avoid backlighting at all costs unless it's a deliberate stylistic choice (like a silhouette). This means don't sit directly in front of a bright window or lamp without also having light on your face.
What Type of Lighting is Best for YouTube Videos on a Budget?
The "best" type depends on your specific needs, space, and budget, but several affordable options stand out for YouTube creators:
- Natural Light: The cheapest and often most flattering option! Positioning yourself near a window can provide beautiful, soft, and free lighting. This is an excellent starting point if your budget is literally $0. The key is to face the window, not have it behind you.
- Ring Lights: These circular lights provide soft, even illumination that's great for solo creators, especially for close-ups or tutorials. They are relatively inexpensive and easy to set up.
- LED Panel Lights: These come in various sizes and price points. Affordable LED panels offer adjustable brightness and color temperature, giving you more control than ring lights. They are versatile and can be used as key, fill, or backlights.
- Desk Lamps and Household Lights: Don't underestimate what you already own! Simple desk lamps can be repurposed as backlights or fill lights, especially when paired with a slightly more professional key light. This aligns with expert advice on combining one professional light with inexpensive lamps for a budget-friendly cinematic look.
Are Ring Lights Good Enough for YouTube?
Yes, absolutely! Ring lights are often a great starting point and perfectly good enough for many YouTube videos, especially for beginners. They provide soft, diffuse light that minimizes shadows, which is flattering for faces. They are particularly popular for beauty tutorials, vlogs, and talking-head style videos where you are close to the camera.
Pros of Ring Lights for YouTube:
- Affordability: Generally one of the most budget-friendly dedicated lighting options.
- Ease of Use: Simple to set up and operate.
- Even Lighting: Reduces harsh shadows on the face.
- Signature Catchlight: Creates a distinctive ring-shaped reflection in the eyes that many creators like.
Cons of Ring Lights:
- Limited Versatility: Primarily best as a single, frontal key light. Harder to use for multi-point lighting setups.
- Can Be Flat: The very even light can sometimes look less dynamic or cinematic compared to multi-point setups.
- Size Matters: Smaller ring lights might only effectively light your face, not your whole upper body.
For many new YouTubers, a good quality ring light is a significant upgrade over relying solely on overhead room lighting and can definitely make your videos look professional enough to start and grow your channel.
How Many Lights Do I Need for a Basic YouTube Setup?
You might be surprised, but you can start with just one light, especially if you leverage natural light effectively.
- One-Light Setup: Position your single light (or yourself facing a window) slightly off-center in front of you. You can use a white bounce card (like a piece of foam board or even a white sheet) on the opposite side to reflect some light back and soften shadows, effectively creating a makeshift fill light.
- Two-Light Setup: This is a fantastic balance of simplicity and quality. Use one light as your key light. Use your second light as a fill light (less intense or further away than the key) or as a backlight to separate yourself from the background. You can achieve this with two affordable LED panels, a ring light plus a desk lamp, or one good LED light and a desk lamp as suggested by the strategy insights.
- Three-Light Setup: This allows you to execute the classic three-point lighting setup perfectly, giving you the most control over light and shadow. You could use three matching affordable lights or mix and match as needed (e.g., two LED panels and one desk lamp for a backlight).
Ultimately, start with what you can afford and gradually add more lights as your budget allows and your skills develop. Even a single, well-placed affordable light is infinitely better than poor, uneven room lighting.
Affordable Lighting Options Deep Dive
Let's look at some specific types of budget-friendly lighting you can consider:
Ring Lights
Ideal for vloggers, makeup artists, or anyone shooting directly to camera. Look for ones that come with stands and phone holders. Adjustable brightness and color temperature are valuable features.
- What to Look For: Diameter (10-18 inches are common), adjustable brightness, adjustable color temperature (warm to cool light), included stand and phone/camera mount.
- Budget Range: You can find decent options starting from $30-$50, with larger, more feature-rich ones going up to $100-$150.
LED Panel Kits
These offer more directional control than ring lights and are great for key, fill, or backlighting. Affordable kits often come with two panels and basic stands.
- What to Look For: Wattage (higher means brighter), color temperature adjustability (bi-color is versatile), Diffusion (built-in or included softbox/diffuser), stands included, power options (AC adapter vs. battery).
- Budget Range: Basic two-panel kits with stands can be found starting around $70-$150.
Desk Lamps and DIY Solutions
This is where creativity meets budget. A simple desk lamp with a flexible neck can be positioned effectively as a backlight or a fill light.
- What to Look For: Flexibility in positioning, compatibility with different bulb types (LED bulbs are energy-efficient), consider adding a cheap clamp light to attach to furniture or shelves.
- DIY Diffusion: You can soften the light from a harsh lamp by clipping parchment paper or a thin white cloth over the front (ensure it's not a fire hazard – LED bulbs run cooler). A white sheet or board can act as a bounce card.
Bulb Types (A Quick Note)
If you're using standard fixtures like desk lamps, the type of bulb matters.
- LED Bulbs: Energy-efficient, run cool, long lifespan, and available in various color temperatures (look for 'daylight' or 5000K-6500K for natural-looking light, or bi-color if the fixture/bulb allows). Highly recommended.
- CFL Bulbs: Twisted fluorescent bulbs. More energy-efficient than incandescent but contain mercury and can have color rendering issues. Less ideal than LED.
- Incandescent Bulbs: Old-fashioned bulbs that get very hot, use a lot of energy, and have a warm, yellowish tone. Generally not recommended for video lighting due to heat and color.
Stick with LED bulbs whenever possible for efficiency, safety, and color accuracy.
Setting Up Your Basic Budget Lighting
Here’s how to approach setting up your affordable lights:
- Start with Your Key Light: Place your brightest light (ring light, LED panel, or even yourself facing a window) slightly to one side of your camera, angled towards you. Experiment with the height and angle to find what looks best – aim for flattering shadows, not harsh ones directly under your nose or eyes.
- Add Your Fill Light: Place your second light (or bounce card) on the opposite side of your camera. Make it less intense than your key light. This could mean using a less powerful light, moving it further away, or dimming it if possible. The goal is to gently lift the shadows created by the key light without eliminating them entirely (some shadow adds dimension).
- Introduce Your Backlight (Optional but Recommended): If you have a third light (like a desk lamp or small LED panel), position it behind you, angled towards your head and shoulders. This creates separation from the background. Be careful not to aim it directly into the camera lens, which can cause flare.
- Diffuse Your Lights: Hard light sources (like bare bulbs or LED panels without diffusion) create harsh shadows. Soften your lights using modifiers like softboxes (often included in kits), diffusion panels, or even DIY solutions like parchment paper (safely!). Soft light is generally more flattering for video.
- Match Color Temperatures: Try to use lights with the same color temperature (measured in Kelvin, K). Mixing warm (low K, like incandescent) and cool (high K, like daylight LED) lights can make your video look unnatural. Aim for lights around 5500K-6500K for a natural daylight look, or match the ambient light in your room.
Maximizing Your Budget Setup
Simply having affordable lights isn't enough; knowing how to use them makes the real difference:
- Placement is Key: Experiment relentlessly with the positioning of your lights. Small adjustments in angle, height, and distance can dramatically change how you look on camera.
- Use Your Environment: Pay attention to the light sources already in your recording space. Can you use a window as a key or fill light? Is there a wall you can bounce light off?
- Bounce and Diffuse: These are your best friends for soft, flattering light. Use white surfaces to bounce light and diffusion materials to soften it.
- Consider Your Background: Lighting your background separately (with a backlight or even a decorative lamp) can add depth and visual interest to your video.
- Practice and Record: The best way to learn is by doing. Set up your lights, record a short test clip, and review it critically. See what works and what doesn't, then adjust.
Integrating Lighting with Overall Production Quality
Improving your lighting is a massive step in enhancing your video production quality, but remember it's part of a larger picture. Good audio is just as, if not more, important than video quality for viewer retention. Pay attention to your sound, framing, camera settings, and editing as well. Balancing production quality with budgetary constraints means making smart choices across the board – maybe investing slightly more in a good microphone while saving on lighting with affordable options.
Finding What Works for You and Planning Your Content
Understanding what kind of lighting and overall production style resonates with your audience and works best for your specific video format is crucial. Instead of guessing, you can leverage tools designed for YouTube creators to analyze what's performing well.
For instance, platforms like Subscribr offer Channel Intelligence and Video Performance Intelligence tools that can help you analyze your own past videos and videos from successful channels in your niche. While these tools focus on metrics like watch time, engagement rate, and outlier scores, understanding why certain videos perform well often involves looking at the production quality – including how the creator used lighting.
By analyzing top-performing videos using Subscribr's Video Breakdown Tool, you can observe their lighting setups (even if you can't see the exact gear, you can see the effect), framing, and overall visual style. This helps you identify patterns and strategies that contribute to success. You can then experiment with replicating those visual elements using your own affordable lighting kit. Subscribr's Research Assistant could also potentially help you research common lighting setups used by creators in your specific niche by analyzing video transcripts or descriptions, giving you concrete examples to draw inspiration from.
This data-driven approach, supported by Subscribr's analytics and research capabilities, allows you to make informed decisions about your production, ensuring your efforts in improving lighting (and other technical skills) directly contribute to your channel's growth.
Monetizing Your Improved Video Quality
Investing in affordable lighting isn't just about looking good; it's an investment in your channel's growth potential. Improved video quality leads to a more professional appearance, which can increase viewer trust, watch time, and engagement. Higher engagement signals YouTube that your video is valuable, potentially leading to more views and subscribers.
As your channel grows, so do your monetization opportunities. And here's where the "affordable lighting kit" angle comes full circle: you can use affiliate links to specific lighting kits and individual lighting components that you recommend and use yourself. In your video descriptions, you can link to the exact gear, allowing viewers to purchase it while earning you a small commission. This turns your investment in affordable gear into a potential revenue stream, helping you further balance production quality with budgetary constraints.
Conclusion
Achieving professional-looking lighting on YouTube doesn't require a massive budget. By understanding basic principles, choosing the right affordable gear like ring lights or budget LED panels, strategically using natural light and even household items, and focusing on smart placement and diffusion, you can dramatically improve your video quality.
Remember that lighting is a crucial part of your overall production value, working alongside Good audio and engaging content. Tools like Subscribr can provide the analytics and research insights to help you see how your production quality impacts performance and to learn from successful creators.
Start with what you can afford, experiment with your setup, and continuously refine your technique. Investing in an affordable YouTube lighting kit is one of the smartest steps you can take to make your videos look amazing and accelerate your channel's growth journey.


