

Ready to get your next 10,000 subscribers?
Join thousands of creators who use Subscribr to create faster, better YouTube videos.

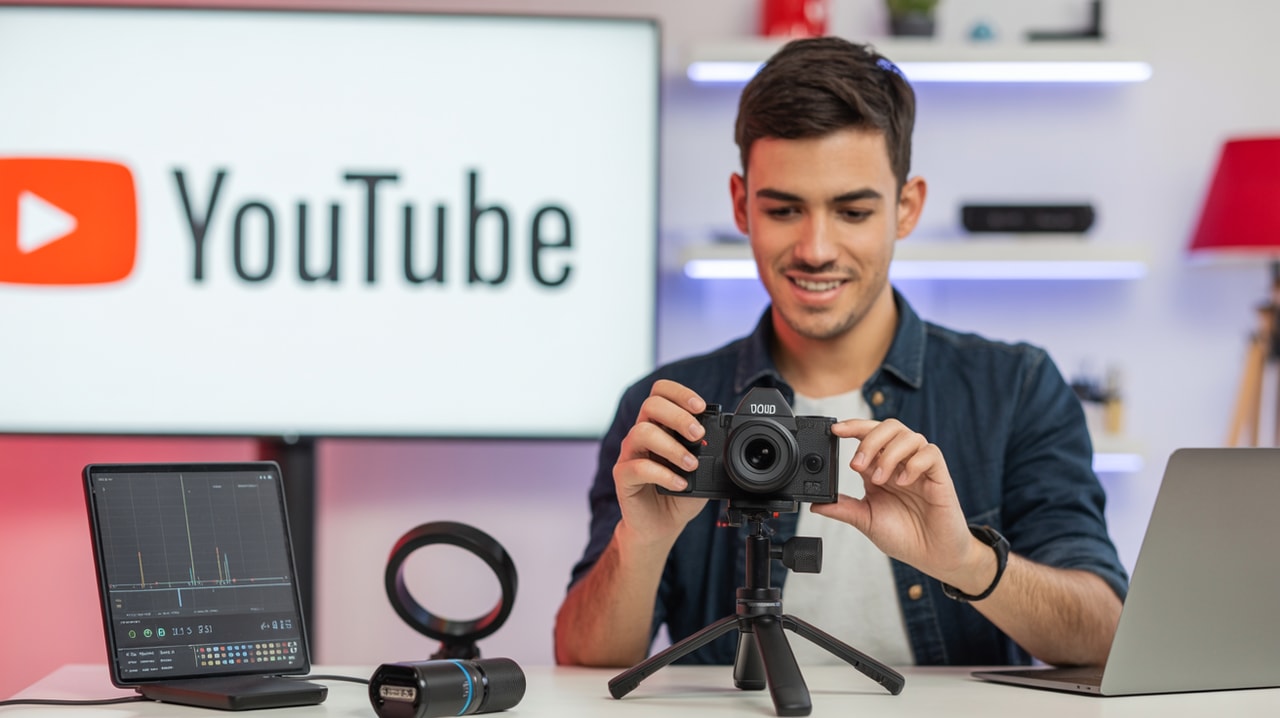
YouTube Video Production for Beginners: Your First 5 Steps to Better Videos
Starting a YouTube channel is exciting, but the idea of video production can feel overwhelming. You see creators with fancy cameras, perfect lighting, and seamless edits, and it's easy to feel like you need expensive gear and years of experience to even begin.
Maybe you're wrestling with a steep learning curve for technical skills, or perhaps you're just drowning in the sheer number of tools and techniques out there. The good news? You don't need to be a professional filmmaker to make great YouTube videos. You can start right now, with what you have, and improve step by step.
This guide is designed for absolute beginners. We'll break down video production into five simple, actionable steps, helping you overcome those initial hurdles and start creating better-quality videos today. Forget the overwhelm and the "fear of the gear." Let's focus on getting started and building your skills incrementally.
By the end of this article, you'll have a clear roadmap for producing your first videos and a solid foundation for mastering essential video production and editing fundamentals for YouTube success.
What Do I Need to Start Making YouTube Videos?
This is one of the biggest questions (and often, one of the biggest roadblocks) for new creators. The truth is, you need a lot less than you think.
Many aspiring YouTubers fall into the trap of waiting until they have the "perfect" camera, microphone, or Editing software. But as many successful creators will tell you, your first videos will likely be your worst videos anyway – and that's perfectly okay! The most important thing is to start.
You probably already own the most crucial piece of equipment: a smartphone. Modern smartphones have incredible cameras capable of shooting high-definition video. Start with your phone. Don't wait for a dedicated camera.
Beyond a recording device, here's what's truly essential for beginners:
- A recording device: Your smartphone (iPhone, Android, etc.) is ideal. An older phone, tablet, or even a basic point-and-shoot camera you already own can also work.
- Basic audio: While your phone's built-in microphone will capture sound, it often picks up a lot of background noise. The single biggest upgrade you can make to improve your video quality when starting out is improving your audio. You don't need an expensive shotgun mic. A simple, inexpensive lavalier microphone that clips onto your shirt can make a dramatic difference in clarity. Alternatively, editing tools with AI audio enhancement can help clean up sound later.
- Editing software: You need a way to cut your footage together. For beginners, free options are plentiful. iMovie (for Apple devices) and CapCut (available on mobile and desktop) are popular, user-friendly choices. Desktop options like DaVinci Resolve (free version) offer more power but have a steeper learning curve. Choose something simple to start.
- A place to record: Find a quiet space with decent lighting. It doesn't need to be a dedicated studio. A corner of your living room, a desk near a window, or even outside can work.
That's it. Seriously. Don't let the "fear of the gear" prevent you from hitting record. Start with this basic setup and upgrade incrementally as your channel grows and you better understand your specific needs.
How Can I Make My First YouTube Video Look Good?
Making your first video "look good" isn't about cinematic camera work or complex visual effects. It's about focusing on the fundamentals that make a video watchable and engaging. For beginners, this means paying attention to lighting, framing, and stable footage.
Simple Lighting Techniques
Good lighting is crucial for making your video look clear and professional, and you don't need expensive studio lights.
- Use natural light: The easiest and often best light source is the sun. Position yourself facing a window. This provides soft, even light on your face. Avoid having a window behind you, as this will silhouette you.
- Use household lamps: If natural light isn't available or sufficient, you can use lamps you already own. Place a lamp in front of you, slightly to the side, to illuminate your face. You can soften the light by bouncing it off a wall or using a sheer curtain in front of it (be careful with heat!). Avoid placing a light directly above you, which can create harsh shadows.
- Avoid mixed lighting: Try not to mix different types of light sources (like a warm incandescent lamp and cool fluorescent overhead lights) in the same shot, as this can create distracting color casts.
Framing Your Shot
Framing is simply how you position yourself and elements within the video frame.
- Rule of Thirds: Imagine your screen is divided into a 3x3 grid (like a tic-tac-toe board). Position yourself or the main subject along these lines or at the intersections. This is often more visually appealing than placing everything dead center.
- Headroom: Don't cut off the top of your head, but also don't leave too much space above you (this is called excessive headroom). Aim for a small amount of space above your head.
- Eye Level: Position your camera so you are looking slightly up or directly into the lens, as if making eye contact with the viewer. Avoid filming from a low angle looking up at you, or a high angle looking down.
- Clean Background: Pay attention to what's behind you. A cluttered or distracting background can take attention away from you. A simple, tidy background works best.
Stable Footage
Shaky video is distracting and looks unprofessional.
- Use a tripod: Even a small, inexpensive phone tripod makes a huge difference. This keeps your camera steady.
- Improvise: If you don't have a tripod, prop your phone up on a stack of books, a shelf, or anything stable. Lean it against something if necessary.
- Hold Steady: If you must hold the camera, use both hands and keep your elbows tucked in. Try to brace yourself against a wall or sit down to minimize movement.
Focusing on these simple aspects of lighting, framing, and stability will dramatically improve the visual quality of your first videos without requiring any expensive gear.
What Are the Basics of Video Production?
Video production might sound technical, but at its core, it's a process of planning, shooting, and editing. Understanding these basic steps will help you create a more efficient workflow and reduce that feeling of overwhelm.
Here are the fundamental stages of video production for beginners:
Step 1: Planning Your Video (Pre-Production)
Before you even pick up your camera, planning is essential. This doesn't need to be complicated for a beginner, but having a basic plan saves time and frustration later.
- Define your topic and goal: What is the video about? What do you want viewers to learn or do after watching?
- Outline your content: Jot down the main points you want to cover. You don't need a detailed script initially, but an outline ensures you stay on track.
- Consider your audience: Who are you making this video for? Tailor your language and examples to them (e.g., aspiring and new YouTubers for this article's topic).
- Gather resources: Do you need any props, visuals, or specific information ready before you shoot?
Planning helps you clarify your ideas and prepares you for shooting. Tools like Subscribr can assist even in this early stage, helping you define your content angle and goals with their Frame Development feature.
Step 2: Recording Your Footage (Production)
This is where you capture your video and audio based on your plan.
- Set up your gear: Place your camera (phone on a tripod!), set up your lighting, and connect your microphone if you're using one.
- Record your takes: Film the different sections of your outline. Don't aim for perfection in a single take. It's okay to pause, restart sections, or record multiple versions. You'll fix it in editing.
- Get extra shots (B-roll): If possible and relevant to your topic, record some extra footage that isn't just you talking. This could be showing a product, demonstrating a step, or filming your environment. This "B-roll" can make your video more visually interesting and help cover up cuts in editing.
Remember the tips on lighting, framing, and stability from the previous section while you're shooting!
Step 3: Editing Your Video (Post-Production)
This is where the magic happens – you assemble your raw footage into a finished video. This is often the most intimidating step for beginners due to the perceived complexity of Editing software.
- Import your footage: Get your video and audio files into your chosen Editing software.
- Assemble a rough cut: Put your main video clips in order according to your outline.
- Trim and cut: Remove mistakes, pauses, or unnecessary sections. This is where you make the video flow well.
- Add B-roll: Place your extra shots over your main video track to add visual interest and smooth out jump cuts.
- Improve audio: Clean up background noise, adjust volume levels, and ensure your voice is clear. Many beginner-friendly editors have simple audio adjustments. Some advanced tools, like Subscribr's underlying technology, can even offer AI audio enhancement capabilities.
- Add basic elements: Include simple text overlays (like names or key points), transitions between clips (use them sparingly!), and background music (make sure it's not too loud and that you have the right to use it).
- Export your video: Save your finished video in a format suitable for YouTube (usually MP4).
Don't try to learn every feature of your Editing software at once. Focus on the basics: cutting, trimming, and adding essential elements. As you get more comfortable, you can explore more advanced techniques.
Subscribr's platform, while focused on script building, understands the entire creator workflow. Features like Script Analytics that estimate speaking time can help you plan your video's length, which is useful during the editing process.
Step 4: Optimizing for YouTube
Once your video is edited, you need to prepare it for the YouTube platform. This isn't about keyword stuffing, but about helping YouTube and viewers understand what your video is about and why they should watch.
- Craft a compelling title: Your title should be accurate, interesting, and include your main topic. Make viewers curious!
- Write a detailed description: Explain what your video is about, include relevant information, and add links (to your social media, website, or affiliate products).
- Create an engaging thumbnail: Your thumbnail is the first thing people see. It should be clear, high-resolution, and visually appealing. Use text sparingly and make sure it's easy to read even when small.
- Add relevant tags: While less critical than they used to be, relevant tags can still help YouTube categorize your video. Use a mix of broad and specific terms related to your topic.
- Include cards and end screens: Use these features within YouTube Studio to link to other videos on your channel, playlists, or encourage subscriptions.
Focus on clarity and intrigue in your title and thumbnail – these are the biggest drivers of clicks. Your description and tags help YouTube understand your content for ranking.
Step 5: Uploading and Promoting
The final step is getting your video onto YouTube and letting people know it exists!
- Upload your video: Use YouTube Studio to upload your finished MP4 file.
- Fill in details: Add your title, description, thumbnail, tags, and select your audience settings (e.g., made for kids or not).
- Add to playlists: Organize your videos into relevant playlists. This helps viewers discover more of your content.
- Promote your video: Share your video link on your social media, with friends and family, or wherever your potential audience hangs out online.
Consistency is key on YouTube. Don't expect your first video to go viral. Focus on making the next video slightly better than the last.
Workflow Optimization & Efficiency
Overcoming the feeling of being overwhelmed by tools and techniques is often about creating a repeatable, simple workflow.
- Start simple: As emphasized throughout this guide, use the gear and software you can easily manage. Don't add complexity until you're comfortable.
- Batch tasks: Try to group similar tasks together. Film all your clips at once, then do all your editing in one session.
- Create templates: Once you have a title, description, or editing style you like, save it as a template to speed up future videos.
- Allocate dedicated time: Schedule specific blocks of time for planning, shooting, and editing. Treating it like an appointment helps ensure it gets done.
- Use tools that streamline the process: While you should start simple, as you grow, look for tools that can make repetitive tasks easier. Platforms like Subscribr are designed to streamline the entire content creation process, from research and scriptwriting to planning and optimization, helping you manage your workflow efficiently.
By focusing on a simple, repeatable process, you'll make video production less daunting and more enjoyable.
Tools & Resources for Beginners
You don't need to buy expensive gear or software when you're starting out. Here are some beginner-friendly options:
- Recording: Your smartphone (iPhone, Android), a basic webcam, or a simple point-and-shoot camera.
- Audio: Rode SmartLav+ (requires adapter for some phones), Boya BY-M1, or simply using your phone's mic initially and focusing on being in a quiet space.
- Lighting: Natural window light, desk lamps, or inexpensive LED panel lights designed for phones.
- Tripods: Small flexible tripods (like a Joby Gorillapod for phones) or basic lightweight camera tripods.
- Editing software: iMovie (iOS/macOS), CapCut (mobile/desktop), DaVinci Resolve (free desktop version - steeper learning curve).
- Content Planning & Strategy: Subscribr offers a comprehensive platform for creators, providing tools for research, scriptwriting, channel analysis, and workflow management. As you move beyond basic production, Subscribr's AI-powered features can help you with everything from generating script outlines to analyzing successful content in your niche.
Investing in a decent microphone is often the most impactful gear upgrade for a beginner after using their phone. For everything else, start with the basics and upgrade only when necessary for the quality of your content.
Monetization Angle: When you’re ready to invest, prioritize gear that directly improves the viewer experience, like a better microphone or simple lighting. For software, explore free options first before committing to paid subscriptions. Tools like Subscribr offer tiered plans, allowing you to start with basic features and scale up as your channel grows and your needs become more complex.
Conclusion
Starting YouTube video production can feel like a massive undertaking, but by breaking it down into these five fundamental steps – Planning, Recording, Editing, Optimizing, and Uploading – you can approach it with confidence.
Overcome the initial overwhelm by starting simple with the gear you already own, like your smartphone. Focus on mastering the basics of lighting, framing, and audio quality, as these make the biggest visual and auditory difference for beginners. Embrace a simple editing workflow using free, user-friendly software.
Remember, your first videos are about learning and improving. Don't wait for perfection. Just press record. As you gain experience, you can gradually upgrade your gear, refine your skills, and optimize your workflow. Tools like Subscribr can become valuable partners as you grow, helping you streamline your process and make data-driven decisions about your content strategy.
Take that first step today. Plan your video, hit record, and start your journey as a YouTube creator. The most important thing is to begin.


