

Ready to get your next 10,000 subscribers?
Join thousands of creators who use Subscribr to create faster, better YouTube videos.

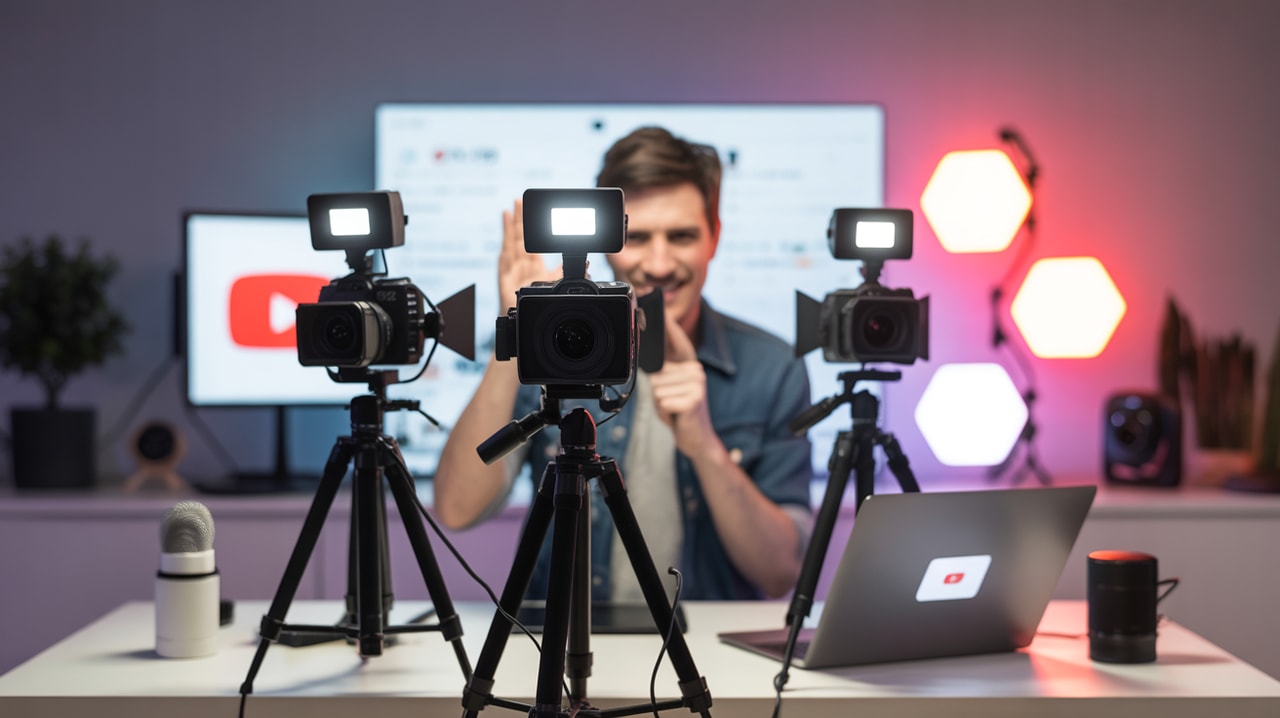
Multi-Camera YouTube Setup: When and How to Implement It
Ready to take your YouTube production quality to the next level and keep your audience hooked? If you're an established creator, you've likely felt the limitations of a single camera. While a solid one-camera setup can get you far, incorporating multiple camera angles can dramatically enhance viewer engagement, make your content more dynamic, and even streamline your workflow in the long run.
Many established creators hit a ceiling with single-camera production. Maybe you're doing interviews and constantly cutting back and forth on a single shot, or perhaps your tutorials lack visual variety. The thought of adding more cameras might feel daunting, conjuring images of complex wiring, syncing nightmares, and a hefty price tag. You might worry about the steep learning curve for new equipment or the time sucked into research and setup instead of creating.
These are valid concerns, but implementing a multi-camera setup doesn't have to be overwhelming. With the right approach and a focus on building a versatile studio that grows with you, you can overcome these hurdles. This guide is for established creators ready to explore specialized filming setups, boost production quality, and improve workflow efficiency through smart equipment choices.
Let's break down when a multi-camera setup makes sense for your content and how to implement it effectively.
Why Go Multi-Camera? The Benefits for Established Creators
Upgrading to multiple camera angles isn't just about looking more professional; it's a strategic move that directly impacts viewer retention and engagement.
- Dynamic Visuals: Switching between angles keeps the viewer's eyes engaged. Instead of staring at a static shot, they get different perspectives – a wide shot of your setup, a medium shot of you speaking, a close-up of a product or demonstration, or a reaction shot during an interview. This visual variety fights viewer fatigue.
- Showcase Different Elements: Multi-cam allows you to simultaneously capture your face, a screen recording, a product demonstration, or an interview guest without awkward cuts or transitions. This is crucial for tutorials, reviews, and collaborative content.
- Enhanced Storytelling: Different angles can emphasize key moments. A close-up builds intimacy or highlights emotion, while a wide shot provides context. This control over visual storytelling makes your content more compelling.
- Covering Angles for Interviews/Podcasts: As highlighted by YouTube strategy experts, using at least two cameras for in-person interviews – one focused on each speaker – creates a much more engaging and intimate viewing experience than a single wide shot. Adding a third wide camera provides a useful establishing shot.
- Flexibility and Efficiency: While the initial setup takes time, a well-planned multi-camera rig can actually speed up filming and editing later. With multiple angles captured simultaneously, you spend less time reframing shots or setting up cutaways during filming.
So, when should you use multiple cameras for YouTube? If your content involves:
- Interviews or podcasts with multiple participants
- Product reviews or demonstrations requiring close-ups and wider context
- Tutorials showing both your face and screen or hands-on work
- Live streaming events or Q&As with dynamic elements
- Any scenario where showing different perspectives simultaneously or rapidly switching views would enhance clarity and engagement.
If you're an established creator looking to elevate your production value beyond the standard talking-head format or single-perspective content, a multi-camera setup is a worthwhile investment.
Addressing the Multi-Camera Challenges
Let's be honest: stepping into multi-camera production introduces complexity. The pain points around technical difficulty, budget, and time are real.
- Technical Complexity: Managing multiple cameras, potentially different frame rates or resolutions, syncing audio and video, and choosing the right workflow (recording separately vs. live switching) adds layers of technical challenge. This is a common hurdle, especially with new equipment.
- Budget Constraints: Acquiring additional cameras, lenses, tripods, potentially a video switcher, extra cables, and storage can add up. The perceived high cost of entry or upgrading existing gear can be a significant barrier.
- Time Investment: Researching gear, setting up the physical space, configuring equipment, and learning new software or hardware takes time away from actual content creation.
However, these challenges can be managed with a strategic approach tailored to established creators. You're not starting from scratch; you have an existing audience and likely some budget to reinvest. The key is to plan thoughtfully and build your setup incrementally.
Essential Equipment for Your Multi-Camera YouTube Setup
Moving to multi-cam requires more gear than a simple one-camera setup, but you can build this out over time. Think of it as building a versatile YouTube studio piece by piece.
- Cameras: You'll need at least two. These don't necessarily have to be identical, especially when starting.
- You could pair your existing main camera with a second, slightly less expensive camera for a different angle.
- Mirrorless cameras (like options from Sony, Canon, or Fuji) are popular for their quality and features. For interviews, having two cameras capable of capturing high-quality video is key.
- Even high-end webcams can serve as a second angle (e.g., for a screen share view) in certain desk-based setups.
- Action cameras (like GoPro) or even a high-quality smartphone on a tripod can serve as a useful third or specialty angle if it fits your content needs (e.g., an overhead shot).
- Lenses: If using interchangeable lens cameras, consider lenses that provide different perspectives – a wider lens for establishing shots and tighter lenses for close-ups or individual speaker shots in interviews. Using a lens that can achieve good background blur (bokeh) can add a professional, cinematic touch, especially for interview setups.
- Tripods, Mounts, and Stands: You'll need stable support for each camera. Tripods are standard, but desk mounts, C-stands with appropriate heads and clamps, or specialized rigging might be needed depending on your space and desired angles (like the side profile and head-on desk angles mentioned by strategy experts).
- Microphones: While you have multiple cameras, audio is still paramount. You'll likely still use your primary microphone setup (e.g., a shotgun mic, lav mic, or studio condenser). However, for multi-person setups like podcasts, you'll need a microphone for each speaker, mixed separately or into a multi-channel recorder/mixer.
- Lighting: Good lighting is essential for each angle. Ensure consistent lighting across all cameras to avoid jarring shifts in exposure or color temperature when switching views. This might mean adding extra lights or repositioning existing ones.
- Recording/Switching Solution: This is the core of the multi-camera workflow. You have two main options:
- Record Separately (Sync in Post): Each camera records its own footage (and audio, if applicable). You then import all footage into your editing software and manually sync it using audio waveforms, clapperboards, or timecode (if your cameras support it). This is often the most budget-friendly starting point but requires more work in editing.
- Live Switching (Hardware Switcher): Devices like the Blackmagic Design ATEM Mini Pro allow you to connect multiple cameras via HDMI and switch between them in real-time. The switcher outputs a single program feed that can be recorded or streamed. This significantly reduces editing time but requires an upfront investment in the switcher and learning its operation. This is ideal for live streams, interviews, or presentations where you want a finished product immediately after filming.
Building a versatile studio means choosing gear that can serve multiple purposes and integrate smoothly. Research compatibility between cameras and switchers if you plan to go the live switching route.
Setting Up Your Multi-Camera Workflow
Once you have the gear, the next step is setting up your workflow. Is a multi-camera setup hard to manage? Initially, yes, there's a learning curve. But by establishing a clear process, you can make it efficient.
- Plan Your Shots: Before hitting record, decide what angles you need and why. Sketch out camera positions and anticipate when you'll switch angles (or when you'll want the option to switch in post). Think about "looking room" for interview setups.
- Position Your Cameras: Place your cameras according to your plan. Use tripods, stands, or mounts to get the desired height and angle. Ensure cameras are stable and won't be bumped during filming.
- Connect Your Gear: Connect cameras to power (using dummy batteries or power supplies for long shoots), route video cables (HDMI is common), set up microphones and audio interfaces, and connect everything to your recording device or switcher.
- Syncing (if recording separately): If you're not using a switcher, ensure you have a method for syncing. A simple clapperboard at the beginning of a take works well. Alternatively, recording good audio on each camera (even if it's just scratch audio) makes syncing by waveform in editing software much easier.
- Recording or Switching:
- Recording Separately: Start recording on all cameras simultaneously.
- Live Switching: Operate your video switcher, selecting which camera's feed is live at any given moment. Record the program output from the switcher.
- Post-Production:
- Separately Recorded: Import all footage into your video editor. Create a multi-camera sequence and sync the clips. Then, edit by simply selecting which camera angle you want to show at each point on the timeline.
- Live Switched: Import the single program feed from the switcher. Edit as you would a single-camera video, making minor trims or adding graphics as needed. If you also recorded isolated camera feeds on the switcher (a capability of some models), you have the flexibility to correct any switching mistakes in post.
Workflow efficiency comes from practice and refining your process. A tool like Subscribr's Script Building Pipeline can help streamline your pre-production, ensuring your multi-camera setup is used effectively to execute a well-planned script.
Multi-Camera Setups for Different Content Formats
How does multi-cam apply to specific types of content popular with established creators?
- Interviews/Podcasts: This is perhaps the most common use case. A standard setup is two cameras, one on each person, plus potentially a wider third camera capturing both. This allows for dynamic cutting between speakers and reaction shots. Using mirrorless cameras with prime lenses can create a visually appealing look with nice background blur.
- Tutorials/Demonstrations: Use one camera on you (talking head or medium shot), one camera for an overhead or close-up view of your hands or the product, and potentially a third for a screen recording or alternative angle. This keeps the viewer focused on the most important visual element at any given time.
- Product Reviews: Similar to tutorials, use multiple angles to show different aspects of the product – a shot of you talking, close-ups of features, and perhaps a shot showing the product in use.
- Talking Head with Visual Aids: Even for a standard talking-head video, a second camera capturing a different angle (e.g., a side profile) allows you to cut away from the main shot to maintain visual interest or to smoothly transition to showing graphics or B-roll full screen before cutting back to a camera angle of you.
By planning your angles around the specific needs of your content format, you maximize the impact of your multi-camera setup.
Monetization and Production Quality
Improving your production quality with a multi-camera setup can indirectly support your monetization efforts. Higher quality videos are often perceived as more valuable, potentially leading to:
- Increased viewer retention and watch time, which boosts ad revenue.
- A more professional appearance, making you more attractive for brand deals and sponsorships.
- The ability to create premium content (courses, workshops) where high production value is expected.
Furthermore, discussing and recommending the gear you use for your multi-camera setup (cameras, lenses, switchers, etc.) provides a natural opportunity for affiliate marketing, creating an additional revenue stream.
Streamlining Your Strategy with Subscribr
While a multi-camera setup handles the filming aspect, a successful YouTube channel requires a robust overall strategy. This is where tools like Subscribr come in, complementing your production efforts by streamlining the crucial pre-production and analysis phases.
Before you even set up your cameras, Subscribr's Research Assistant can help you gather information on your topic, analyze competitor videos (even extracting transcripts to see how others structure multi-camera content), and organize your findings. Subscribr's Channel and Video Intel features allow you to analyze successful channels and videos in your niche, identifying performance patterns and understanding how others are using production techniques like multi-cam effectively. This data-driven insight ensures you're investing time and money into a setup that supports content your audience actually wants to watch.
Once your research is complete, Subscribr's AI Script Writer helps you translate your ideas and research into a compelling script, ensuring your multiple camera angles serve the narrative. You can even add production notes directly into your script within Subscribr, planning out your camera switches and visual cues before you get on set. This level of planning, supported by Subscribr's workflow tools, significantly reduces the time pain point associated with complex setups.
By using Subscribr to refine your content strategy, understand your audience, and build structured scripts, you ensure that your investment in a multi-camera setup is leveraged for maximum impact on your channel's growth and engagement.
Conclusion
Implementing a multi-camera YouTube setup is a significant step for established creators, offering substantial benefits in production quality, viewer engagement, and workflow efficiency. While challenges around technical complexity, cost, and time are present, they are surmountable with careful planning and a phased approach.
By understanding when multi-cam is appropriate for your content, investing strategically in the right equipment (cameras, lenses, support, audio, and crucially, a recording/switching solution), and establishing a smooth workflow for filming and editing, you can unlock a new level of dynamism in your videos.
Remember that the technical setup is just one part of the equation. A strong content strategy, informed by research and tailored to your audience, is what truly drives success. Tools like Subscribr can provide the strategic foundation and workflow efficiency needed to make your multi-camera production efforts translate into meaningful channel growth.
Start by identifying one content format that would benefit most from multiple angles, acquire the necessary gear for that specific need, and refine your workflow. As you get comfortable, you can expand your setup and integrate multi-cam into more of your content, building a versatile studio capable of producing high-quality, engaging videos consistently.


