

Ready to get your next 10,000 subscribers?
Join thousands of creators who use Subscribr to create faster, better YouTube videos.

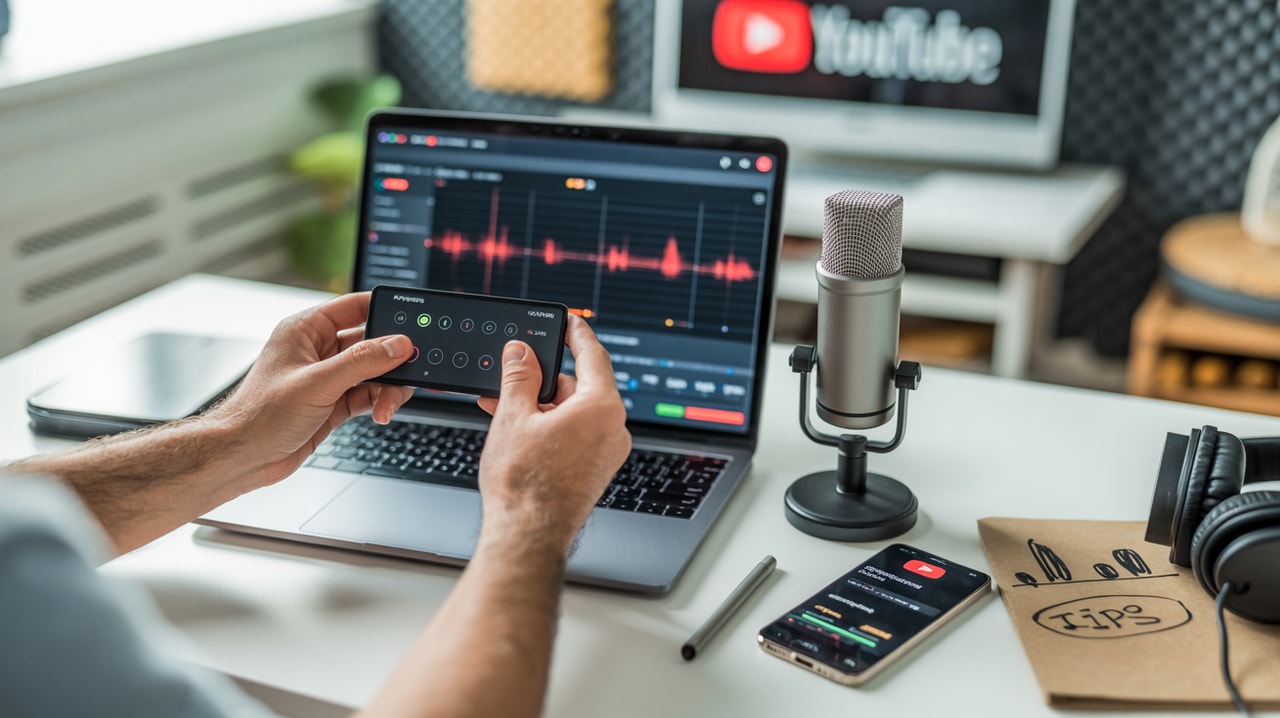
How to Improve YouTube Audio Quality Without Buying a New Mic
Bad audio is one of the fastest ways to lose viewers on YouTube. Even if you have stunning visuals, poor sound can make your content unwatchable. The good news? You don't need to break the bank on expensive microphones or fancy studio equipment to make a significant improvement.
Many creators face the challenge of inconsistent quality and the perceived high cost of entry or upgrades. The technical side of audio can feel overwhelming, adding to the fear of diving in. But improving your audio quality is one of the most impactful steps you can take to professionalize your channel, hold viewer attention, and grow your audience, all while sticking to a budget.
This guide will take you through practical, actionable strategies to enhance your YouTube audio quality using your existing equipment, focusing on technique, your recording environment, and free post-processing tools. We'll cover everything from mic placement to reducing echo and using free software, empowering you to master sound for professional YouTube content from room tone to final mix.
Why Your Audio Quality is More Important Than You Think
It might sound counterintuitive, but on YouTube, audio often trumps video quality. Viewers are much more likely to tolerate slightly imperfect video if the audio is crystal clear and easy to understand. Distorted, noisy, or echoey audio is jarring and quickly leads viewers to click away, regardless of how good your lighting or camera looks.
Investing time in improving your audio is investing in viewer retention. When your message is easy to hear and understand, your audience stays engaged longer, increasing watch time – a critical factor in the YouTube algorithm. Good audio builds trust and makes your content feel more professional, even if it's shot on a smartphone in your living room.
Maximizing Your Existing Microphone: Placement and Technique
The microphone you already own, whether it's built into your camera, phone, or a simple headset, has potential. The key is understanding how to use it effectively through proper placement and recording technique.
1. Get Closer to the Mic: This is the single most important tip. The closer your mouth is to the microphone, the louder and clearer your voice will be relative to background noise and room echo. Even a built-in mic on a phone or laptop will sound significantly better if you are just a few inches away rather than a few feet.
2. Control Your Environment: Your recording location matters. * Choose a Quiet Space: Avoid areas with background noise like humming refrigerators, traffic, or other people. Record when your environment is as silent as possible. * Avoid Echoey Rooms: Large, empty rooms with hard surfaces (bare walls, tile floors) create echoes. These reflections make your audio sound distant and unprofessional. We'll discuss how to mitigate this in the next section.
3. Mind Your Mic Type: * built-in mics: These are omnidirectional, meaning they pick up sound equally from all directions. Getting close is essential, and controlling background noise is critical. * Lavalier (Lapel) Mics: If you have a small clip-on mic, place it about 6-8 inches below your chin, centered on your chest. Avoid clipping it too high (under your chin can cause plosives) or too low (picks up clothing rustle). Hide it under clothing if needed, ensuring the microphone head is not covered. * USB Mics: If you're using a USB mic on a desk, position it about 6-12 inches from your mouth. Speak across the top of the microphone, rather than directly into it, to help reduce plosives (those harsh P and B sounds).
4. Speak Clearly and Consistently: Enunciate clearly and try to maintain a consistent speaking volume. This makes post-processing easier and ensures your audience doesn't have to constantly adjust their volume.
Improving Your Recording Environment: Taming the Echo
Room acoustics play a massive role in audio quality, especially in budget setups. Echo and reverb can make even a decent microphone sound bad. Fortunately, you can significantly improve your room's sound without professional acoustic treatment panels.
How Echo Happens: Sound waves bounce off hard surfaces. In a bare room, these reflections create echo. The goal of acoustic treatment is to absorb or diffuse these sound waves.
DIY Room Treatment Solutions:
- Soft Furnishings: The easiest way to absorb sound is with soft materials. Record in a room with carpets, curtains, upholstered furniture, and bookshelves filled with books. These items naturally reduce reflections.
- Blanket Forts & Closets: For voiceovers or sit-down videos, recording inside a closet filled with clothes can create a surprisingly good, deadened sound. The clothes act as excellent sound absorbers. Alternatively, hang thick blankets or moving blankets behind and to the sides of where you are speaking to create a makeshift "vocal booth."
- Positioning: Position yourself closer to soft surfaces and away from bare walls or corners. Recording facing a wall covered by a tapestry or bookshelf is better than facing an empty wall.
- Temporary Solutions: If you can't permanently alter your room, bring in temporary absorbers. Stand a mattress or large couch cushions behind you. Drape blankets over furniture or even hang them from stands or makeshift frames.
While professional acoustic panels exist, many DIY approaches using readily available materials like rockwool or rigid fiberglass wrapped in fabric can be built cheaply and perform effectively, as demonstrated by creators like @DIYPerks who have shown how to make high-performance sound absorption panels for minimal cost. The key principle, as highlighted by channels like Audio University, is that acoustic treatment doesn't need to be overly complicated – even simple absorption can make a big difference.
By reducing reflections in your recording space, you provide your microphone with a cleaner sound source, making subsequent editing much easier and more effective.
Post-Processing Power: Free Software to the Rescue
Once you've recorded your audio, the magic of free software can elevate it further. You don't need expensive Digital Audio Workstations (DAWs) to clean up, enhance, and optimize your sound.
Audacity: Your Free Audio Editing Studio
Audacity is a powerful, free, open-source audio editor available for Windows, Mac, and Linux. It's a go-to tool for budget-conscious creators to improve their audio significantly. Many tutorials, like those from Kevin Stratvert or Pat Flynn, walk you through the basics.
Here's what you can do in Audacity:
- Import Your Audio: Bring your recorded audio file into Audacity.
- Noise Reduction: If you have background hum or hiss, Audacity's Noise Reduction effect is invaluable. You select a section of pure background noise, tell Audacity to "get noise profile," then select the entire track and apply the effect. This can dramatically clean up your audio.
- Normalization: This adjusts the volume of your entire audio track to a standard level without changing the relative dynamics. It ensures your audio isn't too quiet.
- Compression: Compression reduces the difference between the loudest and quietest parts of your audio, making it sound more consistent and professional. It brings up the quiet parts and brings down the loud parts.
- EQ (Equalization): EQ allows you to adjust the balance of frequencies (bass, mid, treble) in your audio. You can use it to remove muddy low-end, boost clarity in the mid-range, or add air to the high-end.
- Cutting and Editing: Of course, you can also easily cut out mistakes, pauses, or unwanted sections.
Learning the basics of these effects in Audacity will give you immense control over your final audio quality.
AI-Powered Audio Enhancement
Beyond traditional editors, free AI tools are emerging that can perform complex audio cleanup automatically. Adobe Enhance, for example, is a free web-based tool that can make voice recordings sound as if they were recorded in a professional studio, even if the original audio was poor. Videos from channels like Think Media have shown just how effective this tool can be at transforming "trash" audio into "pro" audio with minimal effort.
While not a replacement for good recording practices, these AI tools can be incredibly helpful for fixing issues you couldn't avoid during recording.
Putting It All Together: A Workflow for Better Audio
Improving your audio quality isn't just one step; it's a process integrated into your content creation workflow.
- Plan Your Recording: Before hitting record, think about your location. Can you move to a quieter room? Can you add some temporary soft materials?
- Position Your Mic: Spend a few moments ensuring your microphone is as close as possible while remaining out of frame (or discreet if it's a lavalier).
- Test Record: Always do a short test recording (30-60 seconds) and listen back with headphones before recording your main content. This helps you catch issues like background noise, echoes, or poor mic placement early.
- Record: Focus on speaking clearly and consistently.
- Edit in Post-Production: Import your audio into Audacity or use a tool like Adobe Enhance. Apply noise reduction, normalize, compress, and EQ as needed.
- Final Listen: Listen to your edited audio one last time, preferably with headphones, to catch any remaining issues.
By following a consistent workflow, you can achieve reliable, high-quality audio every time.
Tools & Resources for Creators
Improving your audio is part of the larger journey of optimizing your YouTube content. While this article focuses on audio specifically, remember that overall channel strategy, content planning, and understanding your audience are also key.
Platforms like Subscribr offer a comprehensive suite of tools designed for YouTube creators. While it's not an audio editing tool itself, Subscribr can assist in the strategic planning and research phases that complement good production practices. For instance, using Subscribr's Research Assistant can help you gather information on best practices or find tutorials on specific audio techniques. Its script-building pipeline can help you structure your content, which can indirectly impact audio by allowing for planned pauses or transitions.
Conclusion
You absolutely can improve your YouTube audio quality significantly without buying a new microphone. By focusing on smart microphone placement, optimizing your recording environment with simple DIY solutions, and leveraging the power of free audio editing software like Audacity and AI tools like Adobe Enhance, you can transform your sound.
Overcoming the challenges of inconsistent quality, budget constraints, and technical complexity is achievable with the right techniques and tools. By implementing the strategies outlined above, you'll create content that sounds more professional, keeps viewers engaged longer, and sets you on the path to growth on YouTube. Start implementing these tips today and hear the difference!


