

Ready to get your next 10,000 subscribers?
Join thousands of creators who use Subscribr to create faster, better YouTube videos.

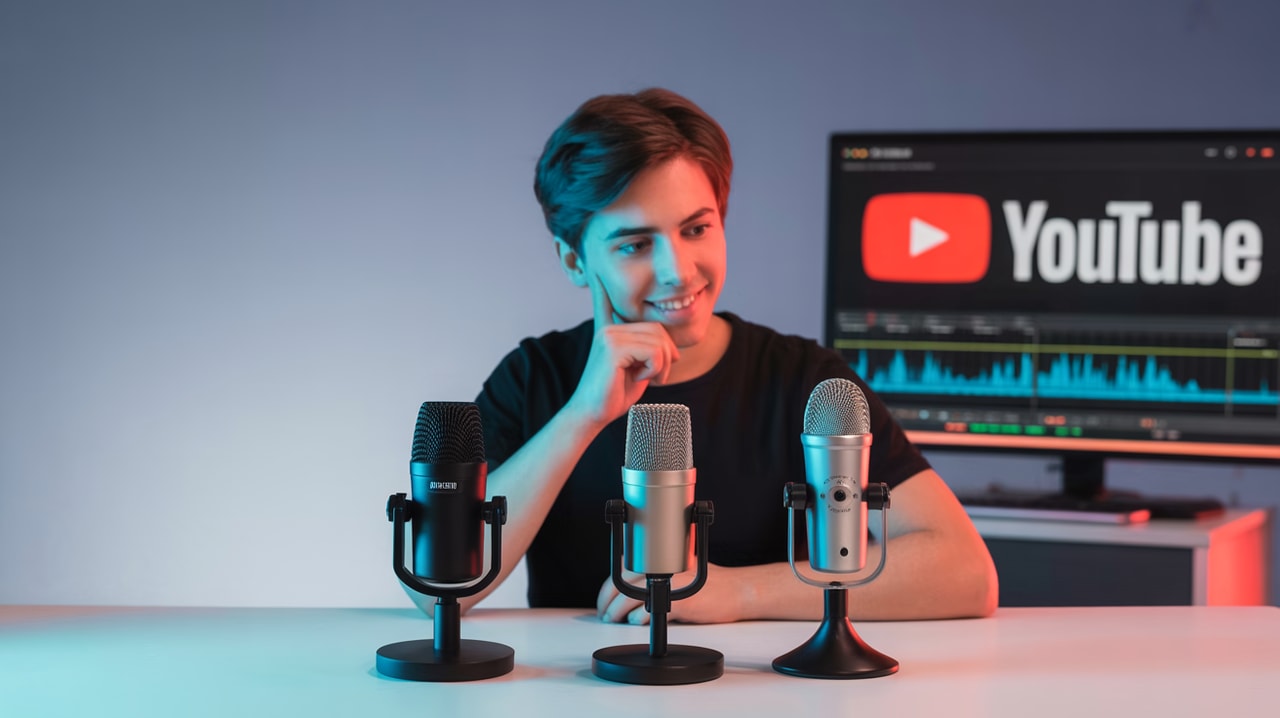
Stop Bad Audio! How to Choose the Right Mic for Your YouTube Channel
You've got great ideas, a decent camera, and you're ready to share your passion with the world on YouTube. But then you hit record, listen back, and... yikes. Your audio sounds distant, muffled, or full of distracting background noise. You're not alone. Achieving clear, professional-sounding audio is one of the biggest hurdles for new YouTubers, and the sheer number of microphone options out there can feel completely overwhelming, especially when you're working with a tight budget.
But here's the truth: Audio is arguably even more important than video quality on YouTube. Viewers might tolerate slightly imperfect visuals if the audio is crystal clear, but bad audio is a guaranteed way to make people click away faster than you can say "subscribe." Investing in the right microphone is crucial for keeping viewers engaged and making your content sound polished and professional, even if you're filming in a less-than-perfect environment.
This guide will break down the different types of microphones, explain what they're best for, and help you choose the perfect mic for your specific content style, recording environment, and budget. Let's silence that bad audio for good!
Why Your Audio Quality Matters More Than You Think
Think about your own viewing habits. How quickly do you leave a video if the sound is echoey, hard to understand, or has a constant hum? Probably pretty fast. YouTube is a visual platform, but audio is half the experience. As insights from YouTube strategists highlight, poor audio is one of the fastest ways to lose viewers. Your message, your personality, and the value you provide all come through your audio. If that's not clear, your content won't land, no matter how good it looks.
Good audio doesn't just make your videos more pleasant to watch; it makes them more professional and trustworthy. It signals to viewers that you care about the quality of your content and respect their time.
Understanding the Different Types of Microphones
Choosing a microphone can feel intimidating because there are so many options. Let's simplify things by looking at the most common types YouTubers use:
Lavalier (Lapel) Microphones
These are the small, clip-on mics you see attached to people's shirts in interviews or talking-head videos.
- How they work: They clip onto your clothing, positioning the microphone element very close to your mouth.
- Pros:
- Keep the mic close to the sound source (your voice) for clear audio.
- Often relatively discreet and can be hidden under clothing if needed.
- Generally affordable.
- Easy to set up – many plug directly into your camera or even a smartphone.
- Cons:
- Can pick up rustling noise from clothing if not positioned correctly.
- The visibility of the mic might not be desired for some video styles.
- Wired versions limit your movement.
- Best for: Talking head videos, interviews, vlogs where you want the mic close but not in your hand.
Shotgun Microphones
Shotgun mics are long, cylindrical microphones designed to pick up sound primarily from directly in front of them, rejecting sound from the sides and rear.
- How they work: They use a design called an interference tube to increase directionality.
- Pros:
- Highly directional, focusing on your voice and rejecting background noise (especially effective outdoors or in controlled environments).
- Can be mounted on top of your camera or placed on a boom pole (off-camera) for a cleaner look.
- Cons:
- Can sound echoey in untreated indoor spaces as they still pick up reflections.
- Require careful positioning to stay out of frame if used on a boom.
- Often require phantom power, meaning they need an audio interface or recorder.
- Best for: On-camera mounting for vlogging, interviews, narrative filmmaking, or boom-mounted off-camera use for talking heads in treated rooms.
USB Microphones
USB microphones have a built-in audio interface and connect directly to your computer via a USB cable.
- How they work: They convert the analog audio signal to digital within the microphone itself.
- Pros:
- Extremely easy setup (plug-and-play).
- Convenient for desk-based recording (podcasts, voiceovers, streaming, talking heads at a desk).
- Often offer multiple polar patterns (how the mic picks up sound) in one unit (e.g., omnidirectional, cardioid, bidirectional, stereo) like the Blue Yeti or HyperX QuadCast S.
- Cons:
- Generally less flexible for upgrades compared to XLR setups.
- Can sometimes pick up more room noise or desk vibrations than dynamic XLR mics.
- Cable length is limited by USB standards.
- Best for: Beginners, voiceovers, podcasts, streaming, talking head videos filmed at a desk. Examples include the Blue Yeti X, Rode NT-USB Mini, and Blue Snowball.
XLR Microphones
XLR microphones are the standard in professional audio production. They connect using a 3-pin XLR cable and require an external audio interface or mixer.
- How they work: They output a low-impedance analog signal that needs to be preamplified and converted to digital by an interface.
- Pros:
- Offer the highest potential for audio quality and durability.
- More robust and less prone to interference than USB mics.
- Highly flexible and upgradable – you can change interfaces, preamps, etc.
- Many professional studio and dynamic mics use XLR (like the Shure SM7B or Audio-Technica AT2020).
- Cons:
- Require additional equipment (audio interface/mixer), increasing cost and complexity.
- Not as portable or quick to set up as USB or some lavalier mics.
- Best for: Dedicated recording spaces, high-quality voiceovers, podcasting, studio-based talking heads, professional audio production.
Wireless Microphones
Wireless systems consist of a transmitter (often attached to a lavalier mic or built into a small pack) and a receiver (which plugs into your camera or recorder).
- How they work: They transmit audio signals via radio frequencies.
- Pros:
- Offer maximum freedom of movement.
- Great for vlogging, interviews on the go, or dynamic presentations.
- Cons:
- Can be subject to interference.
- Require batteries for both transmitter and receiver.
- Can be more expensive than wired options.
- Best for: Vlogging, run-and-gun filming, dynamic presentations, situations where cables are impractical. The Hollyland Lark M2s is a recommended wireless option known for its sound quality and AI noise cancelling.
USB vs. XLR: Which is Right for a YouTuber?
This is a common question, and the answer depends on your current stage, budget, and technical comfort level.
- Choose USB if:
- You're a beginner and want the simplest setup possible.
- You're primarily recording at a desk (voiceovers, streaming, seated talking heads).
- Your budget is limited, as USB mics are often cheaper than an XLR mic + interface combo.
- You don't want to deal with extra cables or equipment.
- You're using a laptop on the go.
- Choose XLR if:
- You want the best possible audio quality and flexibility for future upgrades.
- You have a dedicated recording space or can treat your room to minimize echoes.
- You plan to use professional dynamic microphones (like the Shure SM7B) that require more power.
- You're comfortable learning about audio interfaces and gain staging.
- You need longer cable runs than USB allows.
For aspiring and new YouTubers just starting out or working with budget limitations, a good quality USB microphone or a reliable lavalier mic is often the most practical and effective starting point. You can always upgrade to an XLR setup later as your channel grows and your needs evolve.
Do I Need an Audio Interface with an XLR Microphone?
Yes, absolutely. This directly answers one of the key questions new creators have. XLR microphones output a low-level analog signal. An audio interface serves two primary functions:
- Preamplification: It boosts the microphone's signal to a usable level without adding significant noise.
- Analog-to-Digital Conversion: It converts the analog audio signal into a digital signal that your computer can understand and record.
Audio interfaces also typically provide phantom power (a 48V electrical current) which is required for most condenser microphones to operate. They connect to your computer usually via USB or Thunderbolt.
So, if you choose an XLR microphone, you must pair it with an audio interface or a mixer that has built-in audio interface capabilities. Examples of common audio interfaces include the Sweetwater SSL2, Focusrite Scarlett series, or PreSonus AudioBox.
Choosing Based on Your Content Style, Environment, and Budget
Now, let's bring it all together and figure out the best mic for you, addressing the pain points of feeling overwhelmed and balancing budget with quality.
1. What Type of Content Do You Make?
- Talking Head Videos: Lavalier mics (wired or wireless) are excellent for keeping the mic close to your mouth without being distracting (or they can be hidden). USB mics are great if you're always at a desk. A shotgun mic on a boom pole can work if you have decent room acoustics and want the mic completely invisible.
- Vlogs (On-the-Go): A wireless lavalier system gives you freedom to move. An on-camera shotgun mic is also a popular choice, though it might pick up more ambient noise.
- Voiceovers/Podcasts/Streaming: USB or XLR microphones are ideal here as you're typically in a stationary position. This is where you can get serious about sound quality in a controlled environment.
- Interviews: Lavalier mics for each person are simple and effective. A shotgun mic on a boom can also work well, requiring careful positioning.
2. What's Your Recording Environment Like?
Your room acoustics play a huge role in how your microphone sounds.
- Untreated Room (echoes, background noise): A dynamic microphone (often XLR, though some USB mics are dynamic) is usually recommended. Dynamic mics are less sensitive and better at rejecting off-axis sound, helping to minimize echoes and background distractions like fans, traffic, or roommates. The Shure SM7B is a famous example of a dynamic mic, often used in broadcast for its ability to sound good even in less-than-perfect spaces. Dynamic USB mics like the Rode NT-USB+ can also be good options.
- Treated Room (carpets, acoustic panels, minimal reflections): A condenser microphone (available in both USB and XLR) can shine here. Condenser mics are more sensitive and capture more detail, resulting in a richer, more accurate sound in a quiet, treated environment. Examples include the Audio-Technica AT2020 (XLR) or many USB condenser mics like the Blue Yeti.
Don't have a treated room? Most new creators don't! Start with a dynamic mic or focus on minimizing reflections with blankets, pillows, or recording in a small, cluttered space like a closet (seriously, it works!).
3. What's Your Budget?
You don't need to spend a fortune to get good audio, which directly addresses the budget pain point. Here are some ideas based on different budget levels, drawing on expert recommendations:
- Zero Budget: Use the microphone on wired Apple earbuds (surprisingly decent for urgent voiceovers) or your smartphone's built-in mic if you hold it close. This is just to get started; upgrade as soon as possible!
- Low Budget (Under $100): Look at entry-level USB mics like the Rode NT-USB Mini or Blue Snowball. Simple wired lavalier mics are also very affordable.
- Mid Budget (Under $200-$300): This opens up better quality USB mics like the Blue Yeti X or HyperX QuadCast S. You might also find good quality wired or entry-level wireless lavalier systems in this range.
- High Budget ($400+): This is where you start looking at professional XLR dynamic mics like the Shure SM7B (remember, you'll need an interface!) or quality condenser mics like the Audio-Technica AT2020 with a suitable audio interface (like the Sweetwater SSL2). High-end wireless systems also fall into this category, such as the Hollyland Lark M2s mentioned earlier for its AI noise cancelling.
Remember, it's better to have a good sounding affordable mic than a fancy expensive mic that sounds bad because it's wrong for your environment or you don't have the necessary accessories.
Essential Microphone Accessories
Once you have your microphone, a couple of accessories can significantly improve your sound:
- Pop Filter/Windscreen: These reduce "plosives" – the bursts of air from P and B sounds that hit the microphone diaphragm and cause a distorted "popping" noise. Foam windscreens fit over the mic, while pop filters are usually a mesh screen on a gooseneck stand placed in front of it.
- Shock Mount: This suspends the microphone using elastic bands, isolating it from vibrations that travel through the mic stand or desk (like bumps or typing) and turn into distracting noise in your recording.
- Boom Arm or Stand: Getting the microphone close to your mouth is key for clear audio and rejecting room noise. A desk-mounted boom arm or a floor stand allows you to position the mic optimally. A boom arm is particularly useful as it keeps the mic out of the way when not in use and is easy to adjust.
Advanced Audio Techniques (Without Breaking the Bank)
Getting the right mic is the first step, but you can further enhance your audio without needing a professional studio. This ties into the content opportunity of achieving studio-quality sound on a budget and developing your technical skills.
- Room Treatment: You don't need expensive acoustic panels. Use blankets, pillows, mattresses, or even record inside a closet full of clothes. Soft surfaces absorb sound reflections, reducing echo.
- Recording Levels (Gain Staging): Learn how to set your microphone's gain (input level) correctly. Too low and your audio will be quiet and noisy; too high and it will distort (clip). Aim for your audio levels to peak around -10 to -6 dB in your recording software.
- Editing: Basic audio editing can clean up your sound. Learn to use noise reduction effects to minimize background hums or hisses and compression to make your voice more consistent in volume. Even free editing software like DaVinci Resolve or Audacity have powerful audio tools.
Understanding these techniques, alongside choosing the right gear, is part of the "Technical Skill Development" theme crucial for new creators.
Tools & Resources for YouTube Creators
Choosing gear is just one part of building a successful YouTube channel. For aspiring and new YouTubers, managing all the different aspects – from research and scriptwriting to understanding analytics and planning your content strategy – can feel overwhelming.
This is where a platform like Subscribr can be incredibly valuable. Instead of juggling multiple tools for different tasks, Subscribr provides an all-in-one workspace designed specifically for YouTube creators. While Subscribr doesn't directly choose your microphone for you, its Research Assistant and Channel Intelligence features can help you understand what successful channels in your niche are doing, which might indirectly influence your production choices over time. More importantly, Subscribr's AI Script Writer and Smart YouTube Script Writer help you create compelling content that maximizes viewer retention, ensuring that the great audio you capture is paired with a script that keeps people watching. By streamlining your content planning and creation process, Subscribr frees you up to focus on improving the technical quality of your videos, including your audio.
Monetization Angle: Affiliate Links
As you learn about different microphones and potentially purchase new gear, remember the monetization opportunity. Once you've used and can genuinely recommend a microphone or accessory, you can join affiliate programs (like Amazon Associates or specific audio retailer programs). Include affiliate links to the products you discuss and recommend in your video descriptions. When viewers purchase through your link, you earn a small commission at no extra cost to them. This is a great way for new creators to start monetizing their content by simply sharing the tools they use and trust.
Conclusion
Don't let bad audio hold you back on YouTube. By understanding the basic types of microphones, considering your content style, recording environment, and budget, and knowing which essential accessories can help, you can confidently choose the right mic to make your voice sound clear, professional, and engaging.
Start with the best microphone you can afford that fits your needs right now. Focus on getting good source audio, as even the best editing can't fix truly terrible recording quality. As your channel grows and you gain more experience (and maybe a bigger budget), you can explore more advanced setups.
Pairing your improved audio quality with strong content planning and strategy, facilitated by tools like Subscribr, will set you on the path to creating videos that not only sound great but also keep viewers watching and coming back for more. Now go make some noise – the good kind!


