

Ready to get your next 10,000 subscribers?
Join thousands of creators who use Subscribr to create faster, better YouTube videos.

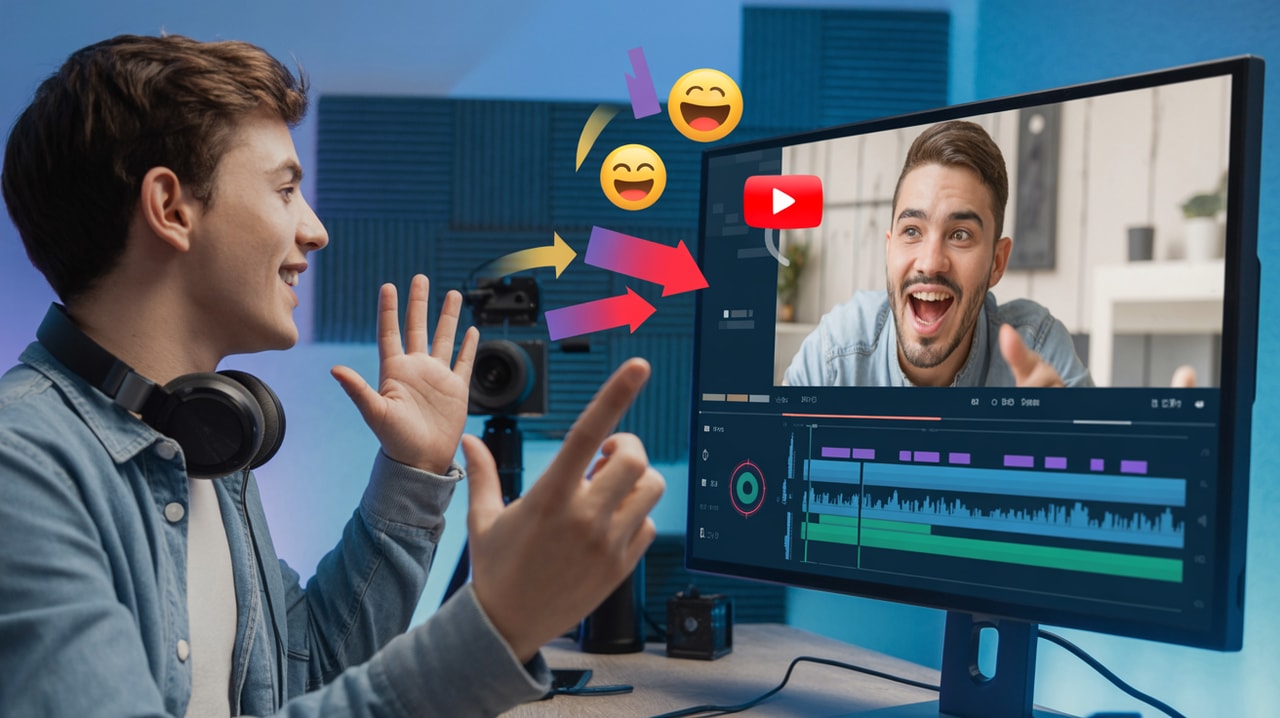
Editing Talking Head Videos: How to Keep Them Engaging
Talking head videos are a staple on YouTube, offering a direct and personal way to connect with your audience. However, let's be honest: a static shot of someone talking can quickly become... well, boring. If you've ever worried that your talking head content feels tedious or that the editing process itself is complex and lengthy, you're not alone. Many intermediate YouTubers struggle to keep viewers hooked when the primary visual is just them speaking into a camera.
The good news? You don't need a massive production budget or a team of editors. With smart editing techniques, you can transform a simple talking head video into dynamic, engaging content that holds attention and encourages viewers to watch longer. This article will dive into actionable strategies to make your talking head videos pop, keep your audience engaged, and simplify your editing workflow.
Why Your Talking Head Videos Might Be Losing Viewers
Before we jump into the fixes, let's understand the problem. The human brain craves visual stimulation and change. When a video features a single, unchanging shot for an extended period, it can lead to what's sometimes called "cognitive underload." Viewers get bored because there's nothing new to see or process. This often results in them clicking away to find something more visually stimulating.
Think of it like listening to a lecture with no slides or visual aids – even the most interesting topic can become monotonous without variations in delivery or presentation. On YouTube, where countless videos are just a click away, keeping that visual and auditory stimulus fresh is crucial for audience retention.
Essential Editing Techniques to Boost Engagement
Making a talking head video "not boring" comes down to strategic choices in the edit suite. It's about adding visual variety, controlling the pace, and reinforcing your message with more than just your spoken words.
1. Master the Jump Cut (and Know When to Use It)
One of the simplest yet most effective techniques for talking head videos is the jump cut. This involves removing pauses, "ums," "ahs," breaths, and any unnecessary gaps between your sentences. The result is a tighter, faster flow that keeps the information coming and prevents the viewer's attention from drifting.
Jump cuts increase your words per minute, which can be particularly effective for many YouTube niches, especially those targeting younger audiences accustomed to the rapid pace of platforms like TikTok. However, the key is finding a cadence that feels natural to you and suits your content style.
- How to do it: In your editing software, simply cut out the silent or filler sections between your speaking points. Place the subsequent clip immediately after the first.
- Pro-Tip: Don't be afraid to be ruthless. If a sentence or phrase isn't essential, cut it out. The goal is maximum information density without sacrificing clarity.
2. Vary Your Shots and Angles
While a single camera setup is fine, incorporating different camera angles instantly adds visual interest. If you have the ability to shoot with two cameras (one head-on, one slightly to the side), you have a powerful tool for breaking up the visual monotony.
Use the side angle strategically:
- To smooth transitions: A quick cut to a side angle can help hide a slightly awkward jump cut in the main frontal shot.
- To break up long takes: If your frontal shot has been on screen for 5-10 seconds or more, switching to the side angle provides a visual refresh.
- After a visual break: If you cut away to B-roll or graphics, return to the main frontal shot when you start talking again. This re-establishes a direct connection with the viewer.
Aim to change the frame or visual element every 3 to 7 seconds. This doesn't always mean a new camera angle; it could be a zoom in, adding text on screen, or cutting to B-roll. The point is to reset attention regularly.
3. Integrate B-Roll, Graphics, and Visual Aids
This is arguably the most crucial technique for making talking head videos engaging. Don't just tell your audience something; show them.
Whenever you mention a concept, statistic, product, place, or anything that can be visualized, cut away to relevant footage (B-roll), still images, graphics, or text overlays.
- B-roll: This is supplemental footage that relates to what you're talking about. If you're discussing a new camera, show shots of the camera. If you're talking about a concept, show abstract or illustrative footage.
- Graphics: On-screen text, lower thirds (identifying who's speaking), animated icons, charts, or diagrams can help explain complex points or highlight key information.
- Images: Static images, photos, or even animated versions of photos can serve as visual aids. Free stock photo sites like Unsplash.com or paid options like Storyblocks are great resources.
Cutting away from your talking head to relevant visuals gives the viewer's eyes something new to look at while reinforcing your message. This is a powerful way to increase engagement and comprehension.
4. Control the Pace with Editing
Editing isn't just about cutting out mistakes; it's about controlling the rhythm and pace of your video.
- Faster Pace: Using jump cuts, shorter sentences, and quick cuts to B-roll or graphics creates a faster, more energetic feel. This is great for tutorials, reviews, or high-energy content.
- Slower Pace: Longer takes, smoother transitions (like dissolves or wipes, used sparingly), and slower cuts to B-roll can create a more relaxed, contemplative, or serious tone. This might suit documentary-style content or reflective pieces.
You can also change the pace within a video. Use montages with quick cuts and music to summarize a process, then slow down for a more detailed explanation. The goal is to match the editing pace to the content and the desired mood.
5. Avoid Cutting Too Fast
While varying shots is good, cutting too fast can be jarring. If shots are on screen for less than 1-3 seconds consistently, viewers might feel overwhelmed or like they can't process the information or visuals.
- Simple Shots: A talking head shot might only need a second or two before a cut.
- Complex Shots: If you're showing a graphic, a detailed piece of B-roll, or something with a lot of visual information, hold the shot for at least 3 seconds to give viewers time to see and understand it.
Finding the right cutting speed is a balance – too slow leads to boredom, too fast leads to cognitive overload.
6. Enhance Your Audio
While this article focuses on editing visuals, good audio is foundational for any talking head video. Poor audio quality will make viewers click away faster than almost any visual issue.
Ensure your audio is clear, free of background noise, and at a consistent volume. Use editing software to de-noise audio, equalize levels, and add compression if needed. Sometimes, simply adding background music (at a low volume so it doesn't distract from your voice) can also help fill space and enhance the mood.
What Makes a Good Talking Head Video?
Beyond the technical editing, a good talking head video is built on a few core principles:
- Clear Structure: Start with a strong hook that tells viewers what the video is about and why they should care. Use an outline to organize your points logically. End with a clear call to action.
- Engaging Delivery: Speak directly to the camera, maintain eye contact, and bring energy to your presentation. Your passion (or at least interest) in the topic should be evident.
- Valuable Content: Provide information, entertainment, or inspiration that genuinely benefits the viewer. Focus on solving a problem or addressing their interests.
- Visual Support: As discussed, use B-roll, graphics, and other visuals to illustrate your points and keep the viewer engaged.
- Good Audio & Video Quality: While content is king, decent technical quality is the price of admission. Ensure you are well-lit, in focus, and your audio is crisp.
How to Edit a Talking Head Video Fast
The perception of editing as lengthy and complex is a common pain point. While editing does take time, you can streamline the process:
- Plan Before You Shoot: Have a clear outline or script. Know what B-roll or graphics you'll need for each section. This minimizes time wasted searching for assets later.
- Shoot Efficiently: Film in a quiet environment to reduce audio cleanup. Perform multiple takes of segments if needed to reduce editing fixes later.
- Master Jump Cuts: Get fast at identifying and removing dead space. This is the quickest way to tighten your edit.
- Create Templates: Save project templates in your editing software with your preferred settings, common graphics (like lower thirds), and audio effects.
- Use Pre-made Assets: Instead of creating every graphic from scratch, use pre-made motion graphics packs or templates. This is also a potential monetization angle – recommending specific template libraries.
- Develop a Workflow: Establish a routine: Import footage, sync audio, create a rough cut (jump cuts), add B-roll/graphics, refine pacing, add music/sound effects, color correct, export. Stick to it.
- Leverage AI Tools: Platforms like Subscribr can help significantly in the planning phase, which speeds up editing. Using Subscribr's AI Script Writer ensures you have a tight, well-structured script before you even start filming, reducing the need for large cuts in the edit. The Research Assistant can also help gather information quickly for your script, meaning you spend less time researching and more time creating.
Tools and Resources
To implement these editing techniques effectively, you'll need video editing software. Popular options include:
- Desktop: Adobe Premiere Pro, Final Cut Pro, DaVinci Resolve, and Descript (great for transcript-based editing).
- Mobile: CapCut, InShot, and VN Video Editor.
Additionally, consider using resources for visual assets:
- Stock Footage/Photos: Storyblocks, Envato Elements, Unsplash, Pexels.
- Motion Graphics/Templates: Envato Elements, Motion Array.
And don't forget the power of planning and research. Tools like Subscribr are invaluable for structuring your content, researching topics, and creating engaging scripts before you hit the edit suite, ultimately making the editing process smoother and faster because you're starting with a solid foundation. Subscribr's analytics can also help you understand which of your videos are performing best (like identifying outliers) so you can analyze their structure and editing pace to replicate success.
Conclusion
Editing talking head videos doesn't have to be a tedious chore. By focusing on strategic jump cuts, incorporating varied visuals like B-roll and graphics, controlling your video's pace, and planning effectively, you can create dynamic content that keeps your intermediate-level audience engaged from start to finish. Implement these techniques, develop a streamlined workflow, and leverage tools that help you plan smarter, and you'll find that making compelling talking head videos is well within your reach. Your viewers (and your watch time) will thank you.


