

Ready to get your next 10,000 subscribers?
Join thousands of creators who use Subscribr to create faster, better YouTube videos.

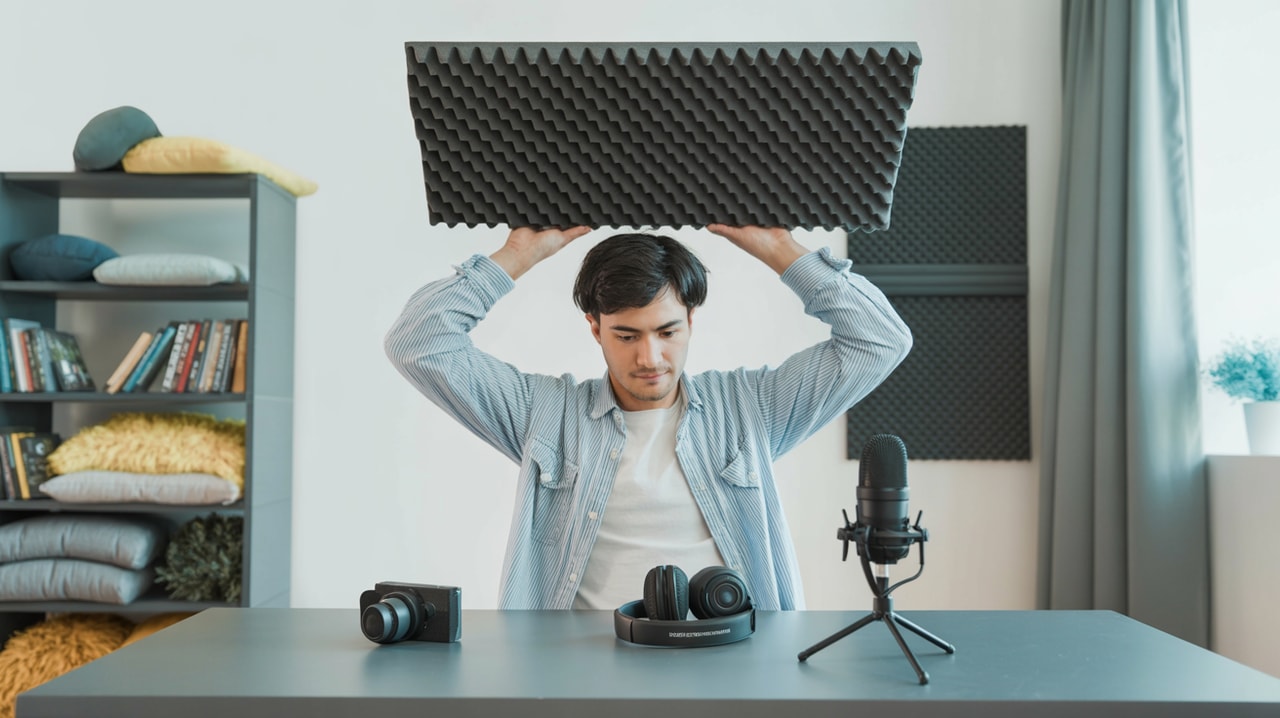
Echo in Your Videos? DIY Soundproofing for Clearer YouTube Audio
Room echo or distracting background noise can instantly turn viewers away, no matter how good your video looks. Achieving clear, professional-sounding audio might seem expensive or complicated, especially when you're just starting out on YouTube and working with a tight budget. But the truth is, you don't need a fancy studio to dramatically improve your sound quality.
This article will guide you through simple, affordable DIY acoustic treatment techniques that can help reduce echo and make your voice sound clearer in your YouTube videos. We'll cover practical solutions using materials you might already have or can find cheaply, helping you overcome the challenge of achieving consistent, professional audio quality without breaking the bank.
Why Good Audio Matters More Than You Think
You might have heard the saying: viewers will tolerate poor video quality if the audio is good, but they won't tolerate poor audio even if the video is stunning. This is absolutely true on YouTube. Experts consistently emphasize that audio quality is paramount for viewer retention. If your audio is scratchy, echoey, hard to hear, or unpleasant in any way, viewers are highly likely to click away within the first few seconds.
Think about it: your message is delivered through sound. If that sound is unclear, your message gets lost. Focusing on good audio is one of the most impactful technical skills you can develop early on. It directly impacts how long viewers stay engaged, which is a critical signal to the YouTube algorithm. Modern YouTube strategy focuses heavily on audience engagement and retention, and clear audio is a fundamental building block.
It's important to clarify the difference between soundproofing and acoustic treatment. Soundproofing is about preventing sound from entering or leaving a room. This is typically very expensive, requiring significant structural changes like adding mass to walls, sealing gaps, and using specialized materials. For most new YouTubers, full soundproofing isn't necessary or realistic.
Acoustic treatment, on the other hand, is about controlling how sound behaves within a room. It aims to reduce unwanted reflections, echo, and reverb, making the audio sound clearer and more controlled. This is what we'll focus on with DIY methods.
Assessing Your Recording Space
Before you start, take a moment to listen to your recording environment.
- Clap your hands loudly. Do you hear a distinct echo or flutter?
- Talk normally while listening for reflections off the walls.
- Identify hard, flat surfaces like bare walls, hardwood floors, large windows, and desks. These are the primary culprits for creating echo.
Understanding where your room's acoustic problems lie will help you target your DIY efforts effectively.
The Cheapest Fixes: Using What You Already Have
The absolute cheapest way to improve your audio is by using items you likely already own to absorb sound reflections.
Does Putting Blankets on Walls Help with Echo?
Yes, absolutely! Putting blankets, duvets, or thick quilts on your walls can definitely help reduce echo. While they aren't as effective as purpose-built acoustic panels, they are readily available and cost nothing extra.
- How to use them: Hang heavy blankets or duvets on walls parallel to your microphone, especially behind you or to the sides. You can use temporary hooks, nails, or even just drape them over furniture. The goal is to cover as much hard surface area as possible to absorb sound waves before they bounce back into your microphone.
- Behind the mic: Hanging a blanket behind your microphone can also help prevent sound from reflecting off the wall directly behind it and entering the back of the mic.
Leverage Soft Furnishings
Fill your recording space with soft items. Rugs on hard floors, upholstered furniture, curtains (especially thick ones), pillows, and even clothes hanging in an open closet can all help absorb sound and reduce echo. Position yourself and your recording setup strategically near these items.
Get Closer to Your Microphone
This is a simple but incredibly effective tip. The closer your mouth is to your microphone, the more your voice will dominate the recording, and the less the room's echo will be picked up. Aim for a distance of 6-12 inches (15-30 cm) if possible. If you're using a built-in camera microphone, getting closer to the camera itself will help.
DIY Acoustic Panels on a Budget
If you want to step up your acoustic treatment, building your own acoustic panels is a highly effective and budget-friendly option compared to buying pre-made foam tiles (which are often thin and ineffective) or professional panels.
What are Acoustic Panels?
Acoustic panels are designed to absorb sound energy using porous, absorbent materials. When sound waves hit the panel, they travel into the material and lose energy through friction and heat, reducing reflections and echo in the room.
Why DIY?
Building panels yourself allows you to use more effective, thicker absorbent materials (like rigid insulation or mineral wool) at a fraction of the cost of finished products. You can often build several high-performance panels for less than the price of one commercial panel. This directly addresses the budget limitation pain point.
Basic DIY Panel Construction
While detailed guides vary, the basic concept is simple:
- Build a frame: Use inexpensive wood (like 1x4 or 1x2 lumber) to create a simple rectangular frame.
- Insert absorbent material: Fill the frame with a suitable acoustic insulation material. Rigid fiberglass insulation (like Owens Corning 703 or 705) or mineral wool (like Rockwool Safe'n'Sound) are commonly recommended for their excellent absorption properties across a wide frequency range. These materials are far more effective than acoustic foam tiles.
- Cover with fabric: Stretch breathable fabric (like burlap or cotton) over the front and sides of the frame and staple it to the back. This holds the insulation in place and gives the panel a finished look.
You can often source materials like insulation and wood from local hardware stores. Fabric can be found at craft or fabric stores, often with affordable options available. This DIY approach allows you to balance production quality with budgetary constraints effectively.
Where to Place DIY Panels
Strategic placement is key for maximum impact:
- First Reflection Points: These are the spots on your walls and ceiling where sound from your mouth (or speakers) bounces once before reaching your microphone. To find them, have a friend hold a mirror flat against the wall while you sit in your recording position. Anywhere you can see your microphone in the mirror is a first reflection point that needs treatment.
- Behind Your Recording Position: Placing a panel or two on the wall directly behind you can help absorb reflections that travel past your microphone and bounce back.
- Corners: Bass frequencies tend to build up in corners. Thicker panels or specially designed corner bass traps are needed to absorb these lower frequencies effectively, leading to a tighter, less boomy sound.
Even placing just a few DIY panels at the first reflection points can make a significant difference in reducing echo and improving clarity.
How Much Treatment Do You Need for Good Audio?
This is a common question, and the answer is: it depends on your room and your goals. You don't necessarily need to cover every wall. For most home recording setups focused on clear voiceover for YouTube, the goal is to reduce the perceptible echo and flutter.
Start with the cheapest methods (blankets, soft furnishings). If echo persists, add DIY panels, focusing first on the primary reflection points. Listen critically to your recordings after adding treatment. You'll likely notice a significant improvement with even a few well-placed DIY panels. You're aiming for a controlled, dry sound where your voice is clear, not for a perfectly anechoic chamber. For beginner YouTubers, reducing noticeable echo is often enough to achieve "good audio."
Integrating Audio Improvement into Your Production Workflow
Improving your audio environment is part of the larger process of technical skill development for YouTube, including shooting, lighting, and editing. Once your recording space sounds better, you can focus on microphone technique and basic audio editing (like noise reduction or equalization) to further polish your sound.
Achieving studio-quality sound without breaking the bank is possible through smart DIY solutions and careful attention to your recording environment.
Tools & Resources
Improving your audio is just one piece of the YouTube puzzle. To truly grow your channel, you need a solid strategy for content creation, audience understanding, and optimization. Tools like Subscribr can significantly help with this, offering a comprehensive suite of features that go beyond just the technical aspects of production.
Subscribr's AI Script Writer, trained specifically on viral YouTube content, can help you craft compelling scripts that keep viewers engaged from start to finish. Its Research Assistant provides high-quality research, including analyzing other successful YouTube channels and videos (which often have excellent audio quality), helping you identify what resonates with audiences in your niche. By combining improved audio with a strong content strategy developed using Subscribr's tools, you can create videos that not only sound great but also perform well and help you build your audience.
For your DIY soundproofing project, consider using affiliate links when recommending materials like acoustic insulation, wood for frames, or fabric. Many affiliate programs are available through major hardware stores or online retailers. You can also recommend budget-friendly microphones as part of your overall audio setup advice.
Conclusion
Don't let room echo tank your YouTube videos. Achieving clear, professional-sounding audio is within reach for any creator, regardless of budget. By understanding the difference between soundproofing and acoustic treatment and implementing simple DIY techniques like using blankets and building your own acoustic panels, you can dramatically improve your recording environment. Focus on treating the key reflection points in your room, and you'll notice a significant difference in your audio quality.
Investing time in improving your sound is one of the smartest moves you can make as a new YouTuber. It directly impacts viewer retention and helps you build a more professional channel, proving that balancing production quality with budgetary constraints is achievable with the right knowledge and effort. Combine these audio improvements with powerful strategy tools like Subscribr to plan and create compelling content, and you'll be well on your way to YouTube success.


