

Ready to get your next 10,000 subscribers?
Join thousands of creators who use Subscribr to create faster, better YouTube videos.

Crisp Tingles: Essential ASMR Video & Audio Production Tips
Creating ASMR content is all about crafting an immersive sensory experience. Unlike many other YouTube niches, the technical quality of your audio and video isn't just a bonus – it's the core of the viewer's experience. Achieving those sought-after "tingles" requires meticulous attention to detail, especially when it comes to production.
Many aspiring ASMR creators struggle with getting consistent, professional-level audio and video. The unique requirements of capturing subtle sounds and creating a soothing visual environment present distinct challenges. This guide dives deep into the specific video and audio production techniques you need to master to overcome these hurdles, deliver satisfying tingles, and grow your ASMR channel.
The Paramount Importance of ASMR Audio
In ASMR, audio is king. Viewers tune in specifically for the sounds – whispers, tapping, scratching, crinkling, and a myriad of other triggers. Poor audio quality, background noise, or inconsistent levels can instantly break the immersion and prevent the tingle response. Your microphone choice and recording environment are perhaps the most critical factors for success.
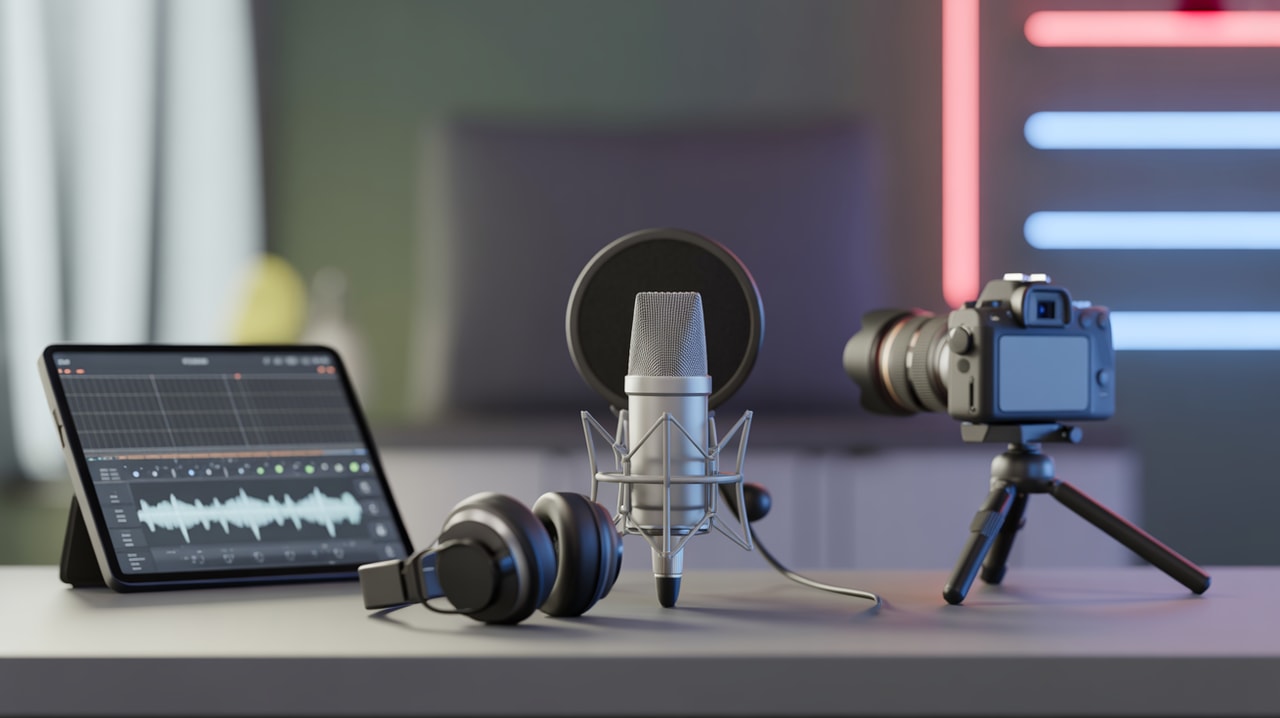
Choosing the Right Microphone for ASMR Triggers
The best microphones for capturing the subtle nuances of ASMR sounds are typically condenser microphones. Unlike dynamic microphones, which are less sensitive and often used for louder sources like vocals or instruments, condenser mics are designed to pick up incredibly fine detail and have a wider frequency response. This sensitivity is essential for capturing delicate triggers accurately.
When selecting a condenser mic for ASMR, look for two key specifications:
- High Sensitivity: This means the microphone can capture very quiet sounds effectively.
- Low Self-Noise (or Equivalent Noise): Even the quietest microphone produces a tiny amount of electronic noise. A lower self-noise rating (measured in dB) means the microphone itself won't introduce distracting hiss into your otherwise quiet recording. Look for mics with self-noise ratings ideally below 15 dB(A).
Many ASMR creators favor binaural microphones. These setups use two microphones positioned to mimic human ears, creating a highly immersive, 3D audio experience for the listener wearing headphones. This can significantly enhance the tingle sensation by making it feel like the sounds are happening right around or inside the listener's head. While binaural mics are excellent, high-quality stereo condenser microphone setups can also produce fantastic results. Even popular general-purpose microphones like the Blue Yeti USB mic are used by many creators, especially when starting out, though dedicated condenser mics will generally offer superior detail and lower noise floor.
Consider the microphone's pickup pattern as well. Cardioid patterns are common as they primarily capture sound from the front, helping to reject some room noise. However, for immersive ASMR, omnidirectional or stereo patterns (like those on binaural mics) are often preferred to capture the surrounding soundscape.
How to Reduce Noise for ASMR Recordings
Minimizing unwanted noise is crucial for clean ASMR audio. The best approach is always to prevent noise from being recorded in the first place rather than trying to remove it later in editing, which can degrade the audio quality.
Here are key strategies for reducing noise during ASMR recording:
- Choose Your Location Wisely: Your recording environment is paramount.
- Find the quietest space possible. A room with carpets and soft furnishings will absorb sound better than one with hard surfaces.
- Consider recording at times when external noise (traffic, neighbors, household sounds) is minimal, such as late at night.
- Minimize internal room noise. Turn off or silence anything that makes sound – refrigerators, air conditioning units, fans (especially computer fans!), phones, notifications.
- Acoustic Treatment: While professional soundproofing can be expensive, you can significantly improve your recording space with simple acoustic treatment. Hanging blankets, using thick curtains, or placing foam panels (even DIY ones using everyday materials) can help reduce echo and external noise bleed. Recording in a closet filled with clothes is a classic, effective low-budget method.
- Monitor Your Audio: Always record while wearing headphones connected to your recording device or computer. This allows you to hear exactly what the microphone is picking up, including any subtle background noise you might not notice otherwise. Monitoring helps you identify problems in real-time and adjust your setup before you finish recording.
- Minimize Handling Noise: Be mindful of touching the microphone, stand, or cable during recording, as these sounds can be very distracting in ASMR. Use shock mounts to isolate the microphone from vibrations.
While post-production noise reduction tools exist in software like Audacity or Adobe Audition, they should be used sparingly. Overaggressive noise reduction can make your audio sound unnatural or "watery." It's far better to get a clean recording from the start.
Setting Audio Levels (Gain)
Setting the correct audio gain (microphone sensitivity) is vital. ASMR sounds are often very quiet, so you need enough gain to capture them clearly, but not so much that you introduce excessive microphone self-noise or clip the audio (distortion caused by the signal being too loud).
- Test Recordings: Do several test recordings of your triggers at the volume you intend to use in the final video.
- Monitor Levels: Watch your audio meters while recording. Aim for your quietest sounds to be audible and your louder triggers to peak well below 0 dB (ideally around -10 dB to -6 dB) to leave headroom and avoid clipping.
- Listen with Headphones: Again, use headphones during testing and recording to ensure the sounds are clear, free of distortion, and at appropriate relative volumes.
Crafting the Visual Experience in ASMR
While audio is primary, the visual component of ASMR videos plays a significant supporting role. Visuals help create a soothing atmosphere, provide a focal point, and can even act as triggers themselves.
Common Visual Techniques
ASMR visuals are typically designed to be calming, non-threatening, and sometimes personal.
- Close-Up Shots: Many ASMR videos feature tight close-ups on the trigger objects or the creator's hands/face. This creates a sense of intimacy and allows viewers to focus on the details of the sounds being made.
- Personal Attention & Eye Contact: Creators often simulate giving the viewer one-on-one attention. This can involve looking directly into the camera lens (simulating eye contact), speaking softly as if directly to the viewer, or performing triggers as if they are being done to or for the viewer. Some creators even gently touch or "pet" the camera lens.
- Hand Movements: Simple, repetitive hand movements can be very visually calming and act as triggers, even with minimal sound.
- Faceless or Talking-Free: As highlighted by YouTube strategy insights, many successful ASMR channels create content without showing their face or speaking. The focus remains entirely on the sounds and the actions producing them (like cleaning a keyboard with slime, as seen with channels like Cracker ASMR). This allows creators to maintain privacy while still delivering effective ASMR.
Lighting and Camera Work
Good lighting enhances the visual experience and sets the mood. Soft, warm lighting is common in ASMR to create a relaxed, intimate atmosphere. Avoid harsh shadows or overly bright lights that could be jarring.
Camera work is typically slow, deliberate, and often static. Fast cuts, shaky camera movements, or distracting zooms are generally avoided as they can detract from the calming nature of ASMR. A stable tripod is essential.
Post-Production Polish: Bringing it Together
Editing is where your raw audio and video come together to form the final tingle-inducing experience.
Video Editing for ASMR
Keep your video edits smooth and unobtrusive. Use simple cuts and transitions that don't disrupt the flow. The pacing of your edits should match the pacing of your triggers – slow and deliberate. Ensure the visuals are perfectly synced with the sounds.
Audio Editing for ASMR
Audio editing is critical for refining your ASMR track:
- Noise Reduction (Cautiously): As mentioned, use noise reduction sparingly if absolutely necessary to clean up minor background noise.
- Equalization (EQ): You might use EQ to subtly enhance the frequencies of your specific triggers or to roll off unwanted low-end rumble. However, avoid drastic EQ changes that could make the audio sound unnatural.
- Leveling: Ensure consistent audio levels throughout the video. Quiet triggers should be audible, and louder ones shouldn't be jarring. Avoid over-compressing the audio, which can flatten the dynamic range and reduce the tingle effect.
- Stereo/Binaural Management: If using a stereo or binaural setup, ensure the spatial imaging is preserved during editing.
Color Grading
Subtle color grading can enhance the mood of your video. Warm, soft color palettes are often used to create a cozy, relaxing feel. Ensure the colors are pleasing and don't distract from the triggers.
Adding Captions
Adding captions is important for accessibility and can also help viewers who may not be native English speakers understand any spoken elements. Ensure captions are accurate and appear in sync with the audio.
Strategic Considerations for Your ASMR Channel
Beyond the technical production, understanding the strategic landscape can help your ASMR channel thrive. The ASMR niche has a massive audience, with millions searching for ASMR content monthly on platforms like YouTube.
Consider exploring different ASMR content styles, such as the popular faceless or talking-free formats mentioned earlier. These can simplify production while still resonating with a large audience.
Monetization for ASMR channels primarily comes from YouTube's Partner Program. While CPMs can vary, combining ASMR with niches that traditionally have higher advertising rates (like finance or technology) could potentially increase your earnings per thousand views.
For creators looking to scale, outsourcing aspects of video creation is also an option, with freelancers available on platforms like Fiverr or Upwork who specialize in creating ASMR content.
Tools and Resources
Creating high-quality ASMR content requires careful planning and execution. Tools designed for YouTube creators can significantly streamline this process. For instance, platforms like Subscribr offer features that can assist with researching successful ASMR channels and videos in your niche to understand popular triggers and visual styles. While I cannot provide specific channel examples with metrics from a live lookup right now, Subscribr's research tools are built to help you find and analyze these examples yourself. You can also use Subscribr's script writing tools to help structure your ASMR videos, planning out trigger sequences and visual cues for a cohesive experience, and its planning features to define your content angle and target audience within the ASMR space.
Conclusion
Mastering ASMR video and audio production is an ongoing journey that requires patience and practice. By focusing on acquiring a high-quality, low-noise microphone, optimizing your recording environment, paying attention to calming visual techniques, and refining your content in post-production, you can significantly elevate the quality of your ASMR videos. Remember to continually listen to feedback, experiment with different triggers and techniques, and most importantly, create content that you find relaxing and enjoyable to produce. With dedication to the craft of crisp audio and soothing visuals, you'll be well on your way to delivering those essential tingles to your audience.


