

Ready to get your next 10,000 subscribers?
Join thousands of creators who use Subscribr to create faster, better YouTube videos.

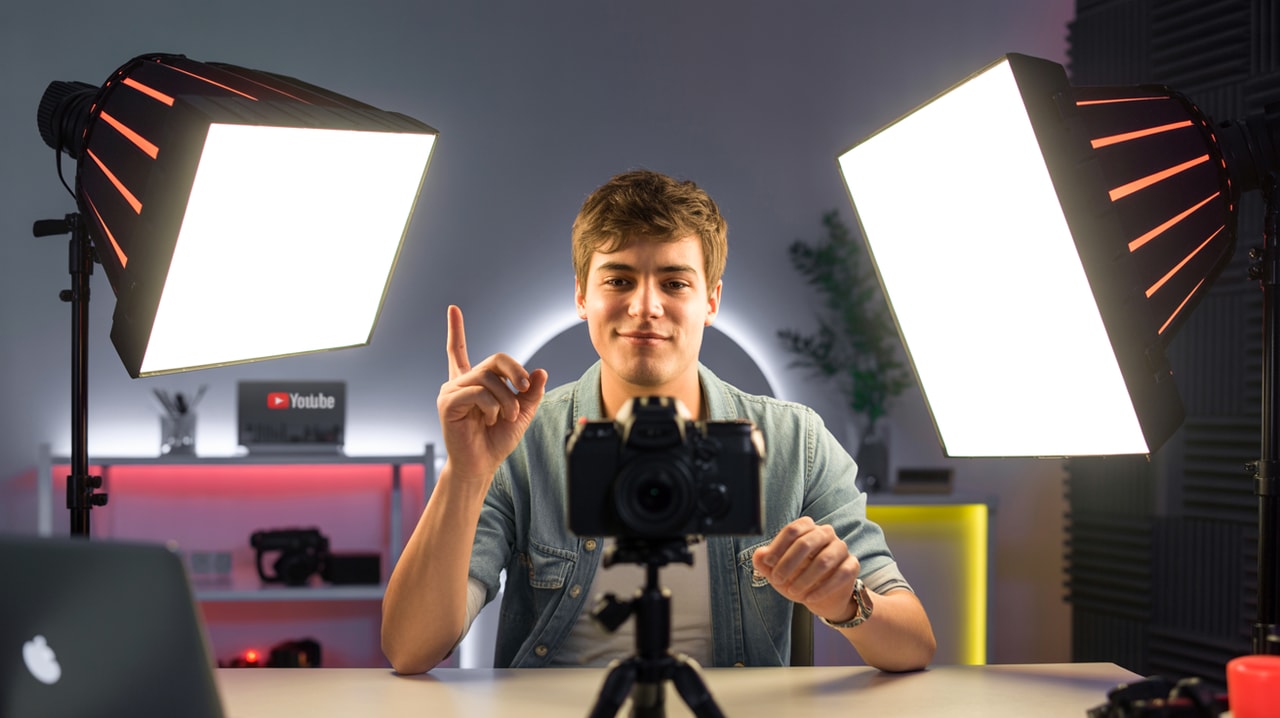
3-Point Lighting for YouTube: A Simple Guide to Professional Video
Want your YouTube videos to instantly look more polished and professional? Tired of inconsistent lighting, harsh shadows, or blending into your background? You're not alone. Many creators struggle with achieving that clean, well-lit look, feeling overwhelmed by technical jargon and the perceived need for expensive equipment.
The good news? Mastering professional video lighting is more accessible than you think. The foundation of great video lighting, used in everything from Hollywood blockbusters to high-quality YouTube productions, is the simple yet incredibly effective 3-point lighting setup.
This guide will break down 3-point lighting, explaining exactly what it is, why it works, and how you can implement it for your own YouTube channel, even on a budget. We'll cut through the complexity and give you actionable steps to transform your video quality.
What is the Purpose of 3-Point Lighting?
At its core, 3-point lighting is a standard method used to illuminate a subject in a way that looks natural, creates depth, and separates them from the background. Instead of just blasting your subject with one flat light, you use three distinct light sources, each serving a specific purpose.
Think of it like sculpting with light. Each light contributes to the overall image, shaping your subject and creating a visually appealing scene. This setup helps you avoid common lighting problems like harsh shadows under the eyes, blown-out highlights, or looking like you're just a flat cutout against your background.
By controlling light and shadow, 3-point lighting allows you to create dimension and make your subject pop, significantly enhancing the production quality of your videos. This is crucial for keeping viewers engaged, as poor visual quality can be a major turn-off, leading to early drop-offs. Consistent, high-quality visuals build trust and professionalism, directly addressing the pain point of difficulty achieving consistent visual quality.
The Three Lights Explained: Key, Fill, and Back
The 3-point lighting system uses three lights positioned strategically around your subject:
-
The Key Light: This is your main light source. It's typically the brightest and is placed to illuminate the primary side of your subject's face or body. The key light establishes the main direction of light and shadow, setting the overall mood and look of your lighting.
- Placement: Often positioned about 45 degrees to the side and 45 degrees up from your subject.
- Purpose: Provides the primary illumination.
- Tip: Using a softbox or diffusion material on your key light will create softer, more flattering light, reducing harsh shadows. As highlighted by YouTube strategy experts, a diffused light source is crucial for minimizing skin imperfections and is particularly important when filming talent.
-
The Fill Light: As the name suggests, the fill light's purpose is to "fill in" the shadows created by the key light. It's usually placed on the opposite side of the key light relative to your subject. The fill light is typically less intense than the key light.
- Placement: Opposite the key light, again often around 45 degrees to the side and slightly raised.
- Purpose: Reduces or softens shadows created by the key light.
- Tip: You can adjust the intensity of the fill light to control the mood. A brighter fill light results in softer, less dramatic shadows (high-key lighting), while a dimmer fill light increases contrast and shadow depth (low-key lighting).
-
The Backlight (or Rim Light/Hair Light): This light is positioned behind your subject, usually aimed at their head or shoulders. It creates a rim of light that separates your subject from the background, adding depth and dimension.
- Placement: Behind and often slightly to the side of your subject, aimed towards their back.
- Purpose: Creates separation from the background and adds depth.
- Tip: A backlight is especially important if your background is dark or similar in color to your subject's clothing or hair, preventing them from blending in.
Setting up these three lights in relation to your subject creates a balanced and visually appealing look that makes your subject stand out and adds a professional polish to your video. This structured approach helps demystify the technical complexity of lighting, making it less daunting for intermediate creators.
Do I Need 3 Lights for YouTube?
The short answer is no, you don't strictly need three dedicated lights to significantly improve your YouTube video lighting. While the classic 3-point setup uses three lights, the principles behind it can be applied with fewer light sources or even by using existing light in your environment.
Many successful YouTubers started with very simple lighting setups. As YouTube strategy insights confirm, you can start improving your lighting for free by simply sitting facing a window. Natural light is a fantastic, soft light source.
You can also achieve great results with just one or two lights, often supplemented by modifiers or existing room lights. The goal is to understand the function of each light in the 3-point system (key, fill, separation) and find ways to replicate those functions with the tools you have.
For growth-focused creators, the focus should be on making smart investments as you grow. As suggested by content strategy experts, a simple, inexpensive LED light or a ring light can make a significant difference when you're starting out. As you progress, you can add more lights or higher-quality equipment.
The technical complexity and steep learning curve of new equipment can be a barrier, but by understanding the core principles of 3-point lighting, you can make informed decisions about what gear you actually need as you scale your production quality.
How Do You Do 3-Point Lighting with 2 Lights?
Achieving a look very close to 3-point lighting is absolutely possible with just two light sources. You'll typically use one light as your key light and the second light or a modifier to serve the function of the fill or back light.
Here are a couple of common ways to do this:
Method 1: Key Light + Fill Light (using a reflector)
This is a very popular and effective two-light setup.
- Set up your Key Light: Position your key light (your brightest light) as you normally would for a 3-point setup – typically 45 degrees to the side and slightly elevated. Use diffusion (like a softbox or umbrella) if possible for softer light.
- Use a Reflector as the Fill: Instead of a second light, place a reflector on the opposite side of your subject from the key light. The reflector bounces some of the key light back onto the subject's shadow side, "filling in" the shadows just like a fill light would.
- Why it works: Reflectors are inexpensive and easy to use. You can buy professional reflectors or even use a large piece of white foam core board or poster board.
- Control: Adjust the distance and angle of the reflector to control how much light is bounced back and how soft the shadows are.
This setup effectively gives you a key and a fill, providing nice, balanced lighting on your subject's face. While you don't have a dedicated backlight for separation, you can sometimes use existing room lights or position your subject further from the background to create some natural depth.
Method 2: Key Light + Backlight
In this setup, you prioritize separation from the background and dramatic effect over perfectly balanced facial lighting.
- Set up your Key Light: Position your key light to illuminate one side of your subject, creating some shadow on the other side. This can be slightly more side-on than a typical key light if you want a more dramatic look (like the Rembrandt triangle effect mentioned in the strategy insights, where a small triangle of light appears on the shadowed cheek).
- Set up your Backlight: Place your second light behind your subject, angled to create that separation from the background. This light defines the edges of your subject.
This setup provides excellent separation and can look very cinematic, but you'll have deeper shadows on the fill side of your subject's face compared to using a dedicated fill light or reflector.
Budget-friendly approaches, like supplementing one professional light with inexpensive desk lamps, as suggested by content creation experts, can also be used to build out a two-light or even a three-light setup gradually. The key is understanding the role of each light and finding creative ways to achieve that effect with the resources you have.
Enhancing Production Quality with Lighting
Beyond simply making your subject visible, mastering 3-point lighting is a fundamental step in enhancing your overall production quality. Professional-looking videos are more likely to be taken seriously, retain viewers, and ultimately help you grow your channel. Consistent, good lighting signals to viewers that you care about the quality of your content.
Good lighting also plays a crucial role in audience engagement and retention. If viewers can clearly see you and your content is visually appealing, they are more likely to stay tuned in. Poor lighting can be distracting or even make it difficult to see what's happening, leading viewers to click away.
For growth-focused creators, focusing on production quality is a key strategy. As YouTube's algorithm evolves, audience satisfaction and watch time are increasingly important ranking factors. Investing time in learning and implementing good lighting techniques is an investment in your channel's future.
Lighting for Mood and Message
Lighting isn't just about making things visible; it's a powerful tool for conveying mood and reinforcing your message. This ties directly into the content opportunity of "Lighting for Mood and Message."
- High-Key Lighting: Using a bright key light and a relatively bright fill light creates minimal shadows and a bright, airy feel. This is often used for upbeat, positive content, interviews, or tutorials where you want a clean, clear look.
- Low-Key Lighting: Using a key light with a much dimmer fill light (or no fill light at all) creates strong contrast and deep shadows. This is often used for dramatic effect, mystery, or intense topics.
- Color Temperature: The "warmth" or "coolness" of your lights (measured in Kelvin) also affects mood. Warmer tones (lower Kelvin numbers, like tungsten bulbs) can feel cozy or intimate, while cooler tones (higher Kelvin numbers, like daylight) can feel clean or modern. Matching the color temperatures of your lights, as recommended by strategy sources, is important for a consistent look.
- Directional Lighting: The angle of your key light can create different effects. Side lighting can add drama and texture, while frontal lighting is generally softer and more even.
By consciously manipulating these elements, you can enhance the emotional impact of your videos and align the visual style with the content you're creating. Learning to use lighting creatively allows you to elevate your storytelling and make your videos more compelling.
Studio Design & Optimization for Lighting
Your filming environment plays a significant role in how your lights perform. While you don't need a dedicated studio space, optimizing your filming area can make a big difference.
- Control Ambient Light: Try to film in a space where you can control external light sources, like windows. Curtains or blinds can help block out unwanted natural light that might interfere with your setup.
- Background: Consider your background. A cluttered or busy background can be distracting. A plain wall or a thoughtfully arranged set works better. The backlight helps separate you from the background, but a good background choice makes this even more effective.
- Room Size and Color: The size and color of your room can affect how light bounces. White walls will reflect light, potentially acting as a natural fill light, while dark walls will absorb light.
Thinking about your filming space as part of your lighting setup, as part of Studio Design & Optimization, helps you get the most out of your equipment and achieve a consistent look.
Integrating Strategy with Subscribr
Developing a strong YouTube lighting strategy, understanding how it impacts viewer engagement, and consistently applying these techniques can be streamlined with the right tools.
While this article focuses on the technical setup of 3-point lighting, successful YouTube growth involves much more, from identifying viral topics to crafting compelling scripts and analyzing performance. This is where a platform like Subscribr can provide significant value.
Subscribr's Channel Intelligence system, for instance, can help you analyze successful channels in your niche. While studying their lighting setups might require visual observation, you can use Subscribr's data to see which videos perform best and then analyze those specific videos for lighting patterns and styles that resonate with the audience.
Furthermore, Subscribr's Script Building Pipeline allows you to plan your video content strategically. As you outline and write your script, you can make notes about the desired lighting setup for specific scenes or segments, ensuring that your lighting plan is integrated into your overall production workflow. This helps address the pain point of technical complexity by providing a structured way to plan your shoots.
By using Subscribr's integrated research capabilities and planning tools, you can not only master technical skills like 3-point lighting but also ensure that your content strategy is data-driven and optimized for growth.
Monetization Angle: Recommending Lighting Gear
As you learn about and invest in lighting for your YouTube channel, you become knowledgeable about the equipment. This presents a natural monetization opportunity: recommending the lighting kits or individual lights you use and trust to your audience, potentially through affiliate links.
Many creators successfully monetize their content by reviewing or showcasing the gear they use. As you demonstrate your improved video quality thanks to better lighting, your audience will likely ask about your setup. You can create dedicated videos reviewing your lighting equipment or simply include affiliate links in your video descriptions.
This not only provides value to your audience by guiding them toward effective tools but also creates an additional revenue stream for your channel, leveraging the core skill you've developed.
Conclusion
Mastering 3-point lighting is a foundational skill that can dramatically improve the professional look of your YouTube videos. By understanding the role of the key, fill, and back lights, you can create depth, control shadows, and separate yourself from the background, solving common pain points related to visual quality.
Remember that you don't always need three dedicated lights to start. You can adapt the principles using fewer lights, reflectors, and existing environmental light. The key is to experiment and see what works best in your space with your available gear.
As you integrate these lighting techniques with a solid content strategy – using tools like Subscribr to research, plan, and optimize your videos – you'll be well on your way to creating high-quality content that engages viewers and helps you grow your channel. Start simple, keep learning, and watch your video quality transform.


