

Ready to get your next 10,000 subscribers?
Join thousands of creators who use Subscribr to create faster, better YouTube videos.

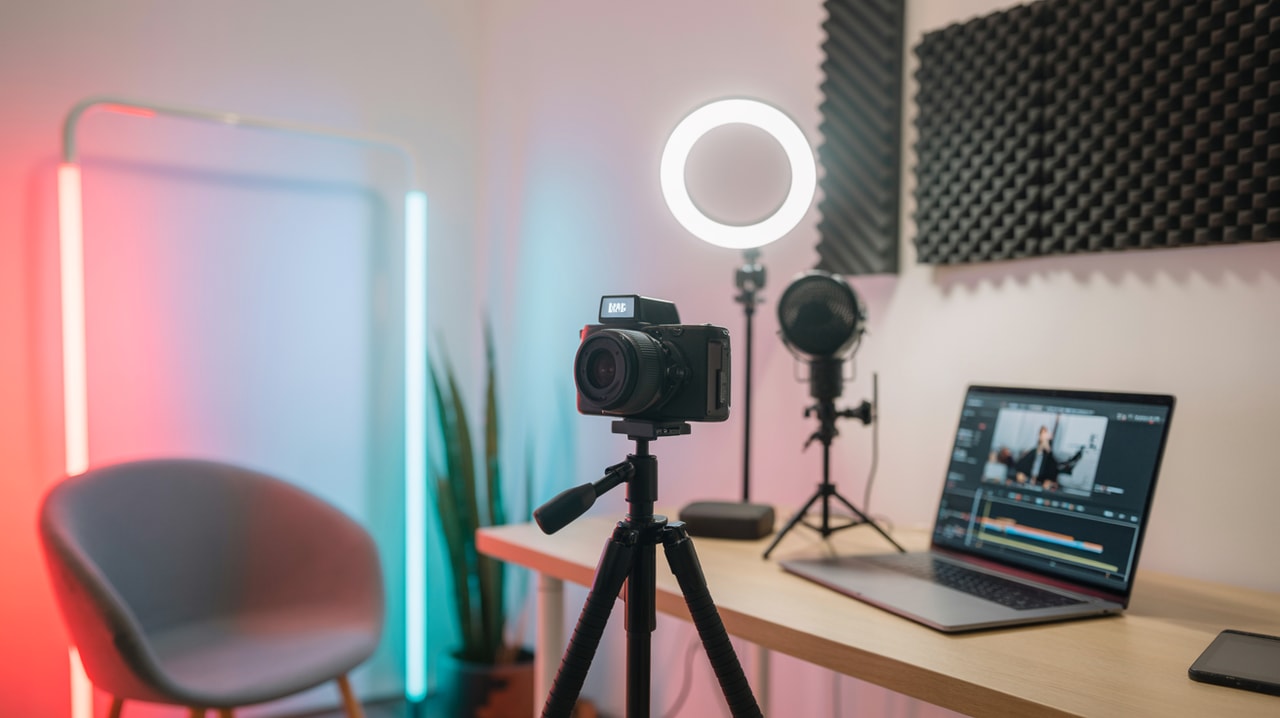
How to Set Up a Small YouTube Filming Space at Home
Dreaming of starting a YouTube channel but think you need a massive studio? Think again! You can create a professional-looking and effective filming space right in a small room or even just a corner of your home. This guide will walk you through setting up a small YouTube filming space that looks great on camera, sounds clear, and doesn't require a huge budget or technical expertise.
One of the biggest hurdles for new creators is overcoming the fear that they don't have enough space or the right equipment. You might worry about making a small room look presentable, achieving consistent audio and video quality without a dedicated studio, or spending endless hours researching gear instead of creating content. The good news is, with smart planning and a few key pieces of equipment, you can build a versatile YouTube studio in a small space that adapts to different content formats and helps you produce high-quality videos efficiently.
Let's transform that cramped corner into your creative hub.
Maximizing Your Limited Space
When you're working with limited square footage, every inch counts. The goal isn't to make your small room look huge, but to make the space you do use look intentional and professional.
Start by identifying the best location. Look for a corner or a section of a wall that offers a relatively uncluttered background potential. Filming facing a wall is often easier in a small space than trying to capture the depth of a whole room.
Consider using a wide-angle lens for your camera (many modern smartphone cameras have excellent wide-angle capabilities). This can help create a sense of depth and make the space appear slightly larger on camera, giving you more flexibility in how you frame your shots.
Think vertically! Use shelves or wall-mounted items to add visual interest without taking up floor space. However, keep it simple – an overly busy background can be distracting.
How do I make a small room look good on camera?
It's less about the size of the room and more about what's in the frame. The key is composition. Even in a small space, strategic placement of yourself, your camera, lighting, and background elements can create a visually appealing shot.
- Declutter: Remove anything distracting or messy from the background.
- Create Layers (Subtly): Even a few inches between you and the background can add depth. Place a small plant or a lamp subtly behind you if space allows.
- Angle Your Shot: Experiment with camera angles. Filming slightly off-center can sometimes make a space feel more dynamic than a straight, head-on shot.
Crafting Your Background: Real is Always Better
Your background is a crucial part of your video's visual identity. It sets the scene and can reinforce your channel's branding. While virtual backgrounds might seem like an easy fix for a messy room, they often look artificial and can be incredibly distracting for viewers. As YouTube strategists recommend, prioritize using a real background. Even a plain wall is better than a glitchy virtual image.
How can I hide clutter in my YouTube background?
The simplest way is to physically remove the clutter from the area you'll be filming in. If that's not possible, strategically use items like:
- Room Dividers: A simple folding screen can effectively block off a messy area.
- Large Fabric Backdrops: A plain colored sheet or a dedicated backdrop stand with fabric can create a clean, consistent background.
- Clever Framing: Position your camera and yourself so that messy areas are simply outside the frame.
Once the clutter is gone, focus on making your real background appealing. It should be simple and contrast with you, the subject, to ensure you stand out. Avoid small, distracting details. If you want something in the background to be a focal point (like a piece of art or a product you're reviewing), bring it into the foreground or hold it up.
Think about the neural associations your background creates. Are there elements that subtly hint at your content? For a cooking channel, a few well-placed cookbooks or kitchen gadgets could work. For a tech channel, a clean desk with a monitor might be appropriate. Ensure any props or decorative items have a purpose that aligns with your brand and message.
Lighting Your Small Studio for Impact
Good lighting is arguably more important than your camera for creating a professional look. It can transform a dull, amateur-looking video into something polished and engaging, even in a small space. You don't need a huge array of expensive lights to get started.
The goal of basic lighting is to illuminate your face evenly and separate you from the background. A simple and effective setup, even in tight quarters, often involves just one or two lights.
- Key Light: This is your main light source, positioned to illuminate the side of your face facing the camera. A soft, diffused light is usually most flattering. You can achieve this with a softbox or by bouncing a light off a wall or ceiling.
- Fill Light (Optional): A less intense light placed on the opposite side of your face to soften the shadows created by the key light. You can use a second, less powerful light, or even a reflector bouncing light from your key light.
- Back Light (Optional): A light placed behind you, pointing towards your back or the back of your head. This helps separate you from the background and adds depth. Even a small lamp can work for this.
For small spaces, compact lighting solutions are ideal.
- Budget-Friendly Starter: A simple softbox kit (often under $50) provides a soft, flattering light that's perfect as a key light.
- Compact LED Panels: These are great for tight spaces where larger softboxes won't fit. Look for bicolor options so you can adjust the color temperature. Some higher-end panels come with small softboxes for better diffusion.
- Using Household Lights: You can even start with inexpensive desk lamps, supplementing them with one dedicated video light for a budget cinematic look. Just be mindful of matching the color temperature of different light sources if possible (some bulbs are warmer/cooler than others).
Experiment with placement. Even small adjustments can make a big difference in how the light falls on your face and background.
Essential Audio Setup for Crystal Clear Sound
Viewers are often more forgiving of less-than-perfect video quality than they are of poor audio. Muffled, noisy, or inconsistent sound will quickly cause people to click away. Achieving clear audio is crucial, and thankfully, it's very achievable even in a small home setup without expensive soundproofing.
What do I need for a home YouTube studio, specifically for audio?
At a minimum, you need a microphone that is significantly better than your camera's built-in mic (including smartphone mics).
- Budget Lavalier Mic: A small microphone that clips onto your shirt is a great starting point. These are relatively inexpensive (some decent options around $20-$30) and capture your voice clearly because they are close to your mouth.
- USB Microphone: These plug directly into your computer and can offer excellent quality for the price. They are often condenser mics, which are sensitive and pick up a lot of detail, but also room noise. Good for quieter spaces.
- Shotgun Microphone: Mounts on your camera or a stand and is directional, focusing on sound in front of it. Can help reject some room noise.
For even better quality, consider recording audio separately using a field recorder. A budget-friendly setup recommended by creators is pairing a Rode SmartLav+ lavalier mic with a Zoom H1n portable recorder. You simply clip the mic on, plug it into the recorder (you might need a small adapter), and hit record. Later, you sync the audio file with your video in editing.
Setting Audio Levels: This is critical to avoid distortion. On your recorder or camera, monitor your audio levels as you speak at your loudest expected volume. Adjust the recording level so that your loudest peaks hit no higher than -6 dB. Never let the levels go above 0 dB, as this will cause irreversible clipping and distortion.
Room Acoustics: Small rooms can sometimes have echoes. You don't need professional sound treatment to improve this. Simple solutions include:
- Soft Furnishings: Adding rugs, curtains, pillows, and upholstered furniture can absorb sound and reduce echo.
- Microphone Placement: Getting the microphone closer to your mouth is the most effective way to make your voice louder relative to room noise and echo.
- Recording Environment: If possible, record in a room with more soft surfaces rather than hard, bare walls.
Focus on getting clear, clean audio at the source. Fixing bad audio in editing is much harder than fixing video.
Essential Gear for a Compact Setup
Beyond lighting and audio, here are the core pieces of equipment you'll likely need for your small home studio:
- Camera: You can start with your smartphone! Modern smartphones shoot in high resolution with good quality. If you want to upgrade, consider a mirrorless camera or a webcam.
- Microphone: As discussed above, a lavalier, USB, or shotgun mic is essential.
- Lighting: A softbox kit, LED panel, or even a few good quality lamps.
- Tripod or Mount: You need a stable way to hold your camera at the right height and angle. For small spaces, a flexible tripod, a C-stand with clamps, or even a desk-mounted arm can work well.
- Computer: For editing your videos.
- Editing Software: Many free options exist (like DaVinci Resolve, iMovie, or CapCut).
- Headphones: Closed-back headphones are best for monitoring audio while recording and editing.
Invest wisely. While you can start with minimal gear, strategically upgrading key pieces like your microphone or a good primary light can significantly improve your production quality over time. A $15 lavalier mic is a small investment that makes a huge difference compared to using your phone's built-in mic. A $25 ring light can provide simple, effective lighting. You can evolve your setup as your channel grows and your budget allows.
Building a versatile studio, even in a small space, means choosing gear that is adaptable. Compact lights that can be placed in different positions, microphones that work with various devices, and flexible mounting options help you create different looks and adapt to multiple content formats without needing a huge amount of equipment.
Setting Up for Efficiency
One of the pain points for new creators is the time spent on setup. If you have to set up and tear down your filming space every time you want to record, it becomes a barrier to consistency.
If possible, designate a specific corner or area in your home as your permanent (or semi-permanent) filming space. Keep your camera on its tripod, your lights in position, and your microphone ready to go. This drastically reduces setup time, making it much easier to film spontaneously or stick to a consistent upload schedule.
Even in a tiny space, you can often find a way to keep the essentials in place. Maybe the tripod stays set up in a corner, and the lights are stored nearby, ready to be quickly positioned. The less friction there is between having an idea and hitting record, the more content you'll create.
Planning Your Content in Your New Space
Once your small home studio is taking shape, you can start thinking about the content you'll create in it. This is where tools designed for creators become invaluable.
Instead of guessing what videos will resonate with your audience or spending hours manually researching successful channels, you can use platforms like Subscribr. Subscribr's AI-powered features can help you research viral topics, analyze what's working in your niche, and even generate script outlines tailored to your channel's voice and audience.
For example, you can use Subscribr's Research Assistant to quickly gather information from web pages or even analyze transcripts from successful YouTube videos in your niche. This saves you time and provides data-backed insights for your content ideas.
When planning a video you'll film in your new small space, you can use Subscribr's Frame Development feature to define the content angle, video goals, and target audience. This ensures your video has a clear purpose before you even start writing.
Then, leverage Subscribr's AI Script Writer to turn your ideas and research into a structured script. It helps you go from a blank page to a draft quickly, focusing on creating engaging content optimized for viewer retention – a key factor in YouTube's algorithm. You can even use Subscribr's Script Analytics to estimate speaking time, ensuring your content fits your desired video length.
By using tools that streamline research, planning, and scriptwriting, you free up more time to actually film and edit in your new, efficient home studio.
Conclusion
Setting up a functional and professional-looking YouTube filming space in a small room is not just possible – it's a common reality for many successful creators. By focusing on optimizing your limited space, creating a simple and intentional background, mastering basic lighting, and prioritizing clear audio, you can overcome common pain points and significantly enhance your production quality.
You don't need to break the bank or have a dedicated soundstage. Start with what you have, make smart, incremental investments in key gear like microphones and lights, and utilize tools like Subscribr to streamline your content planning and scriptwriting.
Your small space is not a limitation; it's an opportunity to get creative and build a versatile studio that helps you consistently produce high-quality videos and grow your channel. Now, go set up your space and start creating!


