

Ready to get your next 10,000 subscribers?
Join thousands of creators who use Subscribr to create faster, better YouTube videos.

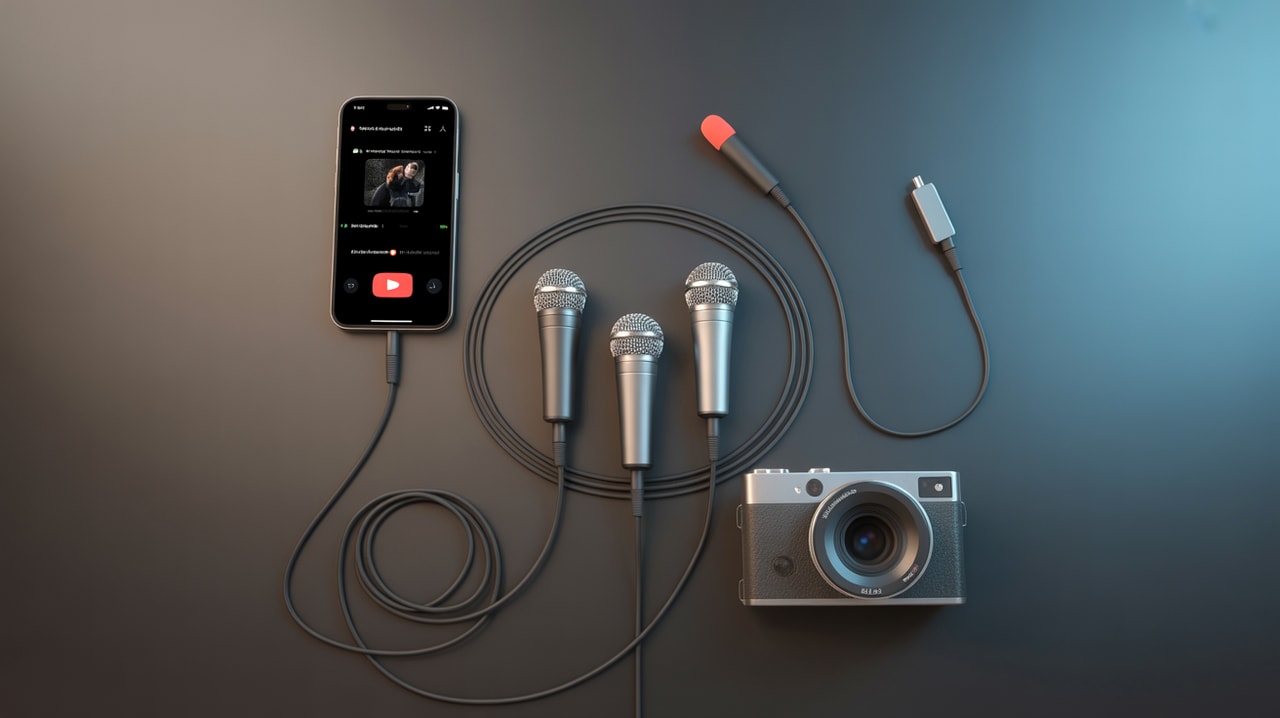
The Best Lavalier Mics for YouTube: Clear Audio On the Go
In the world of YouTube, crisp, clear audio isn't just a nice-to-have – it's essential. You could have the most stunning 4K video, but if your viewers can't understand what you're saying without straining, they're likely to click away. This is a major pain point for many creators: difficulty achieving consistent audio and visual quality. Juggling camera settings, lighting, and trying to get decent sound from a camera's built-in microphone can feel technically complex, leading to a steep learning curve for new equipment. Plus, choosing the wrong gear can feel like a misalignment of equipment choices with specific content goals or style.
Fortunately, there's a simple, effective solution that can dramatically improve your sound without breaking the bank or adding too much complication: the lavalier microphone. Also known as lapel mics, these tiny powerhouses clip onto your clothing, keeping the microphone close to your mouth for consistent, professional-sounding audio, no matter how far away you are from your camera.
This guide is an audio deep dive, focusing specifically on lavalier microphones as a foundational element for mastering sound for professional YouTube content. We'll cover why they're so effective, the difference between wired and wireless options, how to use them correctly for various content styles, and recommend some top picks for 2025 to help growth-focused intermediate creators like you elevate your production quality.
Are Lavalier Mics Good for YouTube? Absolutely.
Yes, lavalier microphones are not just "good" for YouTube – they are often one of the most impactful audio upgrades you can make, especially for content where you or your subject are speaking directly to the camera or being interviewed.
Think Media Podcast highlights a crucial point: clear audio is often more important to viewers than high video quality. While impressive visuals are great, viewers are far more tolerant of basic video if the audio is crystal clear. Investing in a good microphone, like a lavalier, is one of the most effective ways to improve viewer retention. By placing the microphone close to the sound source (your mouth), you capture your voice directly, minimizing room echo and background noise. This results in a much cleaner, more professional sound that keeps viewers engaged.
For content creators, particularly those just starting out or looking for versatile, affordable options, lavalier mics offer an excellent quality-to-price ratio. They are discreet, allowing you to focus on delivering your message without the distraction of holding a microphone or having a large mic visible in the shot. This makes them ideal for vlogging, interviews, tutorials, and any scenario where you need hands-free, consistent audio capture.
Wired vs. Wireless Lavalier Mic for YouTube: Which is Right for You?
The choice between a wired and wireless lavalier microphone system depends largely on your filming style, typical shooting locations, and budget. Both have their place in a creator's toolkit.
Wired Lavalier Microphones
Pros:
- Reliability: Generally more reliable as there's no wireless signal to drop out or interfere.
- Cost-Effective: Typically significantly cheaper than wireless systems.
- Simple Setup: Plug-and-play operation; just connect the mic to your recording device (camera, phone, or audio recorder).
- Consistent Power: No batteries to worry about on the microphone itself (though the recording device will need power).
Cons:
- Limited Mobility: The cable restricts your movement, which can be a major limitation if you need to move around a lot or distance yourself from the camera.
- Cable Management: Hiding or managing the cable can be a hassle and might be visible in your shot if not done carefully.
Best For:
- Static shots (sit-down interviews, desk-based tutorials, voiceovers).
- Filming in controlled indoor environments.
- Creators on a tight budget.
Wireless Lavalier Microphone Systems
Pros:
- Maximum Mobility: Offers complete freedom of movement, allowing you to walk around, film action shots, or stand far from the camera without audio issues.
- Clean Setup: No visible wires running from you to the camera, resulting in a cleaner look on camera.
- Convenience: Quick to set up once the system is paired.
Cons:
- Higher Cost: Wireless systems are generally more expensive than wired mics.
- Potential Interference: Can be susceptible to signal interference from other wireless devices, though modern systems are much better at avoiding this.
- Battery Dependence: Both the transmitter (on you) and the receiver (connected to the camera) require batteries, which need to be monitored and recharged/replaced.
- Complexity: Involves pairing a transmitter and receiver, which is slightly more complex than simply plugging in a wired mic.
Best For:
- Vlogging and run-and-gun shooting.
- Interviews where both parties need freedom to move.
- Filming dynamic content or in larger spaces.
- Creators prioritizing a clean, cable-free look.
For growth-focused intermediate creators, investing in a reliable wireless system often makes sense as it offers the versatility needed for a wider range of content formats, particularly as you explore vlogging or on-location shoots. However, a good wired lav can still be an excellent starting point or a reliable backup.
How to Use a Lavalier Mic for YouTube: Getting the Best Sound
Even the best lavalier microphone won't sound good if not used correctly. Proper placement and technique are key to capturing clear, consistent audio.
-
Placement is Crucial: The goal is to place the microphone capsule a few inches below the speaker's chin, typically clipped to a shirt, tie, or lapel. This puts it close enough to capture your voice clearly while avoiding plosives (those harsh "P" and "B" sounds) and distracting breathing noises. Aim for a spot on the chest, roughly 6-8 inches from your mouth. Most lav mics are omnidirectional, meaning they pick up sound from all directions, so the exact angle isn't as critical as the distance from your mouth.
-
Secure the Microphone: Use the included clip to securely attach the microphone to clothing. Ensure the mic isn't rubbing against fabric, which can cause distracting rustling sounds. Test this by moving around a bit before hitting record.
-
Manage the Cable (Wired): If using a wired lav, run the cable neatly under your clothing to minimize its visibility and prevent it from snagging on anything. A common technique is to create a small loop in the cable near the microphone clip and secure it with tape or the clip itself. This loop acts as a strain relief, reducing noise caused by tension on the cable if you move.
-
Secure the Transmitter (Wireless): With a wireless system, the small transmitter pack (where you plug in the lav mic) needs to be discreetly attached to your belt, waistband, or placed in a pocket. Ensure the antenna (if visible) isn't obstructed.
-
Connect to Your Recording Device:
- Cameras: Most cameras have a 3.5mm microphone input jack. Ensure the lav mic's connector (TRS or TRRS) is compatible or use an appropriate adapter.
- Smartphones: Many modern smartphones require a TRRS connector or a USB-C/Lightning adapter.
- Audio Recorders: Dedicated portable audio recorders (like a Zoom H1n) are an excellent option, especially with wired lavs or wireless receivers. They often provide higher quality preamps and more control over audio levels. You'll record audio separately and sync it with your video in editing.
-
Set Audio Levels: This is critical! Before recording, do a test recording and check your audio levels. You want the audio to be loud enough to be clear but not so loud that it "clips" or distorts. Aim for your audio meter levels to generally stay within the -12dB to -6dB range during normal speech, with peaks not exceeding -3dB.
-
Do a Sound Check: Always record a few seconds of test footage before filming your main content. Listen back carefully through headphones to ensure the audio is clean, at the right level, and free of unexpected noise. This simple step can save you a lot of frustration later.
By paying attention to these steps, you can ensure your lavalier microphone captures the best possible audio, significantly enhancing your video's production quality.
Choosing the Best Lavalier Mic for Your YouTube Channel
Selecting the right lavalier microphone involves considering your budget, your filming needs (wired vs. wireless), and the level of audio quality you require. For intermediate creators, aiming for "acceptable quality within your niche" is a smart approach, as highlighted by Think Media Podcast. Look at successful creators in your specific category – what kind of audio quality do they have? Your goal should be to meet or exceed that standard.
Here are some general types and features to look for based on common recommendations and expert advice:
- Entry-Level Wired: You can find very affordable wired lavs (under $50) that connect directly to smartphones or cameras. While they might not offer the absolute highest fidelity, they are a massive step up from built-in mics and are a great starting point for static shots or controlled environments.
- Mid-Range Wired: In the $50-$150 range, you'll find wired lavs with better build quality, longer cables, and improved sound clarity, often designed for use with cameras or dedicated audio recorders.
- Entry-Level Wireless: Affordable wireless systems (under $200) are becoming increasingly common. These provide the freedom of wireless at a lower cost, suitable for basic vlogging and interviews, but may have shorter range or be more susceptible to interference than higher-end models.
- Mid-Range Wireless: Systems in the $200-$500 range offer more reliable wireless performance, better sound quality, longer battery life, and often include features like dual transmitters (for two-person interviews) or onboard recording capabilities (like the DJI Mic series). These are a solid investment for creators doing a mix of content types.
- Professional Wireless: For creators demanding the absolute best audio and most reliable performance, professional wireless systems (often $500+) offer robust build quality, advanced features, and superior sound. The DJI Mic 2, for example, is praised for its ease of use, professional-level vocals, adaptive noise reduction, and even 32-bit float recording (which makes correcting audio levels in post-production much easier).
When researching specific models, pay attention to:
- Connectivity: Ensure it's compatible with your camera, smartphone, or audio recorder (check connector type: TRS, TRRS, USB-C, Lightning).
- Cable Length (Wired): Make sure the cable is long enough for your typical shooting setup.
- Battery Life (Wireless): Consider how long the batteries last on both the transmitter and receiver, and if they use standard rechargeable batteries or proprietary ones.
- Range (Wireless): How far can you get from the receiver before the signal cuts out?
- Sound Quality: Look for reviews or sample audio to get a sense of how the microphone sounds. Condenser lav mics are generally preferred for capturing clear vocals in controlled environments.
- Included Accessories: Does it come with a clip, windshield (essential for reducing wind noise when filming outdoors), or carrying case?
Choosing the right microphone is part of equipment selection & justification. Think about the specific types of videos you make or plan to make. If interviews or vlogging outdoors are a priority, the mobility of a wireless system is likely worth the investment. If you primarily film static tutorials at a desk, a good wired lav might be all you need. Aligning your equipment choices with your content goals helps overcome the pain point of misalignment of equipment choices with specific content goals or style.
Integrating Lavalier Mics into Your Production Workflow
Once you have your lavalier microphone, integrating it seamlessly into your production quality enhancement process is key.
For creators using a platform like Subscribr, you can leverage its features to plan and optimize content that utilizes your new audio setup. For instance, when planning an interview or review, you can use Subscribr's Research Assistant or Research Phase tools to gather information on your topic or product. If you're analyzing successful videos in your niche using Subscribr's Video breakdown tool or Channel Intelligence, pay attention not only to their visuals but also their audio quality. Does clear audio seem to be a common factor in high-performing content?
When writing your script using Subscribr's AI Script Writer, you can factor in how using a lavalier mic will affect your delivery. For an interview script, you might include notes about microphone placement for both participants. For a product review where you're demonstrating something with your hands, the hands-free nature of a lav mic allows you to focus on the demonstration while knowing your audio is being captured clearly.
Improving your audio quality with a lavalier microphone also opens up new monetization angles. For review channels, having clear audio is essential for demonstrating product features and providing valuable feedback, which can directly lead to drives affiliate sales for lavalier mics and other equipment you recommend. For channels focusing on interviews or educational content, improved audio makes your videos more watchable and professional, increasing their perceived value and potentially leading to better ad revenue or opportunities for sponsored content. Using a lavalier mic improves audio for specific content formats that are highly monetizable.
Final Thoughts
Upgrading your audio with a lavalier microphone is one of the most impactful steps you can take to improve your YouTube channel's production quality and viewer retention. They offer a fantastic balance of performance, portability, and affordability, making professional-sounding audio accessible to intermediate creators.
By understanding the benefits, weighing the pros and cons of wired vs. wireless, and practicing proper usage, you can overcome common audio challenges and ensure your voice is always heard loud and clear. This focus on fundamental production elements, combined with strategic content planning and analysis using tools like Subscribr, will set you on the path to continued growth and success on YouTube.


